Great Planes Ultra Sport 1000 Kit - GPMA0425 User Manual
Page 21
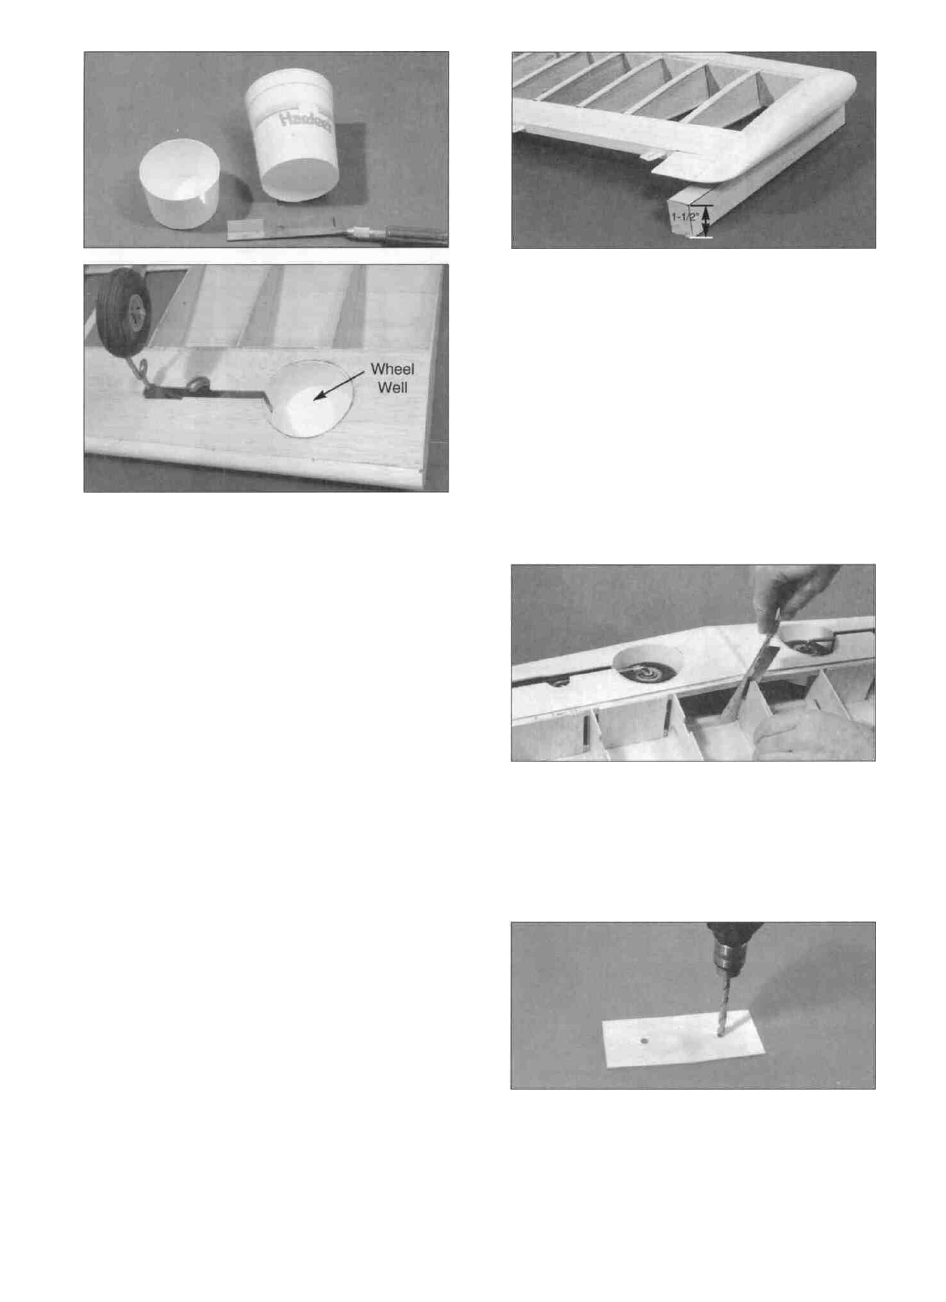
D 5. Use either vertical grain 1/16" balsa or a section
of foam or plastic cup to form the walls of the wheel
wells. The large plastic cups that are commonly found
at fast food restaurants, 7-11 type stores and college
football games are ideal for wheel wells. Install the
wheel well cup deep enough into the wing to permit
full retraction of the gear. Glue the wheel well
securely to the sheeting. Then trim and sand it flush
with the sheeting. NOTE: There should be sufficient
room for the retract pushrod to pass under the wheel
well; if not it may be necessary to cut pushrod
clearance holes through both sides of the wheel well
so that the pushrod has a straight route to the retract
mechanism.
D 6 Verify that the retracts work properly with no
interference or binding.
D 1. Place the two wing panels together on a flat
surface and block up both wing tips 1-1/2". The blocks
should be located at the W-13 ribs. Sand the root end
of the wing panels until they fit together properly at
that angle.
D 2. With waxed paper or protective plastic under the
center section, carefully align the wing panels at the
centerline. Hold the leading and trailing edges
together with pins or strips of masking tape.
D 3. Lock the wing panels together by dripping thin
CA into the center joint. Fill any minor gaps with thick
CA. NOTE: The center joint has very little
strength at this point, so handle the wing gently.
D 4. Turn the wing over and cut a 1/8" slot for the die-
cut 1/8" ply dihedral brace through the W-1 ribs,
immediately behind the spars. Yes, this is a
challenging little task, (we didn't want to make it too
easy)! Use a razor saw and a little patience.
JOIN THE WING PANELS
NOTE: 30-minute epoxy is
strongly recommended for
the wing joining process.
D 5. Drill two 5/16" holes for the wing dowels in the
die-cut 1/8" ply dihedral brace, at the marked
locations.
21