Great Planes Ultra Sport 1000 Kit - GPMA0425 User Manual
Page 22
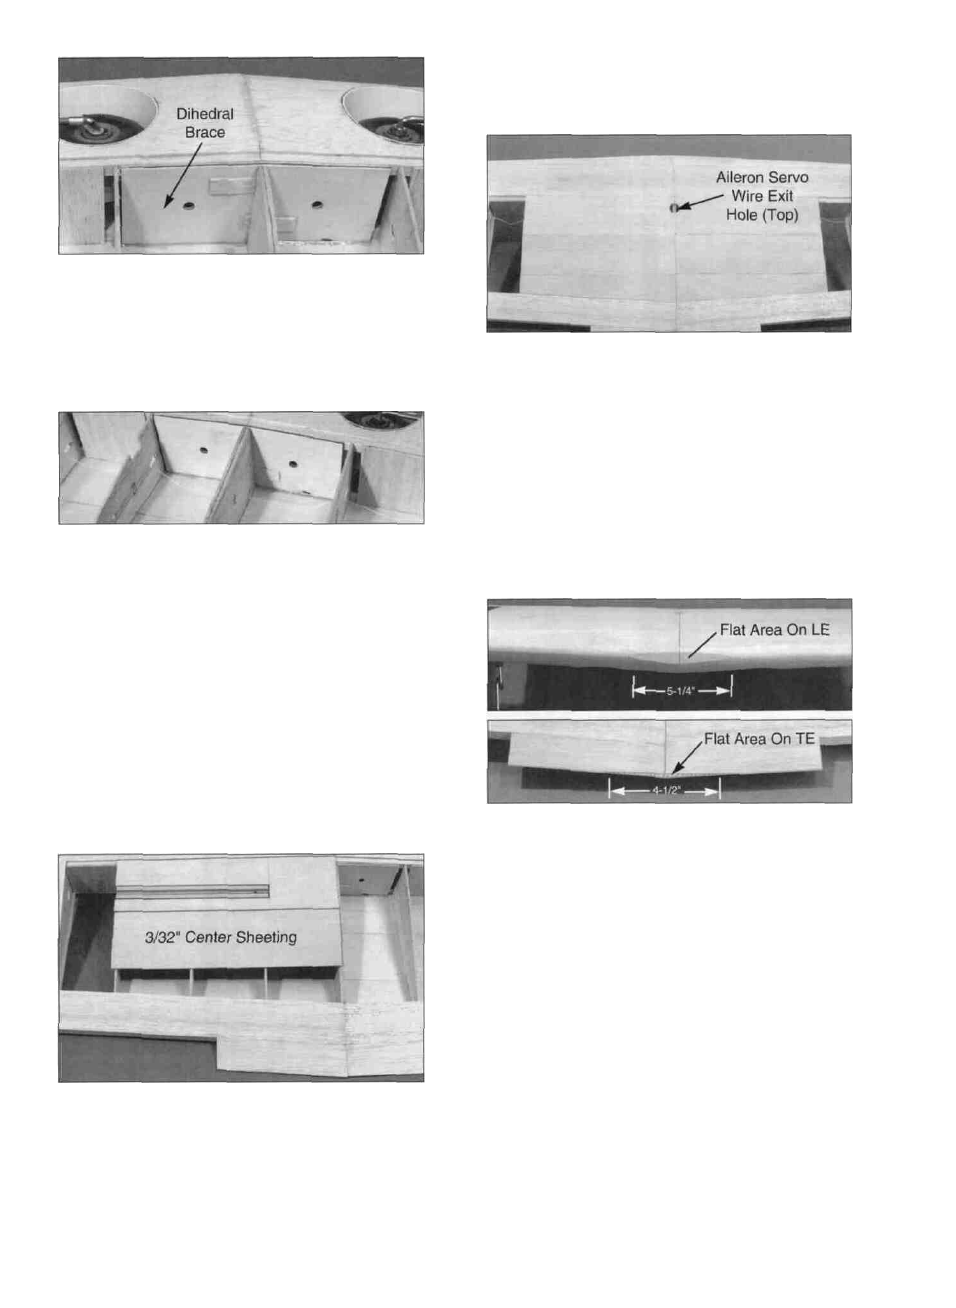
D 6 Using 30-minute epoxy, securely glue the
dihedral brace to the back of the spars Observe (in
the photograph) how two small balsa wedges were
used to hold the dihedral brace against the spars with
slight pressure Wipe off excess glue that may have
squeezed out onto the top of the spar. Let the glue
fully harden before proceeding.
D 7 You will later have to thread an aileron servo
extension wire through the holes in the ribs As an aid
in doing so, tie a 70" length of string to the aileron
servo rails in one wing panel and pass the string
through the servo wire holes in the W-6 through W-2
ribs Make a new hole in the W-1 ribs 1/2" behind the
spars and close to the top sheeting Pass the string
through the W-1 ribs and out the other wing panel and
tie it to the other servo rails Leave plenty of slack and
be sure you can reach the string through the servo
holes in the servo bay sheeting You will later cut a
hole in the top sheeting to expose this string, and you
will use this string to pull the servo wires through the
wing after the wing is covered.
D 9. Sand the wing joint smooth all around.
D 10 Now turn the wing right side up and cut a 1/2"
hole in the center of the top sheeting about 1/2"
behind the spars, for the servo wires to exit the wing.
This hole should include a section of W-1 so that it
provides access from one wing panel to the other, and
should expose the string which you installed in step 7
SAND "FLATS" ON LE AND TE
D 1. Study the wing plan near the wing centerline.
Note that the center portion of the LE and TE must be
sanded straight across to properly mate with the
formers in the fuselage
D 8 Using the remaining 3/32" x 3" x 11-1/8" sheets,
install the bottom center sheeting If you are using
tricycle gear you will need to cut a slot in the sheeting
to clear the main gear block.
D 2 Sand approximately 5/32" into the LE at the
centerline, and approximately 5/32" into the TE at the
centerline (The flats will end up approximately 5-1/4"
wide at the LE, and 4-1/2" wide at the TE)
FIBERGLASS THE CENTER SECTION
NOTE: Because of the high stresses in the center
of this wing, fiberglass reinforcement is
REQUIRED. Please do not omit this important
section!
NOTE: If you have previous experience with applying
fiberglass, feel free to use your favorite method,
providing that it results in a strong bond between the
glass cloth and the wood If this is your first time, we
offer the following suggested method, which is the
fastest and easiest we have seen.
22