Great Planes Super Chipmunk ARF - GPMA1303 User Manual
Page 19
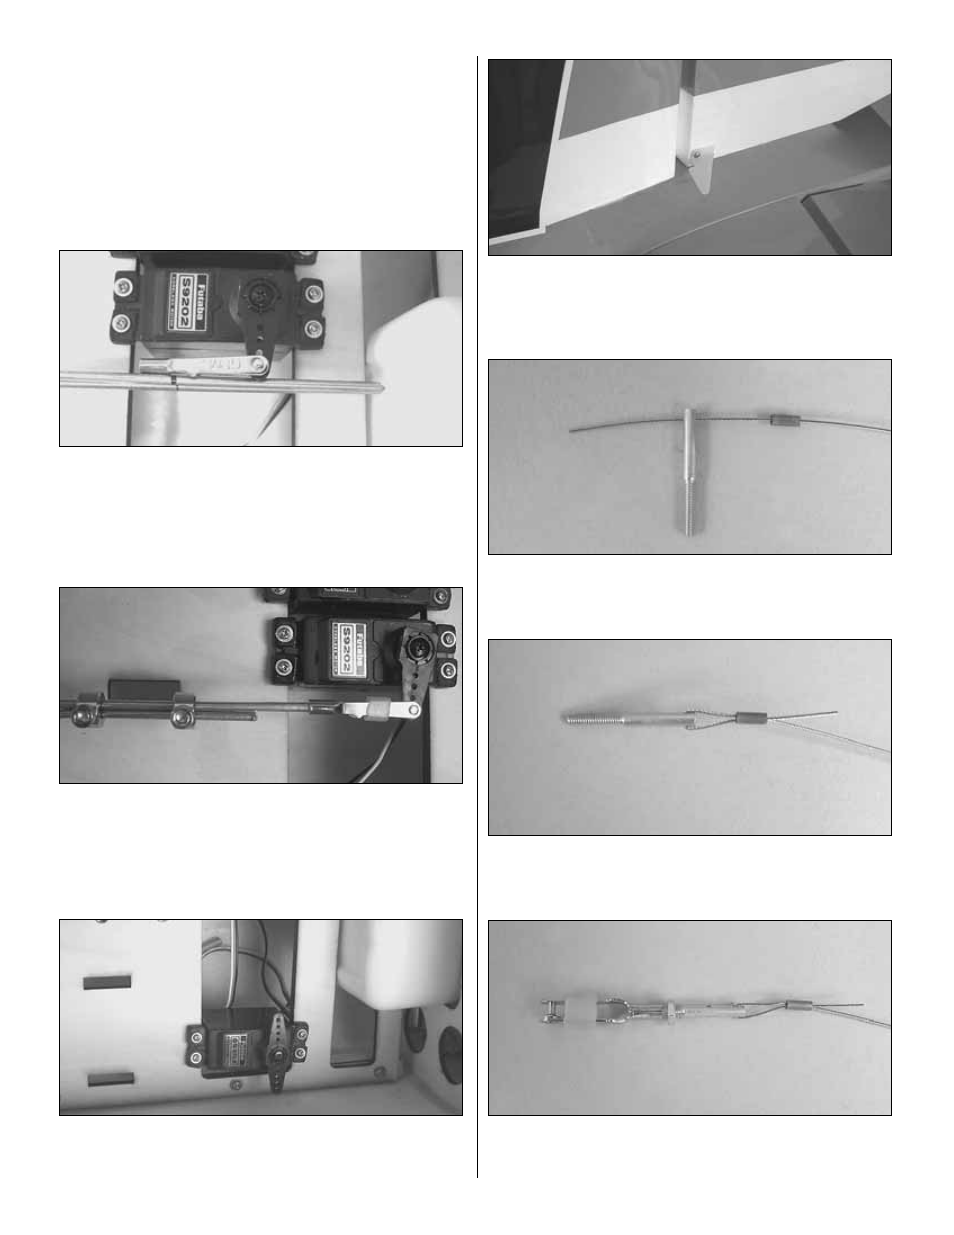
❏
4. Place your elevator servo into the servo tray as shown,
positioning the last hole of the servo arm over the pushrod
wire. Drill a 1/16" [1.6mm] hole through each of the
mounting holes. Remove the servo, then install and remove
a servo mounting screw into each hole. Apply a couple
drops of thin CA into the holes to harden the threads. When
the glue has hardened, permanently mount the servo to the
servo tray with the hardware provided with your servo.
❏
5. Center the elevator servo. Install a 4-40 solder clevis
onto the servo arm. Center both halves of the elevator. On
the wire closest to the servo, mark the cut location for the
wire to fit the clevis. Cut the wire on that mark. Cut the
remaining wire 1" [25mm] shorter.
❏
6. Solder the clevis to the wire closest to the servo. Slide
a clevis retainer over the servo. Then, attach the clevis to the
servo arm. With the elevator servo centered and both halves
of the elevator centered, tighten the socket head cap screws
securely to the pushrod wires.
❏
7. Install a two-arm servo arm onto the 80 oz-in rudder
servo, then install the rudder servo as shown using the
same technique used on other servos.
❏
8. Install a nylon control horn on both sides of the rudder
with #2 x 1/2" [13mm] screws in the same way you installed
the elevator horns.
❏
9. Slide a copper crimp connector onto one of the coils of
pull-pull wire followed by a threaded brass pull-pull connector.
❏
10. Loop the wire back through the crimp connector and
crimp the connector onto the wire with pliers.
❏
11. Screw a 2-56 nut onto the end of the threaded brass
pull-pull connector followed by a 2-56 clevis and a silicone
clevis retainer.
19