Great Planes Super Chipmunk ARF - GPMA1303 User Manual
Page 15
Great Planes “Dead Center
™
” Hole Locator (GPMR8130)
works well for this. Drill through the marks you have made
with a #29 or 9/64" [3.6mm] drill bit. Tap each hole with an
8-32 tap.
❏
5. Install the engine to the mount with four each, 8-32 x
1" [25mm] socket head cap screws, #8 lock washers and #8
flat washers.
❏
6. Drill a 3/16" [4.8mm] hole through the firewall in-line
with the throttle arm on the carburetor.
❏
7. Locate the 12" [305mm] gray plastic pushrod tube.
Sand one end of the tube with 220-grit sandpaper. Insert the
tube into the firewall and glue the roughened end of the tube
flush to the firewall.
❏
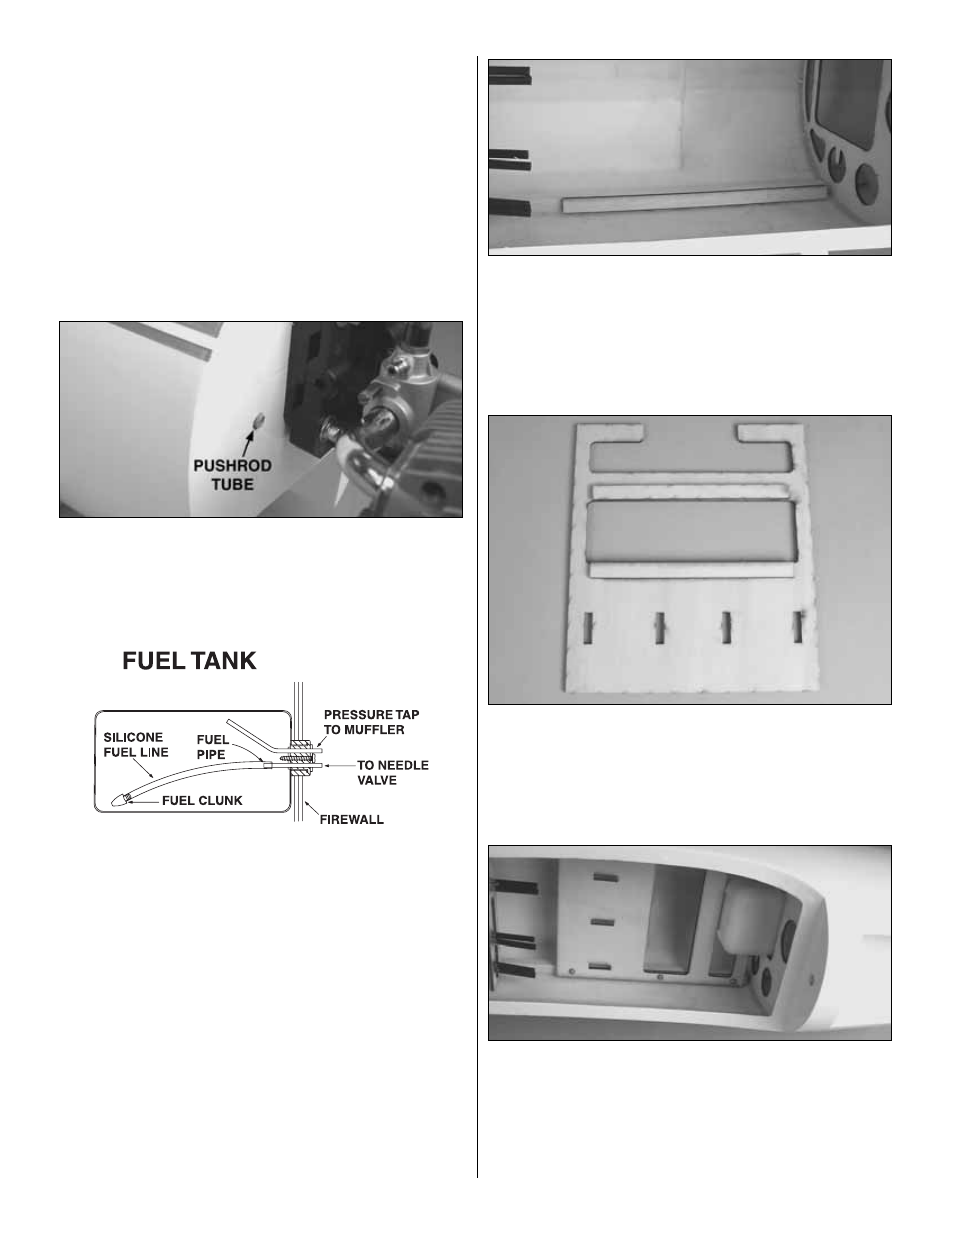
8. Assemble the fuel tank as shown in the sketch. When
tightening the center screw be sure not to overtighten it. You
just want it snug enough to pull the rubber stopper tight
against the tank.
❏
9. Install silicone fuel tubing (not supplied) onto the
aluminum tubes from the fuel tank. The line with the fuel
clunk will feed to the fuel inlet at the needle valve and the
other will attach to the pressure tap on the muffler. If you
choose to use some kind of an external fuel valve follow the
instructions with your particular brand of fuel valve. You can
also install a third line to the tank and use it for filling the
tank. The method you use is your choice but make your
decision before moving onto the installation of the fuel tank.
❏
10. Install the tank into the fuselage with the neck of the
tank through the firewall.
❏
11. Locate and glue two 1/8" x 3/8" x 7-3/8" [3 x 9.5 x
187mm] plywood sticks and glue them to the balsa
longerons inside the fuselage with 6-minute epoxy.
❏
12. Glue two 1/8" x 3/8" 5-1/4" [3 x 9.5 x 133mm] plywood
doublers to the plywood servo tray.
❏
13. Install the 1/8" [3mm] plywood servo tray into the
fuselage, making sure the doublers you glued in are facing
the top of the fuselage. Position it on the longerons on the
sides of the fuselage and far enough forward to hold the fuel
tank securely in place. Drill six 1/16" [1.6mm] holes in the
tray and longeron. Secure the tray in place with six #2 x 1/2"
[13mm] screws and #2 washers.
15