Great Planes Super Chipmunk ARF - GPMA1303 User Manual
Page 10
Did you know…Between 1969 and 1985 Art Scholl
performed in a total of 1,345 airshows in the U.S.A., Canada
and Japan!
❏
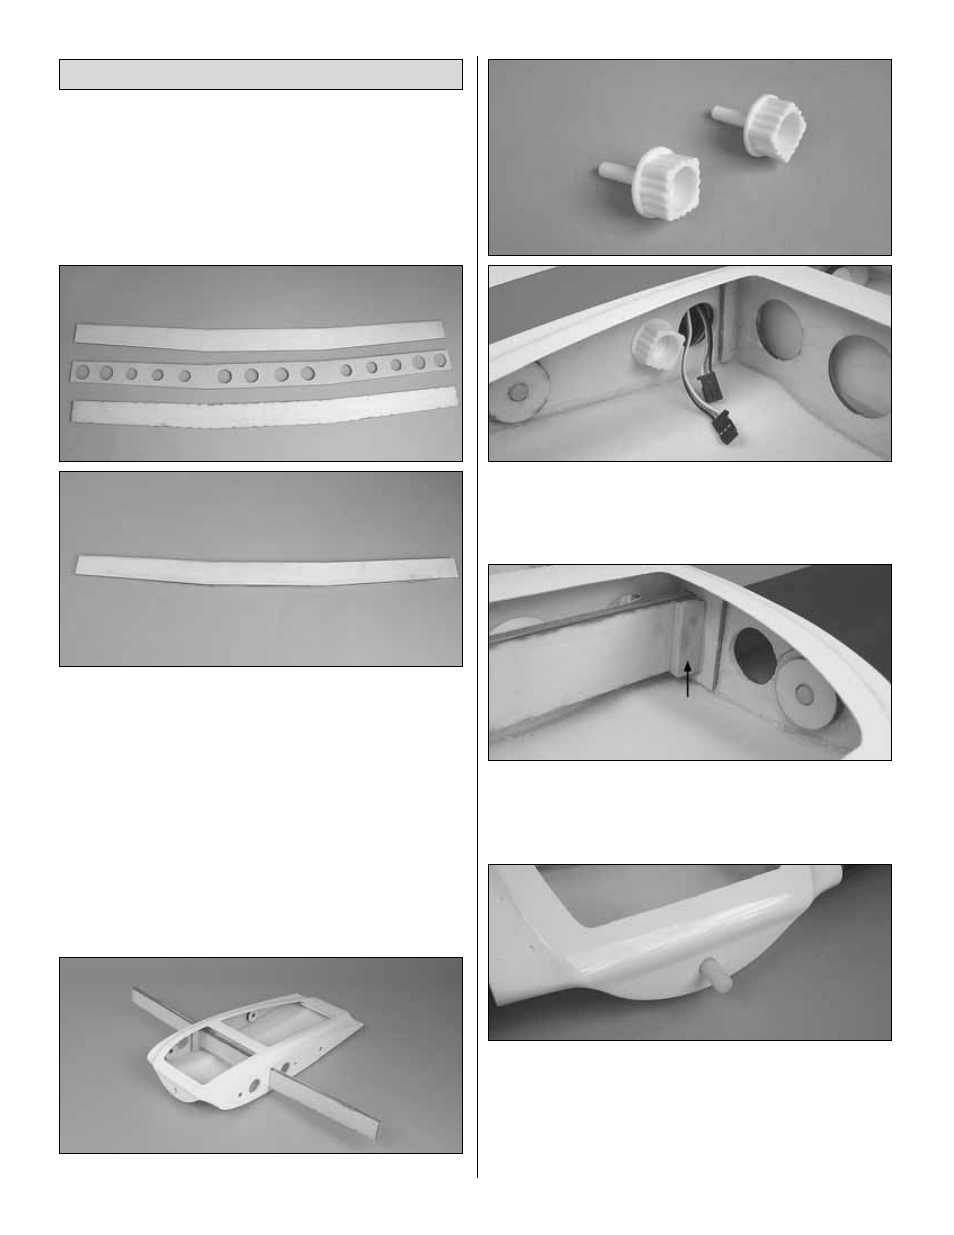
1. Before beginning this step be sure you have plenty of
clamps to assure that the plywood is securely bonded to the
aluminum. Locate the aluminum wing joiner and two 1/8"
[3mm] plywood wing joiners. Using 30-minute epoxy, glue
the plywood to both sides of the aluminum to form the wing
joiner using denatured alcohol and a paper towel, clean any
excess epoxy from the joiner before the glue hardens. After
the glue fully hardens, test fit the joiner into each wing and
the wing center-section. Sand the joiners as needed for a
good fit between the wing halves and the joiner.
❏
2. Center the joiner in the wing center-section.
❏
3. Slide both wing halves onto the joiner, pushing the
wings tight against the wing center-section. Locate two
1/4-20 wing bolts with the knurled head and screw them into
the wing and the wing center-section. Do this for both wings.
❏
4. Once you are satisfied with the fit of the wings to the
wing center-section, glue a 1/4" x 1/2" x 1-1/2" [6 x 13 x 38mm]
hardwood block to the joiner and the wing center-section at
both sides of the center-section.
❏
5. Using 6-minute epoxy, glue the remaining nylon wing
dowel into the leading edge of the wing center-section. The
dowel should extend approximately 1/2" [13mm] from the
front of the wing center.
The method we have designed for the wing assembly gives
you the flexibility of leaving the wing together as a one piece
Assemble the Wing Center-Section
10