Install the landing gear, wheels & wheel pants – Great Planes Super Chipmunk ARF - GPMA1303 User Manual
Page 11
wing or you can disassemble it into two or even three pieces
for easier transportation. If you choose to leave the wing
together as a one piece wing, it is recommended that you
regularly check the nylon screws to be sure they remain tight.
❏
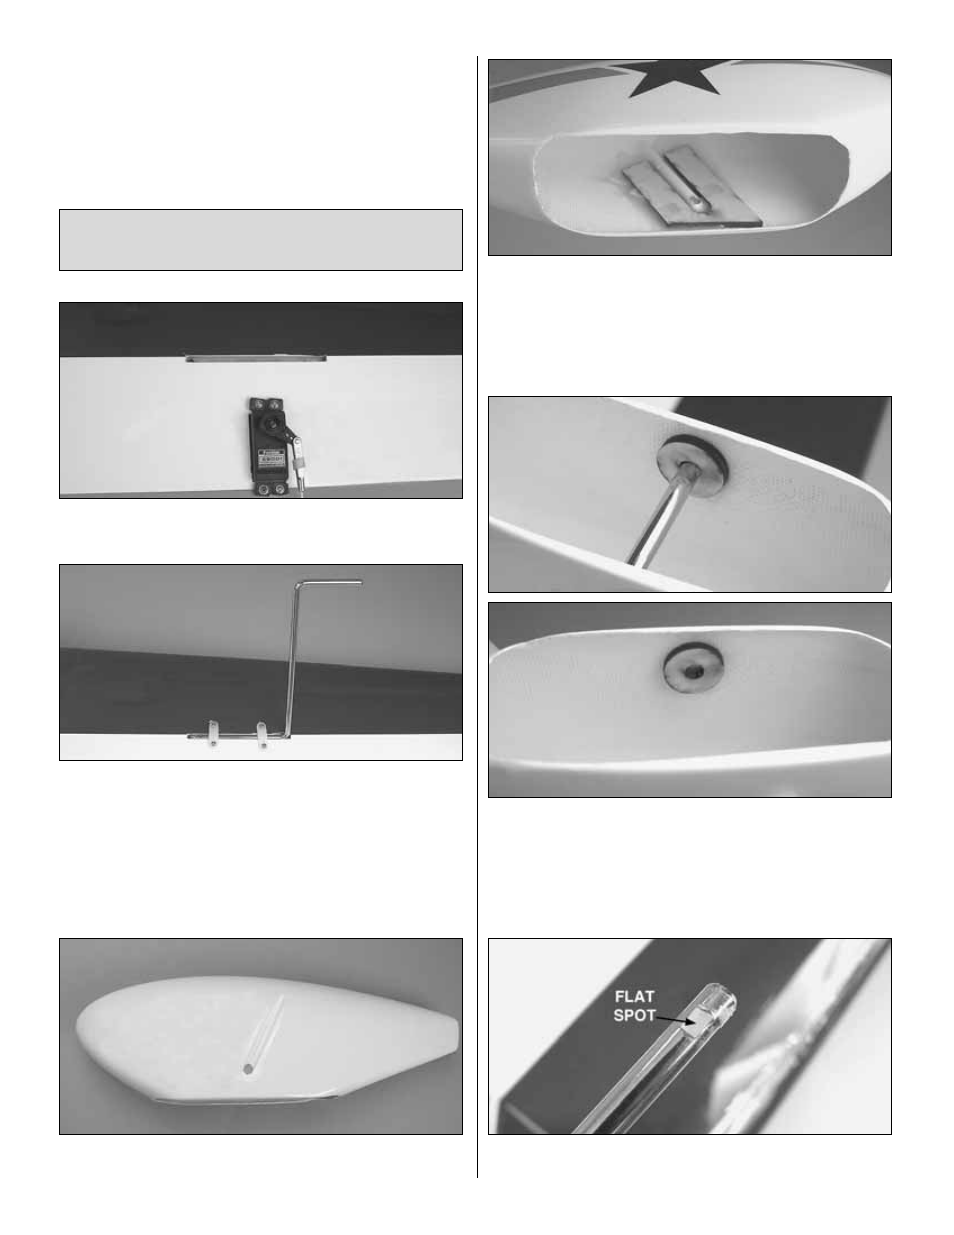
1. Cut the covering away from the landing gear wire slot
in the bottom of each wing.
❏
2. Install the landing gear wire in the wing as shown.
Mount the wire to the wing with two nylon landing gear
straps. Drill four 1/16" [1.6mm] holes into the hardwood
landing gear blocks. Insert and remove a #2 x 1/2" [13mm]
screw into each of the holes. Apply a couple drops of thin
CA into the holes to harden the threads and allow the glue
to harden. Install the landing gear wire to the wing with the
screws and landing gear straps. Do this for both wings.
❏
3. Drill a 3/16" [4.8mm] hole into each of the wheel pants
as shown.
❏
4. Inside the wheel pant, roughen the fiberglass along
each side of the molded slot with 80-grit sandpaper. Clean
the area well with denatured alcohol. Using 6-minute epoxy,
glue the plywood wheel pant doubler inside the wheel pant
as shown. Allow the glue to harden before proceeding. Do
this for both wheel pants.
❏
5. Apply 6-minute epoxy on one side of the plywood axle
doubler. Slide the doubler onto the axle. Push the axle
completely into the wheel pant, aligning the axle
perpendicular to the side of the wheel opening. Use small
clamps to hold the doubler in place to the wheel pant until
the glue hardens.
❏
6. File a flat spot onto the end of each axle for the wheel
collar set screw.
Install the Landing Gear, Wheels
& Wheel Pants
11