Hook up the flaps & ailerons – Great Planes Giant U-Can-Do 3D - GPMA1271 User Manual
Page 9
❏ ❏
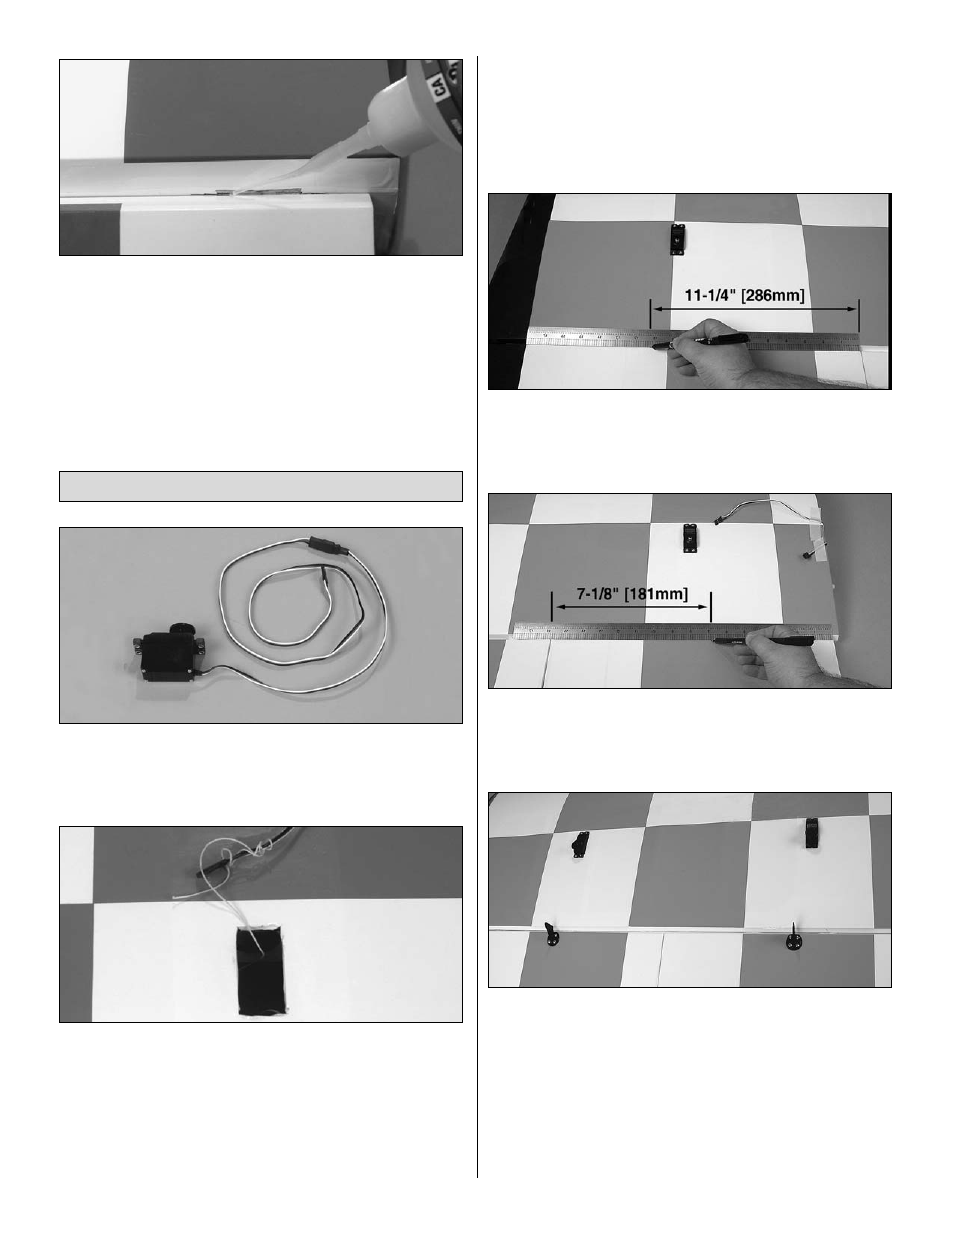
10. Apply six drops of thin CA to the top and bottom side
of each hinge. Do not use CA accelerator. After the CA has fully
hardened, test the hinges by pulling on the aileron and flap.
❏
11. Repeat steps 1 to 10 for the left wing half.
❏
1. Add a servo extension to the aileron servo, so that the
total length of the lead will be at least 30" [760mm] from the
servo to the end of the extension. Using tape or heat-shrink
tubing, securely attach the servo extension to the servo.
❏ ❏
2. Using needle nose pliers, pull the string out of the
right aileron servo hole. Tie the string to the end of the servo
lead. Note: Take care not to pull the string loose from the
root end of the wing.
❏ ❏
3. Use the string to pull the servo wire through the
wing. Fit the aileron servo in the wing. Slide the flap servo
lead through the wing and fit the flap servo.
❏ ❏
4. Drill 1/16" [1.6mm] holes through the servo mounts
for the servo screws. Add a few drops of thin CA to the holes
and allow to fully harden. Mount the aileron and flap servos
using the hardware that came with the servos.
❏ ❏
5. Mark the bottom LE of the right aileron 11-1/4"
[286mm] from the inboard end.
❏ ❏
6. Mark the bottom LE of the right flap 7-1/8" [181mm]
from the inboard end of the aileron.
❏ ❏
7. Center the control horns on the marks you made and
align the LE of the control horn with the LE of the control
surface. Drill 1/16" [1.6mm] holes through the plywood plates
using the control horns as a guide. Note: Take care to not drill
through the top of the control surface.
❏ ❏
8. Mount the control horns using #4 x 1/2" [13mm]
screws. Remove the screws and harden the threads in the
wood with thin CA. Mount the control horns the second time.
Hook Up the Flaps & Ailerons
9