Mount the ailerons & flaps assemble the wing – Great Planes Giant U-Can-Do 3D - GPMA1271 User Manual
Page 7
❏
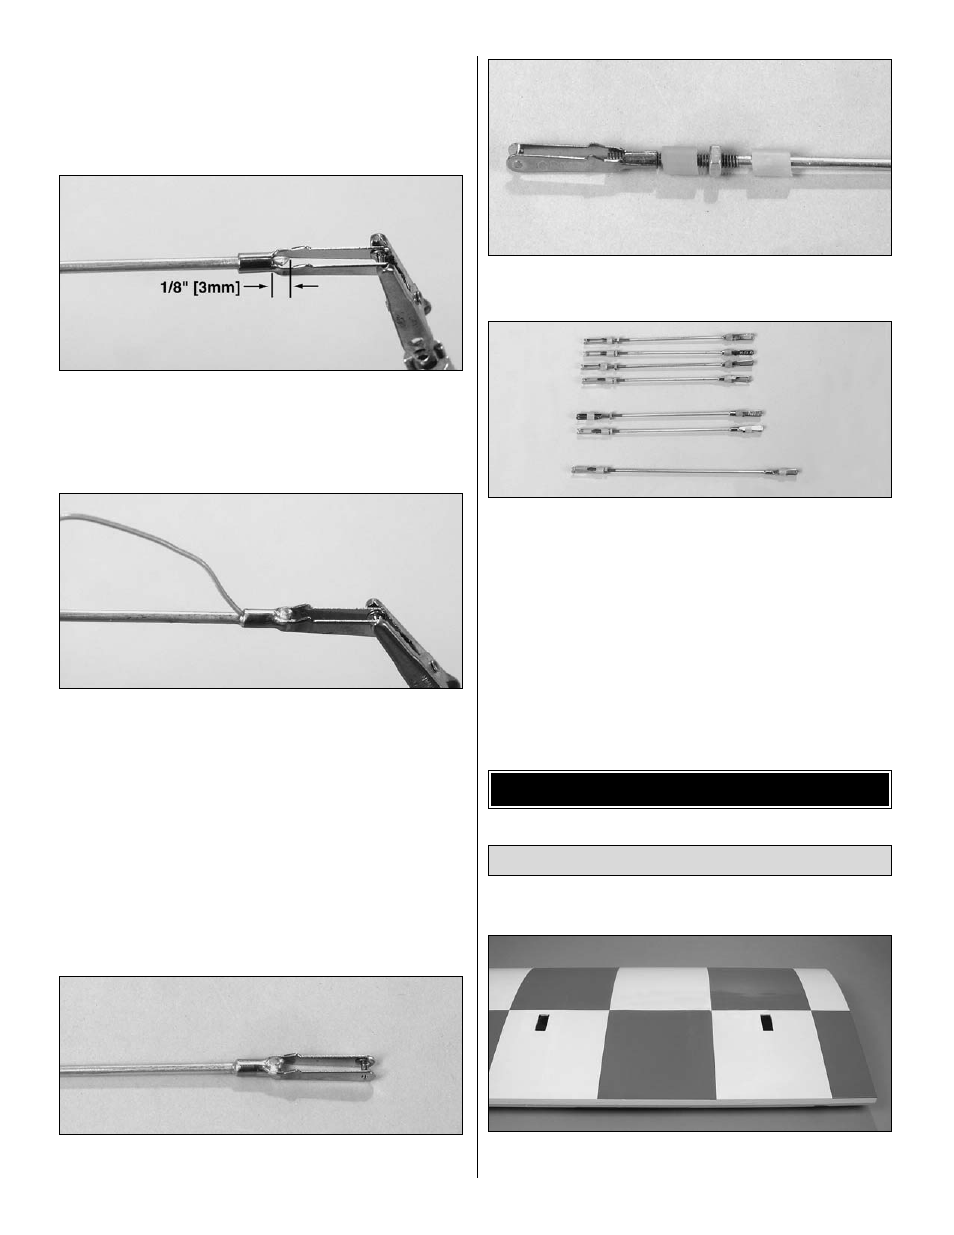
2. Use denatured alcohol or other solvent to thoroughly
clean one of the pushrods. Use coarse sandpaper to
roughen the end of the pushrod where it is to be soldered.
❏
3. Apply a few drops of soldering flux to the end of the
pushrod. Position the clevis so that 1/8" [3mm] of the
pushrod protrudes into the open area of the clevis.
❏
4. Simultaneously heat the clevis and pushrod. Apply silver
solder (GPMR8070) to the joint. The heat of the parts being
soldered should melt the solder, thus allowing it to flow.
❏
5. Immediately after the solder has solidified, but while it
is still hot, carefully use a cloth to quickly wipe off the flux
before it hardens. IMPORTANT: After the joint cools, coat
with oil to prevent rust. Note: Do not use the acid flux that
comes with silver solder for electrical soldering.
❏
6. This is what a properly soldered clevis looks like; shiny
solder with good flow, no blobs, flux removed.
❏
7. Fit a silicone clevis retainer, 4-40 nut, another silicone
clevis retainer and the clevis on the other end of the pushrod.
❏
8. Make the remaining six pushrods the same way. Note:
The amount that the clevis screws onto the pushrod will be
adjusted when they are installed.
Do the right wing first.
❏ ❏
1. Trim the covering from both servo openings on the
bottom of the wing.
Mount the Ailerons & Flaps
ASSEMBLE THE WING
7