Install the throttle servo, receiver & battery – Great Planes Giant U-Can-Do 3D - GPMA1271 User Manual
Page 17
❏
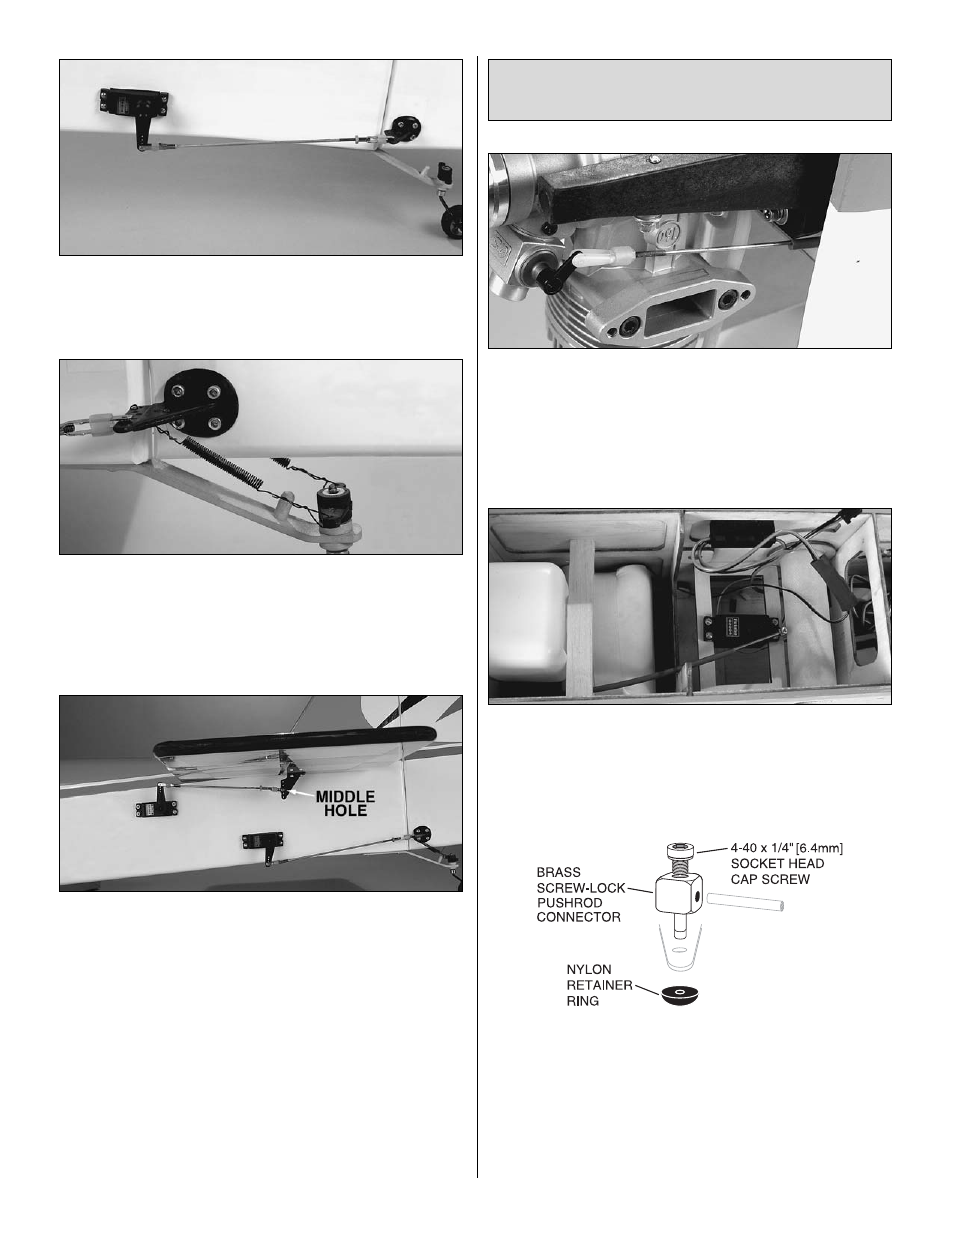
9. Attach the 6-3/4" [172mm] pushrod to the outer holes
on the rudder servo arm and the second to outer hole on
the control horn. Adjust the length of the pushrod so that the
rudder lines up with the fin.
❏
10. Attach the two tail gear springs to the inner holes on
the control horns and the tail gear steering arm. Wrap the
ends around the wires at least twice and trim off the
excessive wire.
❏
11. Mount the stab to the fuse.
❏
12. Attach the 5-1/2" [140mm] pushrods to the outer holes
on the elevator servo arms and the middle hole on the control
horns. Adjust the length of the pushrods so that the elevators
lines up with the stab.
❏
13. Double-check that the elevators align with the stab and
the rudder aligns with the fin. Tighten the 4-40 nuts against the
clevises. Slide the silicone retainers over the clevises.
❏
1. Screw the nylon clevis 15 full turns onto the 17-1/2"
[445mm] throttle pushrod. Slide the throttle pushrod into the
plastic outer pushrod tube, attaching the clevis to the
throttle arm. Note: Bend the pushrod as necessary for
smooth operation.
❏
2. Fit the throttle servo in the tray, but do not screw it in
place at this time.
❏
3. Connect the throttle pushrod to the throttle servo with
the screw-lock pushrod connector.
❏
4. Let the pushrod locate the servo in the tray. Mount the
servo to the servo tray with the hardware provided with
your servo.
Install the Throttle Servo, Receiver
& Battery
17