Mount the cowl mount the engine – Great Planes Giant U-Can-Do 3D - GPMA1271 User Manual
Page 13
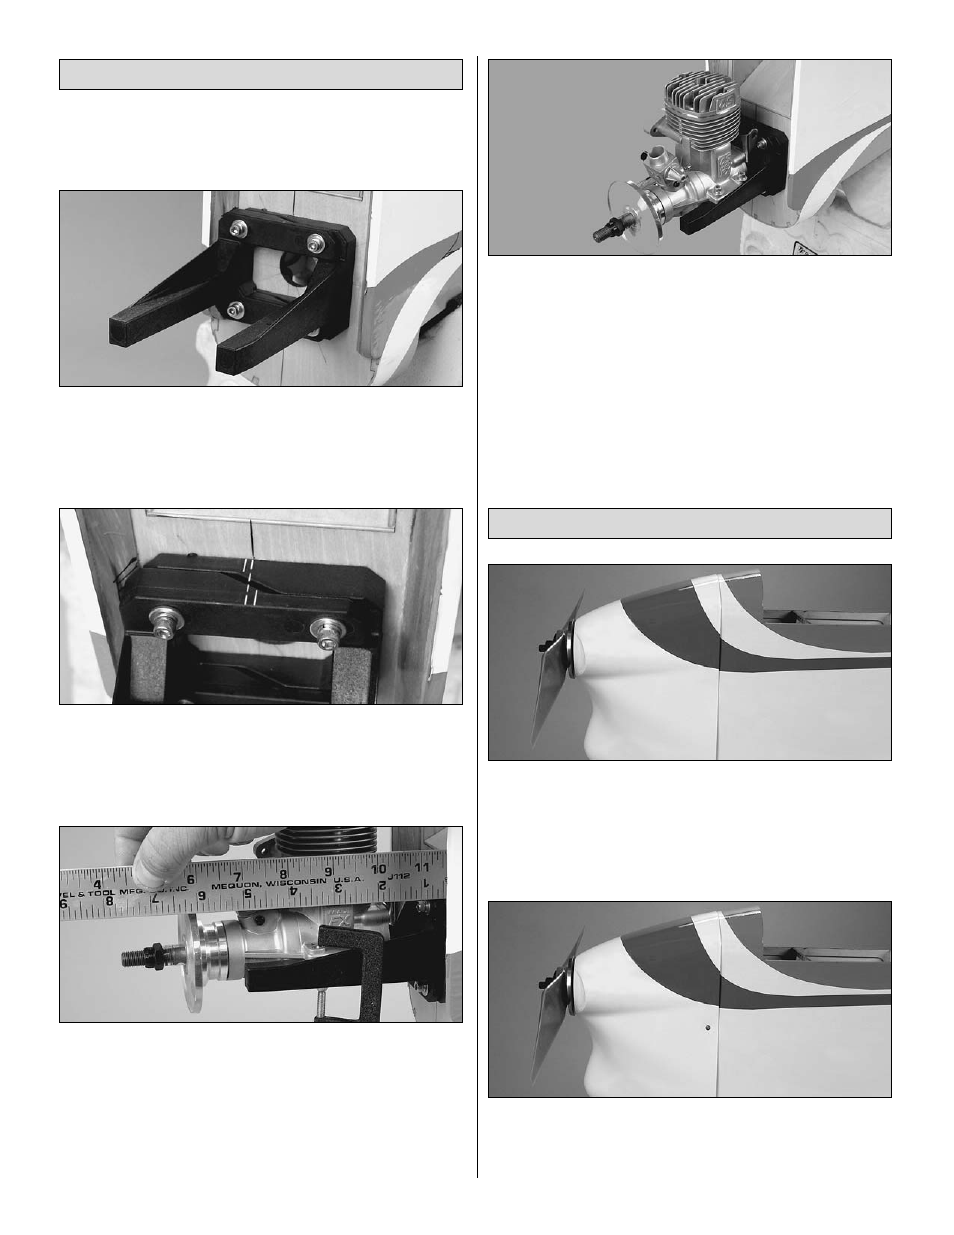
❏
1. Draw a vertical line on the firewall using the embossed
lines as a guide. Note: This line is offset to the left so that the
spinner will be centered on the cowl.
❏
2. Trim the spreader bars from both halves of the engine
mount. Mount the engine mount to the firewall with four
8-32 x 1" [25mm] SHCS, #8 flat washers and #8 lock
washers, but do not fully tighten the bolts.
❏
3. Adjust the width of the mount to fit the engine. Center
the molded-in “tick” marks on the engine mount equally to
the left and right of the vertical line on the firewall. Tighten
the mounting bolts.
❏
4. Place the backplate of the spinner on the engine.
❏
5. Use small clamps or another method to temporarily
secure the engine to the mount with the backplate of the
spinner 6" [152mm] from the firewall. Use the Great Planes
Dead Center
™
Engine Mount Hole Locator (GPMR8130) or
your preferred method to mark the engine mount holes onto
the engine mount.
❏
6. Remove the engine from the mount. Drill #29 holes
through the mount at the marks you made. Tap 8-32 threads
into the mount. Mount the engine to the mount with four 8-32
x 1" [25mm] SHCS, #8 flat washers and #8 lock washers.
❏
1. Place the cowl on the fuse. Mount the spinner and
prop to the engine. Position the cowl on the fuse so it is in
alignment with the spinner. Be certain there is at least a
3/32" [2.5mm] gap between the front of the cowl and the
backplate of the spinner. It may be helpful to have an
assistant hold the cowl for you.
❏
2. Drill a 1/16" [1.6mm] hole through the cowl and fuse
side centered vertically and 1/2" [13mm] forward of the aft
edge of the cowl. Mount the cowl to the fuse with a #2 x 1/2"
[13mm] screw and a #2 washer.
Mount the Cowl
Mount the Engine
13