Apply the decals mount the canopy – Great Planes Giant U-Can-Do 3D - GPMA1271 User Manual
Page 18
❏
5. Mount the cowl, prop, muffler and spinner.
❏
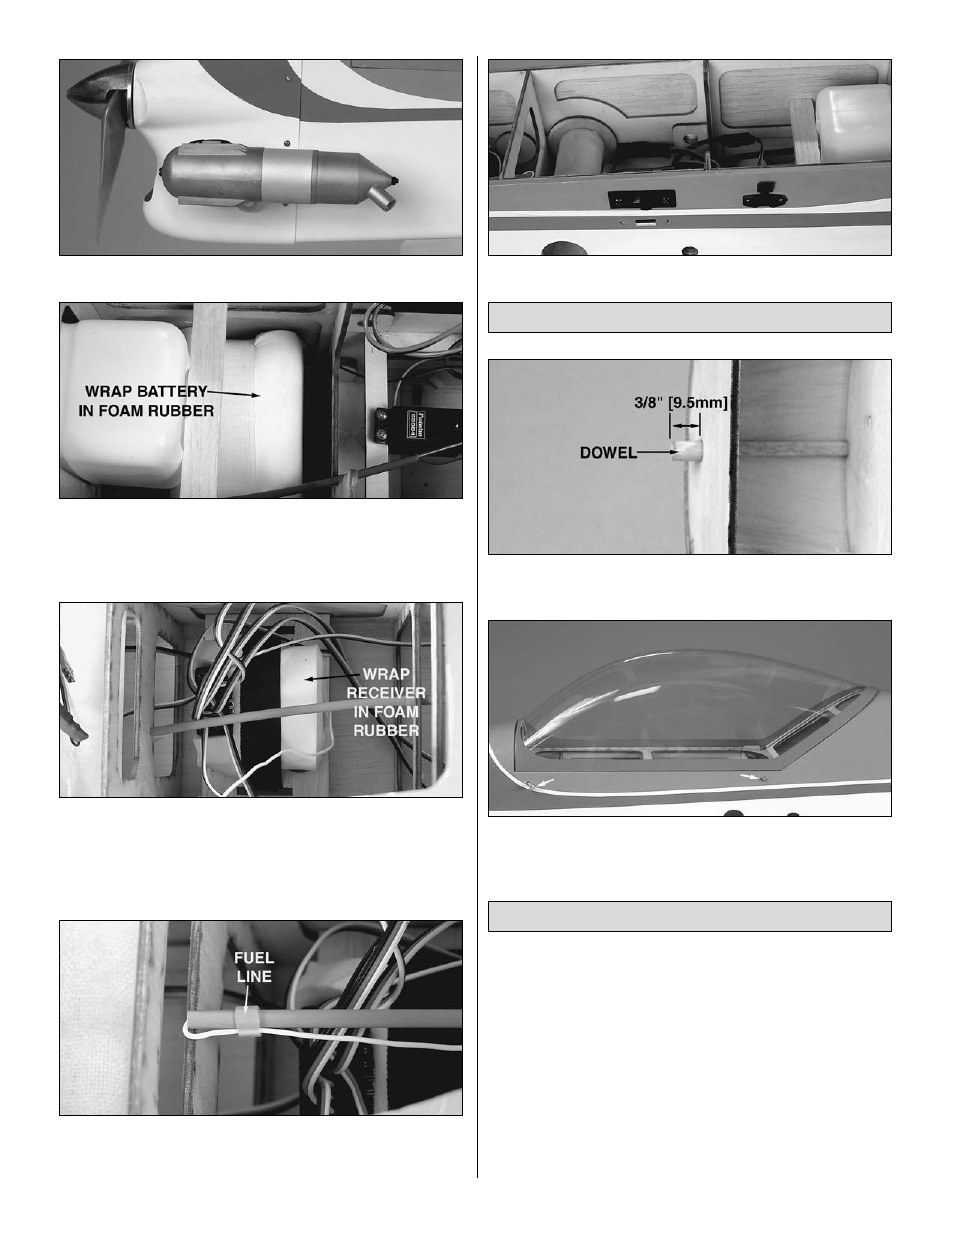
6. Wrap the battery pack in 1/2" [13mm] of R/C foam
rubber and use the Velcro
®
strap to mount it to one of the
battery/receiver trays. Fit the tray in the fuselage under the
fuel tank and glue it to the fuse sides with medium CA.
❏
7. Wrap the receiver in 1/2" [13mm] of R/C foam rubber
and use the Velcro strap to mount it to one of the
battery/receiver trays. Fit the tray in the fuselage behind the
wing tube and glue it to the fuse sides with medium CA.
❏
8. Extend the receiver antenna and guide it down the
antenna tube in the fuse. Retain the end of the antenna with
a 1/4" [6mm] piece of fuel line slid over the antenna tube.
❏
9. Mount the receiver on/off switch and charge jack.
❏
1. Glue the 1/4" x 5/8" [6 x 16mm] dowel in the hole in
the front of the canopy hatch assembly.
❏
2. Mount the hatch to the fuse with two 4-40 x 3/4"
[19mm] SHCS.
❏
1. Use scissors or a sharp hobby knife to cut the decals
from the sheet.
❏
2. Be certain the model is clean and free from oily
fingerprints and dust. Prepare a dishpan or small bucket
with a mixture of liquid dish soap and warm water–about
one teaspoon of soap per gallon of water. Submerse the
decal in the soap and water and peel off the paper backing.
Note: Even though the decals have a “sticky-back” and are not
the water transfer type, submersing them in soap & water allows
accurate positioning and reduces air bubbles underneath.
Apply the Decals
Mount the Canopy
18