Great Planes Edge 540 FlatOuts 3D EP ARF - GPMA1113 User Manual
Page 8
HOW TO GLUE THE TUBES TO
THE CONTROL SURFACES
Note: You may want to protect your work surface from
excess glue. We recommend Great Planes Plan Protector
(GPMR6167) for this purpose.
A. Cut several 1-1/2" [38mm] pieces of cellophane tape. Fold
the last 1/4" [6mm] over to make a tab for easy removal.
B. Lightly coat the leading edges of the elevators with foam-safe
CA–do not use an excessive amount. Hint: A CA applicator tip
is recommended to accurately control the bead of glue.
C. Tape the tube to the leading edge of the elevators. Weigh
the assembly down on a flat surface to prevent warping and
allow the glue to harden without accelerator.
D. Once the glue has hardened, remove the tape.
❏
5. Now the elevator halves may be cut from the sheet.
❏
6. Join the elevators to the stab by snapping the clip
hinges to the joiner tube.
❏
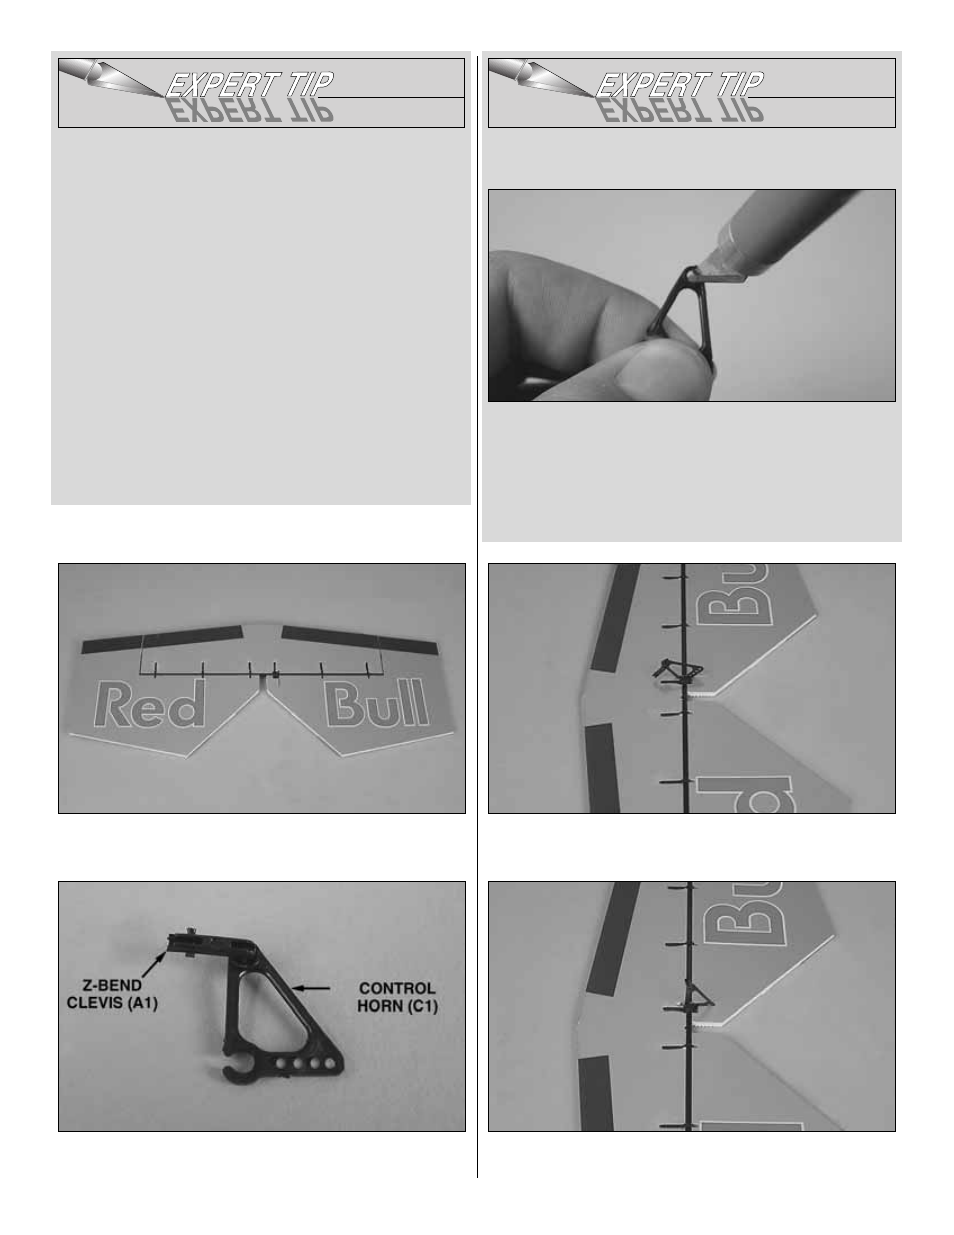
7. Insert a Z-bend clevis (A1) into a clip hinge control
horn (C1).
HOW TO INSTALL Z-BEND CLEVISES MORE EASILY
A. Using a sharp #11 hobby knife, remove any flashing from the
inside of the hole you are installing the Z-bend clevis into. Do this
by rotating the blade in the hole while applying gentle pressure.
Be careful not to remove too much material–your goal here is to
remove small ridges of flashing, not to make the hole larger.
B. Snap the Z-bend clevis into place.
❏
8. Clip the control horn onto the joiner tube aligned with
the precut slot.
❏
9. Coat the gluing area on the control horn with glue and
rotate it down into the precut slot.
8