Great Planes Edge 540 EP ARF - GPMA1550 User Manual
Page 17
17
the magnets after they have been glued into the fuselage.
Let the CA cure without accelerator.
❏
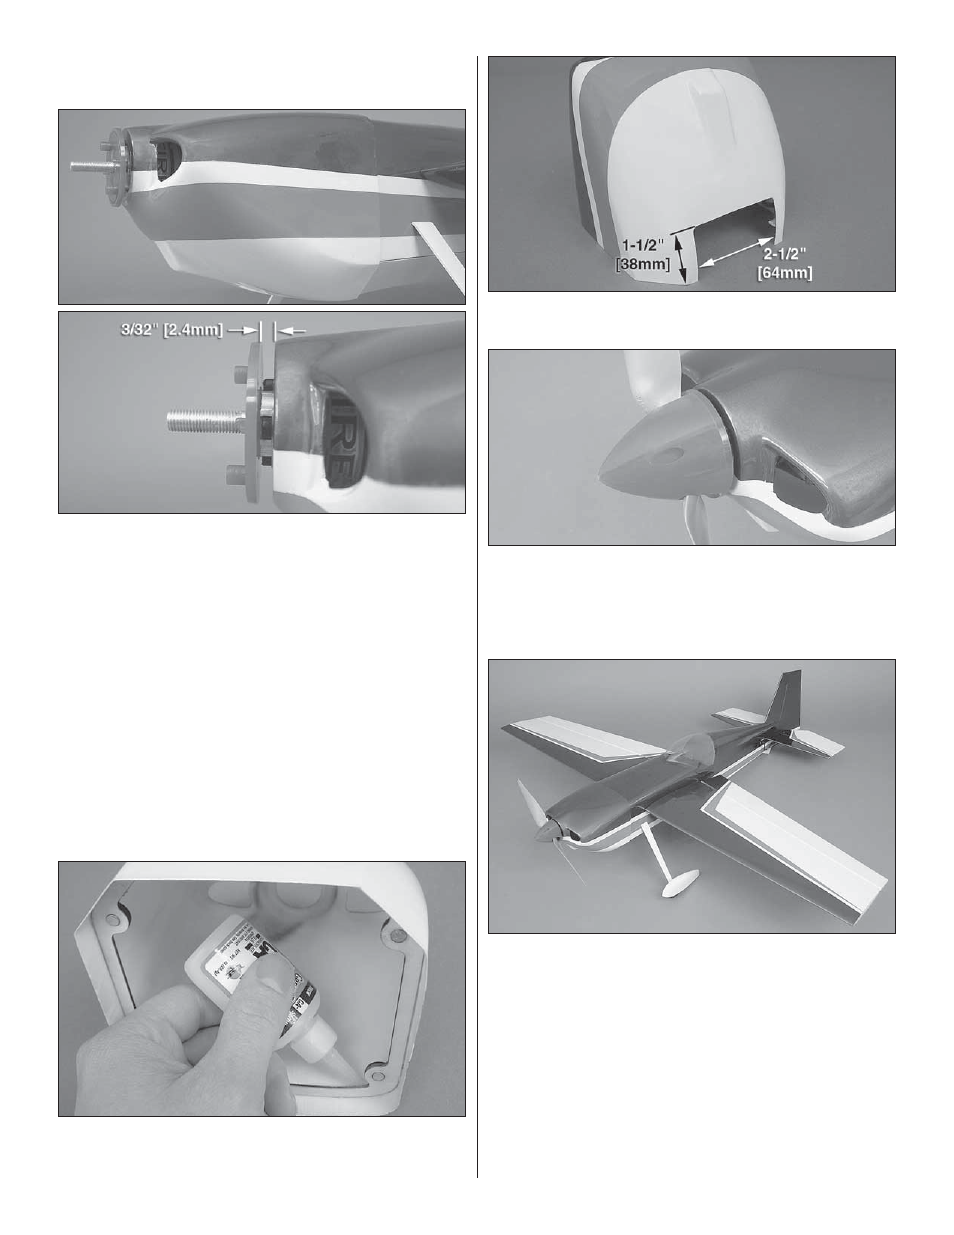
4. Connect the cowl ring onto the fuselage. Slide the
cowl over the cowl ring and onto the fuselage. Confi rm that
the spinner backplate properly fi ts your motor shaft. If not,
ream or drill it to the correct diameter. Temporarily install the
spinner backplate onto the prop shaft. Adjust the position
of the cowl on the fuselage so that the colors line up with
the covering on the fuselage. The spinner backplate should
be centered over the front cowl opening, and the backplate
should be approximately 3/32" [2.4mm] beyond the front
of the cowl. When satisfi ed, tack glue (medium or thick CA
recommended) the cowl to the cowl ring in three or four
spots by reaching through the front opening in the cowl. A
CA applicator tip is very useful in this step. If you do not have
an applicator tip long enough, use a stick to apply a dot of
epoxy to each of the four cowl ring corners. Be careful not to
glue the cowl ring to the fi rewall! As an additional precaution,
you can use one of the plastic bags that came in the plane
box as a protective liner between the cowl ring and fi rewall.
❏
5. Carefully remove the cowl (and cowl ring) from the
fuselage and apply a fi llet of medium or thick CA glue along
the front of the cowl ring where it touches the cowl.
❏
6. Cut a cooling hole out of the underside of the cowl as shown
approximately 2-1/2" [64mm] wide x 1-1/2" [38mm] long.
❏
7. Reattach the cowl to the fuselage. Install the propeller,
prop washer, and prop nut onto the prop shaft. Install the
spinner cone using the included spinner screws. Depending
on the size propeller being used, the slots in the spinner cone
may need to be enlarged using a hobby knife or rotary tool.
❏
8. If you plan to install the instrument panel decal, do so
now. Finish up the assembly by taping the canopy in position.
Clear tape works well for this.