Great Planes Edge 540 EP ARF - GPMA1550 User Manual
Page 16
16
❏
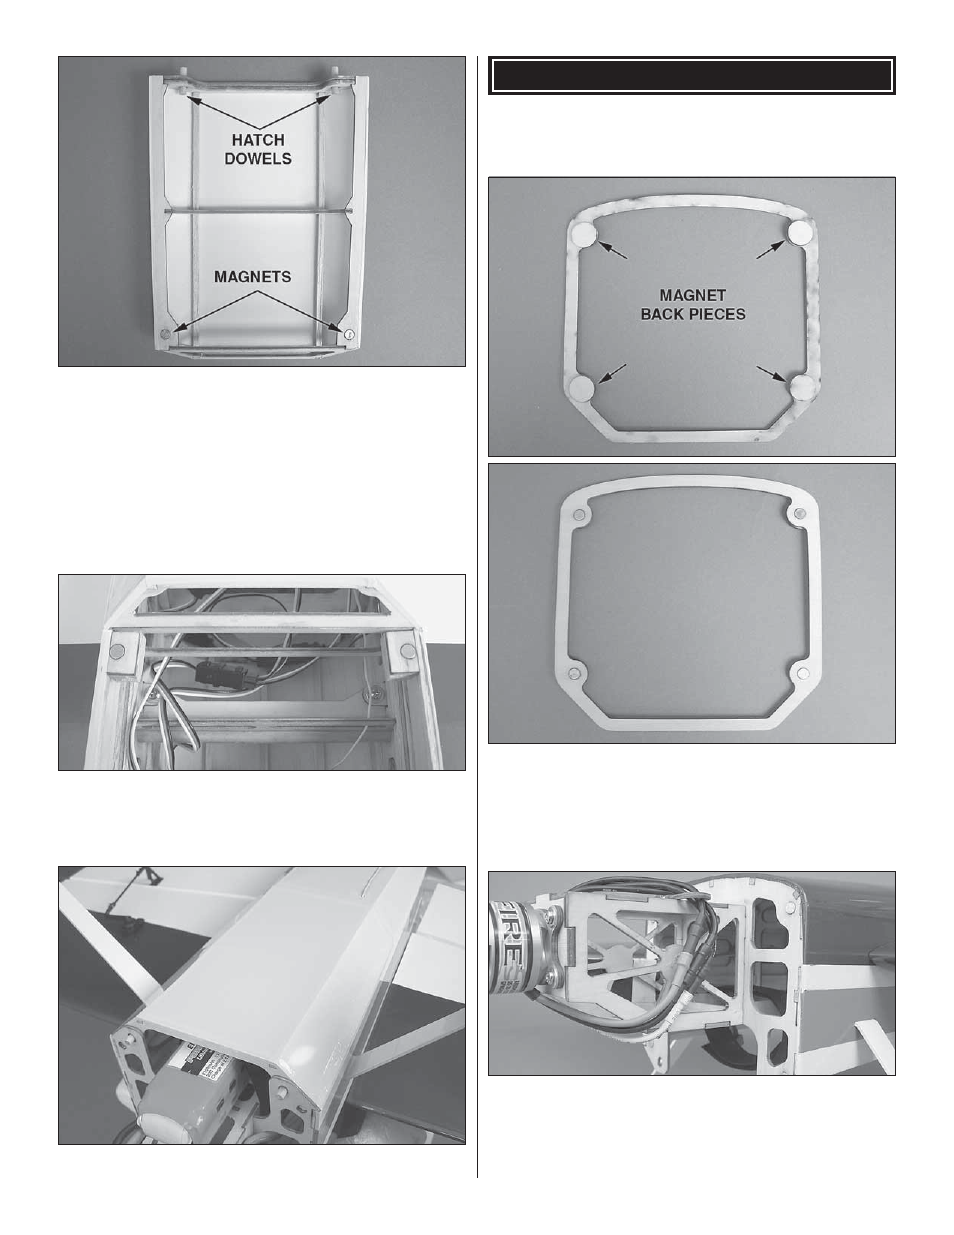
9. Glue the two hatch dowels halfway into the holes in
the front of the battery hatch. Glue two magnets into the
battery hatch with medium CA as shown. Do not use too
much CA because it may prevent the magnets from sitting
fl ush inside the holes. If the magnets do not sit fl ush with the
hatch bottom, use long nose pliers to carefully press them
in place. A light skin coating of thin CA over the magnets
that overlaps onto the wood frame of the hatch will help
secure the magnets in place. Let the CA glue harden without
accelerator.
❏
10. Glue two magnets into the fuselage for the battery
hatch. Be sure that the magnets are glued with the correct
polarity facing out! The magnets in the fuselage must be
attracted to the magnets in the battery hatch.
❏
11. Test fi t the battery hatch onto the fuselage.
INSTALL THE COWL, CANOPY & SPINNER
❏
1. Prepare the inside of the cowl by lightly scuffi ng it with 220-
grit sandpaper. When satisfi ed, clean the inside with alcohol.
❏
2. Glue the four plywood magnet back pieces to the cowl
ring. Glue a magnet into each of the four holes in the cowl
ring by coating the insides of the holes with medium CA. A
light skin coating of thin CA over the magnets that overlaps
onto the cowl ring will help secure the magnets in place. Let
the CA glue cure without accelerator.
❏
3. Glue four magnets into the holes in the fuselage as
shown. Be sure that the magnets are glued with the
correct polarity facing out! The magnets in the fuselage
must be attracted to the magnets in the cowl ring. As you did
with the cowl ring, apply a light skin coating of thin CA over