Great Planes Christen Eagle ARF - GPMA1217 User Manual
Page 24
❏
1. The same as was done for the cowl, wipe the inside of
the wheel pants where the plywood braces will go with
paper towel squares dampened with denatured alcohol. Use
coarse-grit sandpaper to roughen the inside of the wheel
pants in the same area.
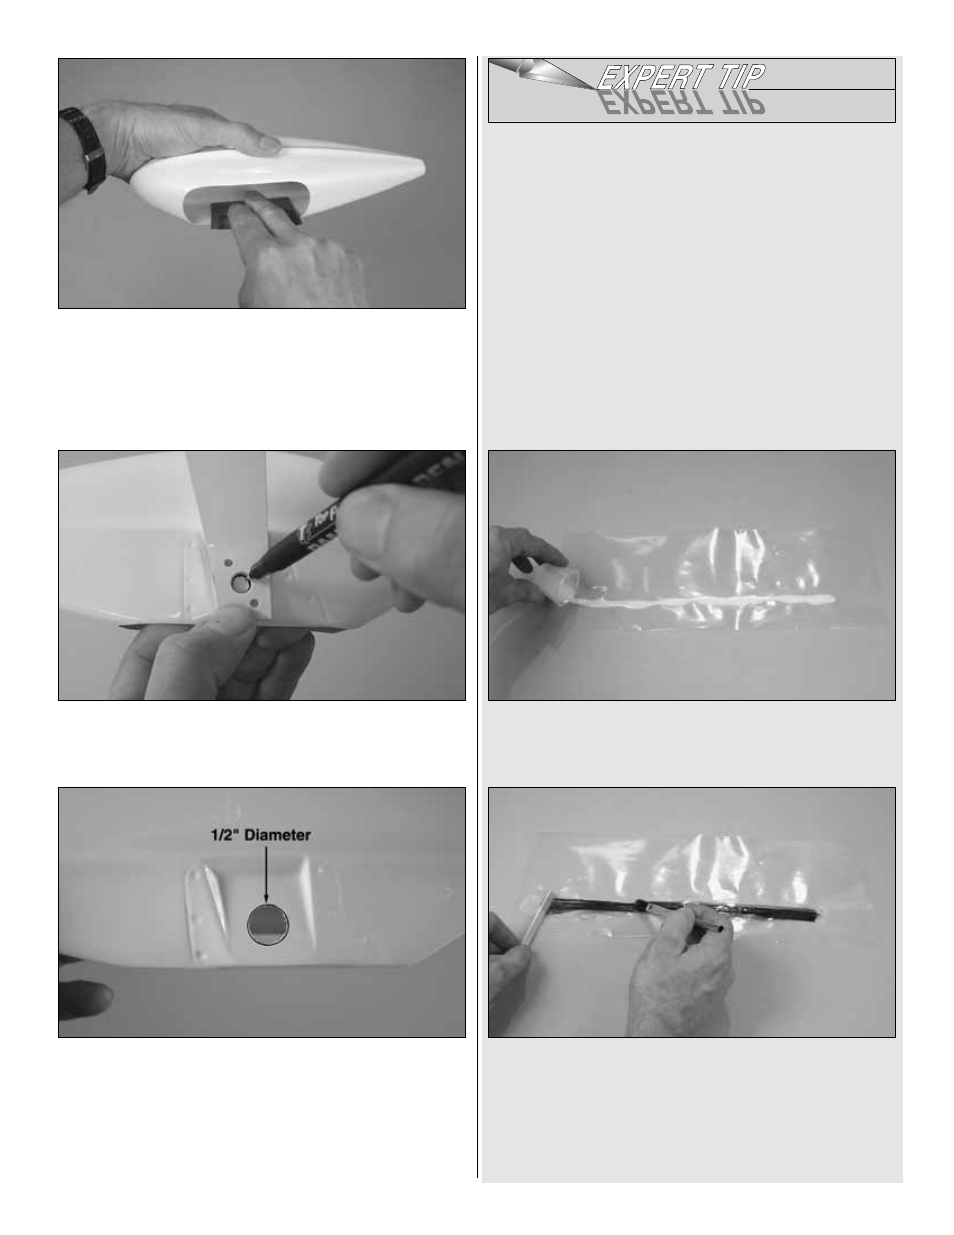
❏
2. Mark the location of the axle hole in the left side of the
landing gear onto the left wheel pant.
❏
3. Use a rotary tool with a cutting bit to cut a 1/2" [13mm]
hole centered over the hole marked in the previous step.
❏
4. Mark and cut the hole in the right wheel pant the same way.
❏
5. Follow the Expert Tip that follows if you would like to
add additional reinforcement in the wheel pants.
How to “Bullet-Proof” Your Wheel Pants
Here’s a way to add rigidity to the wheel pants and increase
their service life. They still may not hold up to a crash, but
they will survive the day-to-day rigors of bouncy landings
and rough runways. This could get messy, so take
precautions and wear a shop apron and rubber gloves. The
instructions show how to do one pant at a time, but they
could be done simultaneously.
❏
A. Thoroughly sand the inside of the wheel pants where
the carbon fiber will go. Cut an approximately 13" [330mm]
long, 3/8" [10mm] wide “swatch” of Dave Brown Carbon Fibre
Tape (DAVR2000).
❏
B. Mix approximately 1/4 oz. of 30-minute epoxy. Pour a
bead of epoxy onto an approximately 16" [400mm] sheet of
plastic (leftover from the kit packaging or another plastic bag).
❏
C. Lay the carbon fiber swatch onto the bead of epoxy.
Let it sit there for a minute or so. Holding one end of the
carbon fiber with an epoxy mixing stick, use an epoxy brush
to work the epoxy up through the fibers.
❏
D. Apply a light coating of epoxy to the inside of the wheel
pant all the way around the wheel opening.
24