Great Planes Christen Eagle ARF - GPMA1217 User Manual
Page 11
❏
6. Adjust the aileron so there is a small gap between the
trailing edge of the wing and the leading edge of the
aileron—just enough to see light through or to slip a piece of
paper through. Add six to eight drops of thin CA to both
sides of all three hinges. Using a CA applicator tip is highly
recommended. Allow enough time between drops to allow
the CA to soak in—otherwise, excess CA will get into the
hinge gap.
❏
7. Tighten the covering, open the servo hatches and join
the ailerons to the remaining three wing panels the same way.
❏
8. Cut the covering from the openings in the bottom wing
panels for the servo wires and the wing bolts. Tape the string
for the servo wires to the top of the panels.
Do the bottom wing first…
❏
1. Round both ends of the 3/8" x 1-3/16" [10 x 30mm]
hardwood wing dowels.
❏
2. Use a bar sander with coarse sandpaper to true the
edges and remove any excess hardened epoxy from the
forward and aft bottom wing joiners prepared earlier.
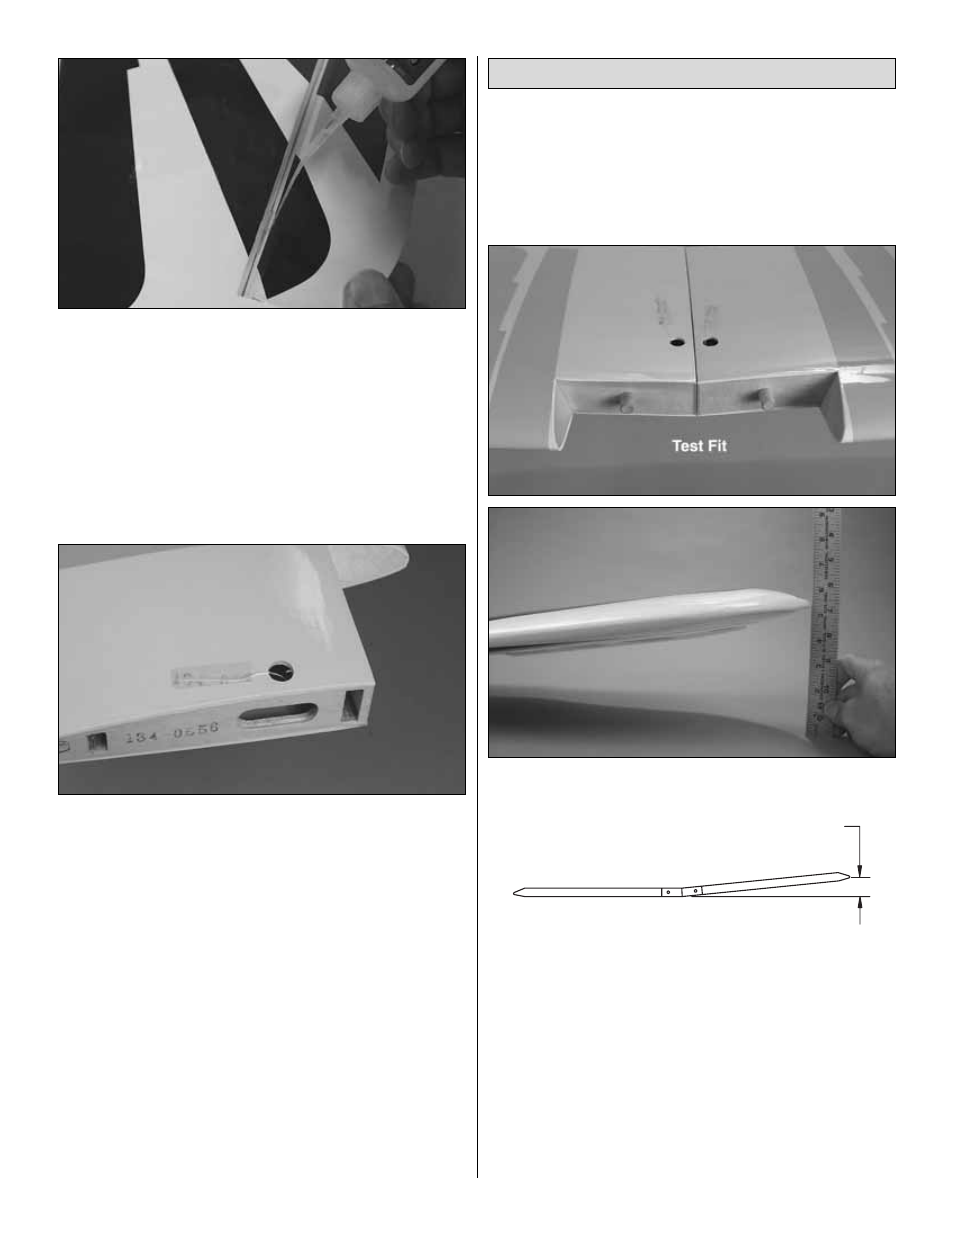
Without using any glue, test join the bottom wings with the
joiners and the dowels. Make any adjustments necessary for
a good fit. The dihedral angle of the bottom wing is factory-
set and determined by the angle of the wing joiners.
However, those who wish to confirm the dihedral angle may
do so by placing one wing panel flat on the workbench and
measuring the distance from the tip of the other panel to the
bench. The distance should be 5-1/4" [133mm], but small
variances are acceptable.
BOTTOM WING
5-1/4"
[133mm]
Join the Wings
11