Great Planes T-Craft 20 Kit - GPMA0155 User Manual
Page 24
❏
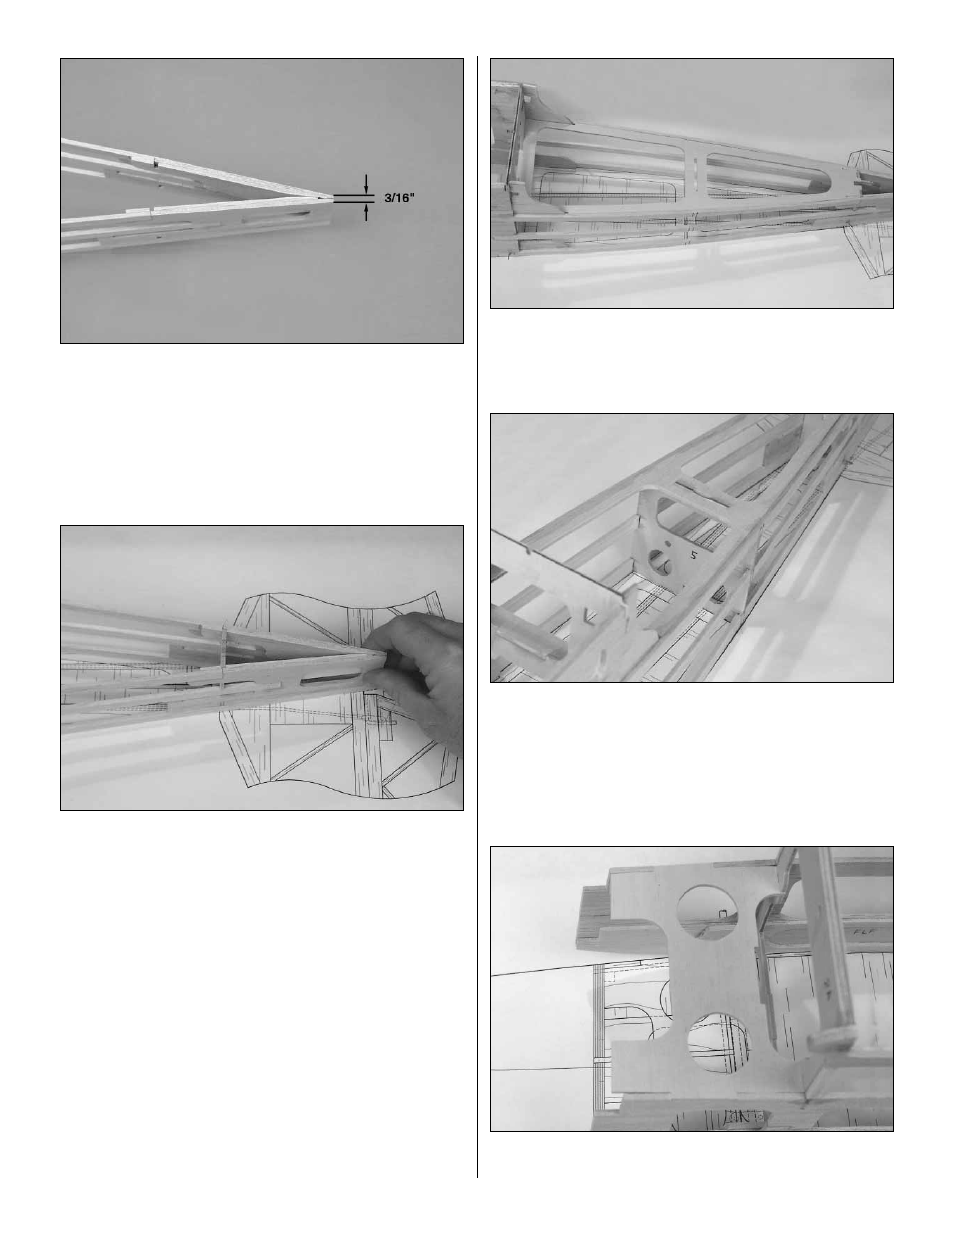
6. Use a sanding bar to taper the inside of the aft end of
the fuse sides so that when the aft fuse sides are brought
together the two ends are approximately 3/16" wide.
❏
7. Test fit the die-cut 1/8" plywood former F-6 at the aft
end of the fuselage. Position the fuselage right side up over
the plan top view with formers F-3 and F-4 aligned with the
plan. Pull the aft end of the fuselage together, checking the
fit between the sides and sanding if necessary.
❏
8. Pin the fuse over the fuselage top view. Carefully line
up the aft end. Use a building square to make sure the fuse
sides are perpendicular to the building board. Then, glue the
aft end of the fuse together and former F-6 to the fuse sides.
Note: A small misalignment here will throw the aft end out
of line, so double-check before gluing.
❏
9. Test fit the die-cut 1/8" plywood aft deck base between
the top longerons, F-4 and F-6. Check that the fuse sides
are perpendicular to the building board. Then, glue the aft
deck base to the top longerons, F-4 and F-6.
❏
10. Position the die-cut 1/8" plywood former F-5 between
the longerons. Insert the tab on the top of F-5 into the slot in
the aft deck base. Align the former with the lines you put on
the longerons. Glue the former to the longerons and the aft
deck base.
❏
11. Now, glue former F-3 to the fuse sides.
❏
12. Temporarily install the die-cut 1/8" plywood front deck.
The shorter side of the deck is positioned on the right side.
24