Adjustments and flight techniques – Futaba 9VAP User Manual
Page 30
ADJUSTMENTS AND FLIGHT TECHNIQUES
F3A Pattern Aircraft
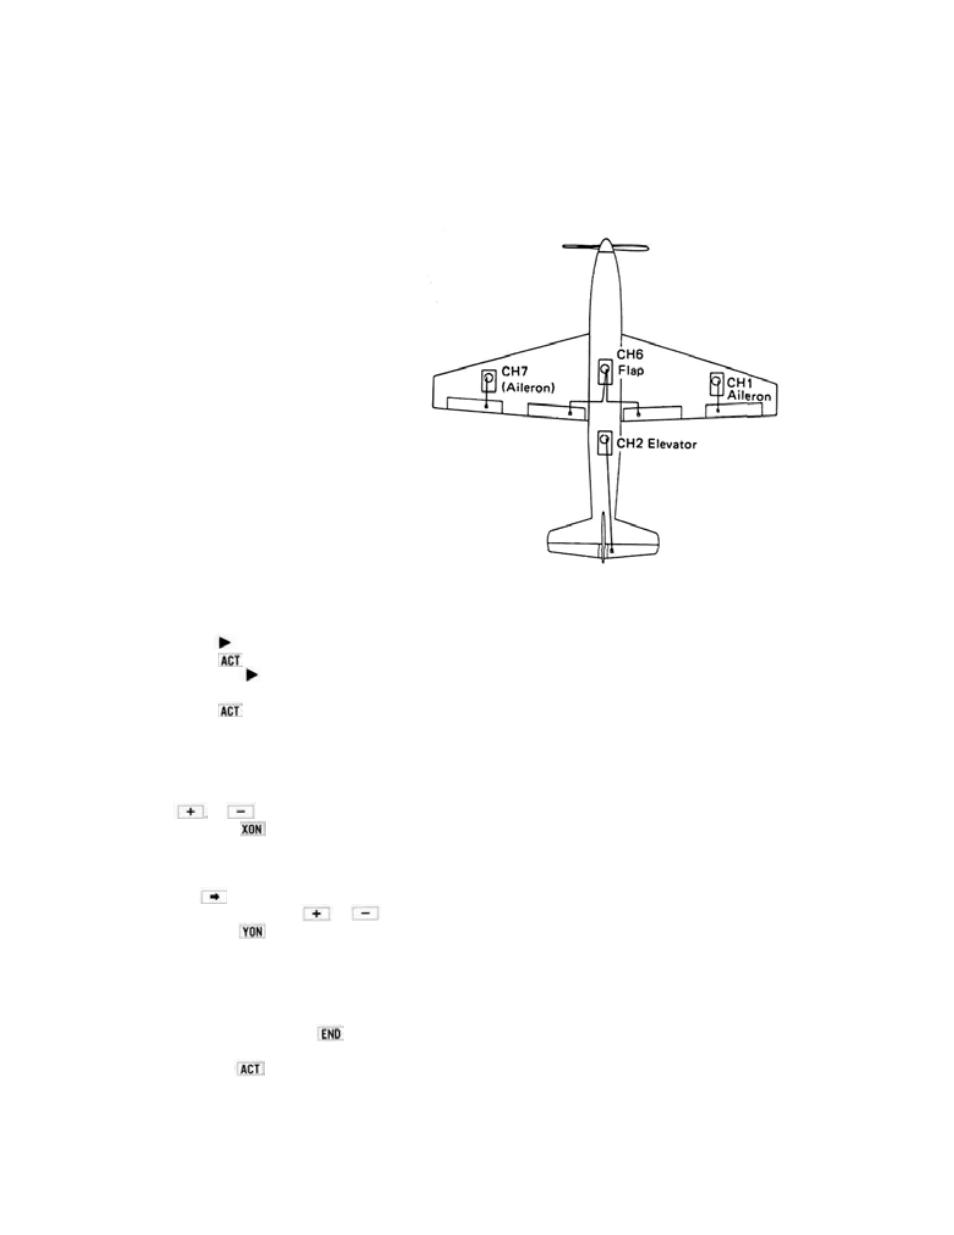
The figures below show multiple mixing func-
tions in an F3A contest aircraft. Both built-in
and Programmable mixing functions are used.
Elevator Flap (CH6) mixing and Aileron Dif-
ferential (CH1 and CH7) are used. In addition,
the PROG-MIX function is used to allow the
ailerons (CH1 and CH7) to act as flaps (flap-
perons) when ELV -> FLP mixing is ON.
Setting Method
Press the
program key.
See Aileron Differential Mixing, page
1. Select the Programmable Mixing CHAN-
NEL SETTING screen.
2. Set the "mas" channel to FLP with the
or program
key.
3. Press the
program key. ("Slaves" the
PROG MIX 1 circuit to the built-in ELV ->
FLP circuit.)
4. Move the cursor to the "slv" position with
the
cursor key and set the "slv" chan-
nel to AIL with the key.
or
5. Press the
program key. ("Slaves" the
1) Elevator
flap Mixing (Built-in)
Press the
program key.
Flap Mixinq, paqe
See Elevator
2) Aileron Differential Mixing (Built-in)
3) Set PROG MIX
4) Rate (amount) of movement of the FLP
(CH6) servo in relation to the Elevator control
stick is set in the ELV -> FLP mixing screen
(page 40).
5) Aileron differential is set with the AILERON
DIFFERENTIAL screen (page 32).
6) UP and DOWN movement of the Ailerons
(CH1 and CH7) in relation to Elevator stick
movement will be influenced by the rate set
for ELV -> FLP mixing and by the rate set at
U/R and L/D on the PROGRAMABLE MIX-
ING screen. If the U/R and L/D rates are set
at 100%, then the UP and DOWN movement
of the Ailerons (at ELV -> FLP MIX ON) will
be the same as set in Step 4) above.
built-in AIL DIFF circuit to the PROG
MIX 1 circuit.)
All the mixing channels are now designated. The
screen should appear as below.
6. Return to the PROGRAMABLE MIXING
screen by pressing the
program key.
7. Move the cursor to the "inn" position and
press the
key.
8. Move the cursor to the "sw" position and
select the ON/OFF switch option desired.