Assemble wing, Attach left elevator and elastic thread – Estes 2190 – Cosmos Mariner User Manual
Page 4
page 4
page 9
4.
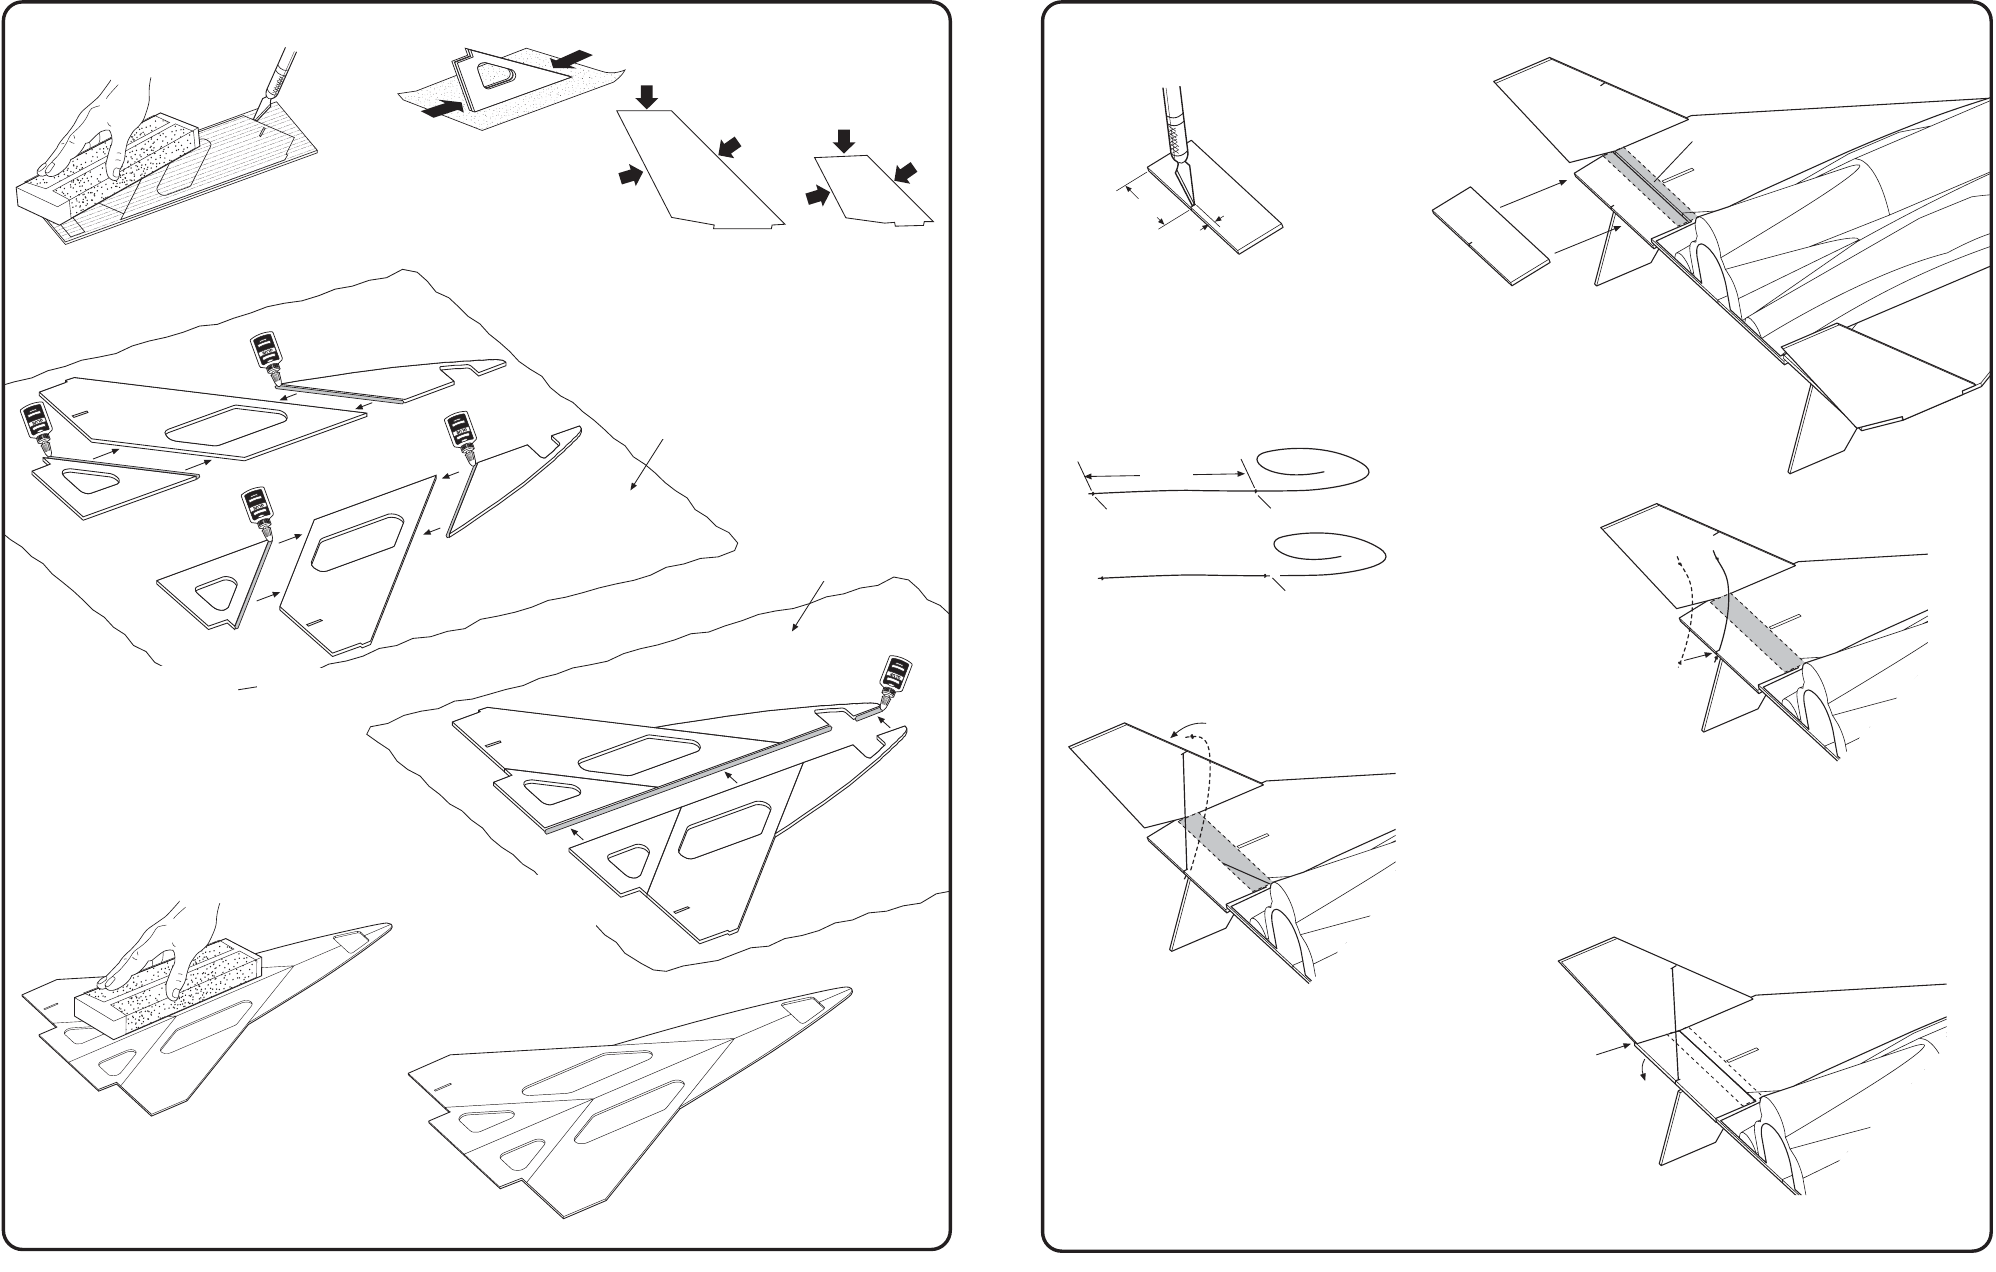
ASSEMBLE WING
A. Sand balsa sheets
smooth, both sides.
WAX PAPER
B. Using a modeling
knife, carefully
remove balsa
parts from sheets.
C. Sand edges
smooth to remove
any nibs. Keep
edges square and
do not round.
NOTE: Place a piece of wax
paper on a flat surface prior to
assembling balsa wing parts.
F. After wings are completely
dry, align and glue
together as shown. Place
a piece of wax paper on
top of wing, place a book
on top and let dry
completely.
G. Sand both sides smooth.
TOP VERTICAL
STABILIZER
BOTTOM
STABILIZER
NOTE: On these parts, sand
only the edges indicated
with arrows.
D. Place a piece of wax paper on
a flat surface. Line up balsa
wing pieces as shown. Glue left
and right wings together as
shown.
LEFT
RIGHT
E. After alignment, place another piece
of wax paper on top of wings. Place
a book on top and let dry completely.
NOTE: Accurate
alignment is critical
for fuselage fit.
WAX PAPER
COMPLETED WING
ASSEMBLY
12.
ATTACH LEFT ELEVATOR AND ELASTIC THREAD
A. Using a modeling knife, cut a
1/8"
(3 mm
) slit, 1-5/8"
(4.1 cm)
from left of elevator as shown.
B. Position elevator at rear of left wing as
shown. Apply a strip of cellophane tape
centered over seam. Press down securely,
especially along seam. Fold elevator up and
down several times to crease the "hinge"
and ensure proper operation.
E. Wrap elastic thread around vertical
stabilizer and insert into slit with knot
on the outboard side of stabilizer.
1/8"
(3 mm)
1-5/8"
(4.1 cm)
CELLOPHANE
TAPE
D. Insert thread into slit on elevator as shown.
COMPLETED ASSEMBLY
ELEVATOR SHOULD FIT
SNUG AGAINST BOTTOM
OF STABILIZER, BUT
STILL HAVE MOVEMENT
C. Tie a double knot near one end of elastic cord, and
another 2"
(5 cm)
from first knot. Trim as shown.
CAUTION: Do not sand
off the tabs on top and
bottom stabilizers!
DOUBLE KNOT
DOUBLE KNOT
2" (5 cm)
TRIM