Mount the machine gun – Dynaflite DYFA3045 User Manual
Page 54
similar to the way the exhaust pipes were glued
into position with balsa sticks.
❏
5. Cut out the molded clear plastic windscreen.
Paint the base black. Position the windscreen on
the fuselage, then mark its outline directly onto
the fuselage with a ballpoint pen. Cut a 1/16"
[1.6mm] strip of covering from the fuselage
along the line.
❏
6. Position the windscreen on the fuselage so
it conceals the removed strip of covering. Glue
the windscreen into place with thin or medium
CA. Use the CA sparingly so as not to fog the
plastic.
A wing-mounted machine gun is not supplied
with this kit, but the following instructions show
how to make one from a William’s Brother’s
#16100 2" (1/6-scale) Lewis Aircraft Machine
Gun kit (WBRQ3561) and a few other various
hobby materials.
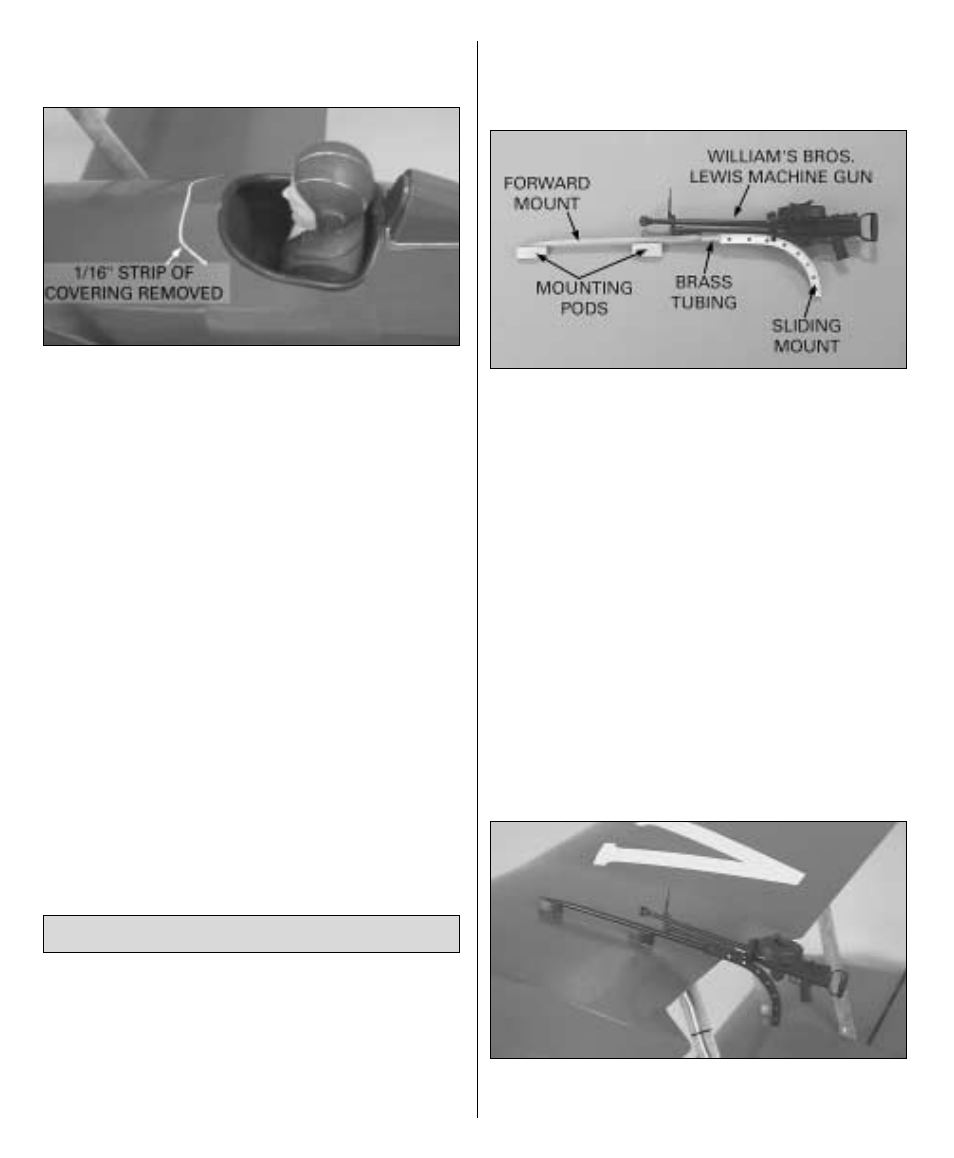
Refer to this photo while making the
machine gun and mount.
❏
1. Assemble the machine gun per the
instructions that came with it.
❏
2. Make the sliding mount from a sheet of
plastic or thin plywood (the cross-section is the
shape of an “I” beam). The forward mount
was made from a 3/16" wood dowel (though
further study of the photos shows that the
forward mount should actually be square).
❏
3. Notch the aft end of the forward mount and
connect it to the sliding mount with a piece of
brass tubing. Carve the mounting pods from
balsa or basswood and glue them to the
forward mount.
❏
4. Paint the machine gun and mount, then
mount to the top of the wing.
MOUNT THE MACHINE GUN
54