Build the top of the fuselage – Dynaflite DYFA3045 User Manual
Page 33
❏
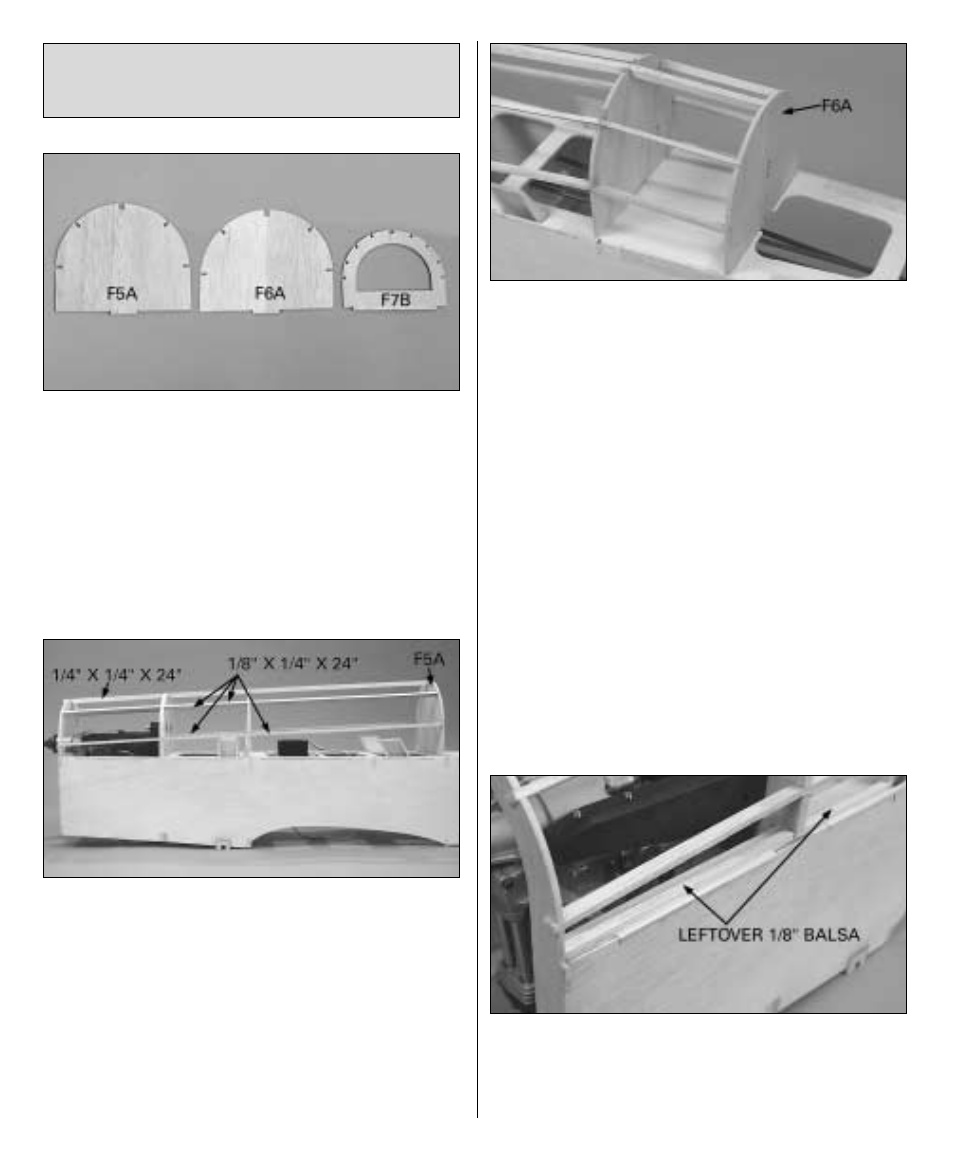
1. Glue together both halves of the die-cut 1/8"
[3.2mm] balsa formers F5A, F6A and F7B.
❏
2. Glue formers F3A, F5A and F6A to the fuse
top as shown. Cut one 1/4" x 1/4" x 24" [6.4 x 6.4
x 610mm] balsa stick and four 1/8" x 1/4" x 24"
[3.2 x 6.4 x 610mm] balsa sticks to the correct
length, then glue them into the notches in
formers F1 through F5A. Note that the aft end of
all the sticks “ends” in the middle of F5A. As
you proceed, use a builders’ square to remove
warps and hold the stringers vertical. Glue the
stringers into the formers.
❏
3. Cut 4-1/2" [115mm] from each of four more
1/8" x 1/4" x 24" [3.2 x 6.4 x 610mm] balsa sticks
and 4-1/2" [115mm] from one 1/4" x 1/4" x 24"
[6.4 x 6.4 x 610mm] balsa stick. Save the longer
sticks for the aft end of the fuselage. Glue the
4-1/2" [115mm] sticks into the notches of
formers F5A and F6A. Cut, then sand the sticks
even with the back of F6A.
❏
4. The same as you made the skins for
sheeting the center panels, glue together two
1/8" x 3" x 30" [3.2 x 75 x 760mm] balsa sheets
to make a skin for one side of the front of the
fuselage. Glue together two more sheets for the
other side.
❏
5. Sand both skins flat and even, then cut
them to a length of 21" [535mm]. Save the
remainder of the sheets for sheeting over the
cockpit between formers F5A and F6A.
❏
6. Use a ballpoint pen to mark the location of
the struts on the fuselage sides. This will aid in
cutting the sheeting for the struts later. As
shown in the photo, glue strips of leftover 1/8"
BUILD THE TOP OF THE
FUSELAGE
33