Mount the bottom wing final construction – Dynaflite DYFA3045 User Manual
Page 35
❏
11. Using the marks made earlier on the
fuselage sides, cut the sheeting to accommodate
the wing struts. Start by making the openings
small, then carefully enlarge the holes until the
struts will fit.
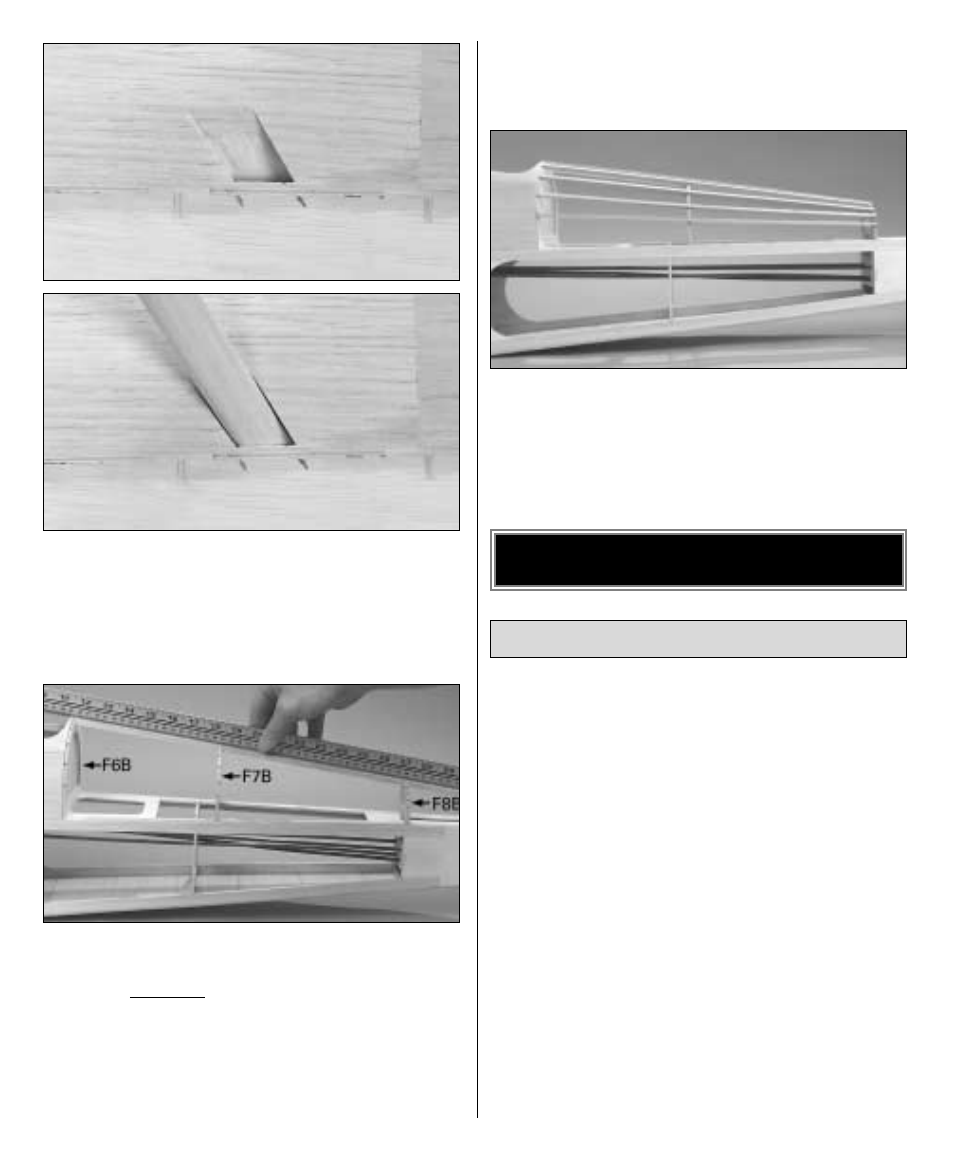
❏
12. Glue the die-cut 1/8" [3.2mm] plywood
former F6B into position on the back of F6A.
Glue the laser-cut 1/8" [3.2mm] balsa former
F8B into position. Position, but do not glue
the die-cut 1/8" [3.2mm] balsa former F7B on
top of the fuselage. Insert the 1/4" x 1/4" [6.4 x
6.4mm] balsa stick left over from step 3 into the
notches of the three formers. Using a straightedge,
adjust the position of F7B until the stringer is
straight. Glue F7B into that position. Glue the
stringer into the notches of the formers.
❏
13. Use the four remaining 1/8" x 1/4" [3.2 x
6.4mm] balsa sticks left over from step 3 and
four more 1/8" x 1/4" x 24" [3.2 x 6.4 x 610mm]
balsa sticks to make the stringers that run from
F6B to F8B and glue them into position.
❏
1. Sand the bottom of the bottom center wing
panel flat, smooth and even. Use 30-minute
epoxy to glue the aft landing gear block into
the bottom of the bottom center panel.
❏
2. Starting with a razor plane, followed by
sanding, shape the leading edge of the bottom
wing as shown on the plan.
❏
3. Install the 3/16" x 4" [20.6 x 100mm] wing
dowels in the bottom wing. You may permanently
glue them in now with 30-minute epoxy, or wait
until after the wing is covered (which is the way
it was done with the model shown in this
manual). Fit the bottom wing into the fuse.
Place weights on the wing to hold it down.
❏
4. Taking accurate measurements, mark the
aft landing gear block where the holes for the
MOUNT THE BOTTOM WING
FINAL CONSTRUCTION
35