Mount your receiver and battery balance the model – Dynaflite GPMA0525 User Manual
Page 22
❏ ❏
2. Join the aileron to the wing with the hinges.
If you cannot get the hinges to remain centered,
stick a pin through the center of the hinges and
rejoin the aileron to the wing. Remove the pins
after you join the aileron to the wing.
❏ ❏
3. Make sure you have a small gap between
the aileron and the wing so you do not
inadvertently glue them together.
❏ ❏
4. Carefully apply three drops of thin CA to
both sides of the hinges. Use pieces of paper
towel to absorb excess CA before it cures.
Do not use accelerator on any of the hinges.
Do not glue the hinges with anything other
than thin CA and do not attempt to glue
one half of the hinge at a time with medium
or thick CA. They will not be secure and the
controls could separate while the model
is flying.
❏ ❏
5. Let the CA fully cure, then carefully move
the aileron up and down several times to break it in.
❏
6. Hinge the other aileron the same way.
❏
1. Mark the balance point on the bottom of the
wing. The balance point is on the center of the
spars where they meet both sides of the fuse as
shown on the plan.
❏
2. Temporarily position your receiver, battery
pack and switch inside the fuselage. At this time all
the rest of the components should be in your Talon
and it should be ready to fly with the wing mounted
to the fuse.
❏
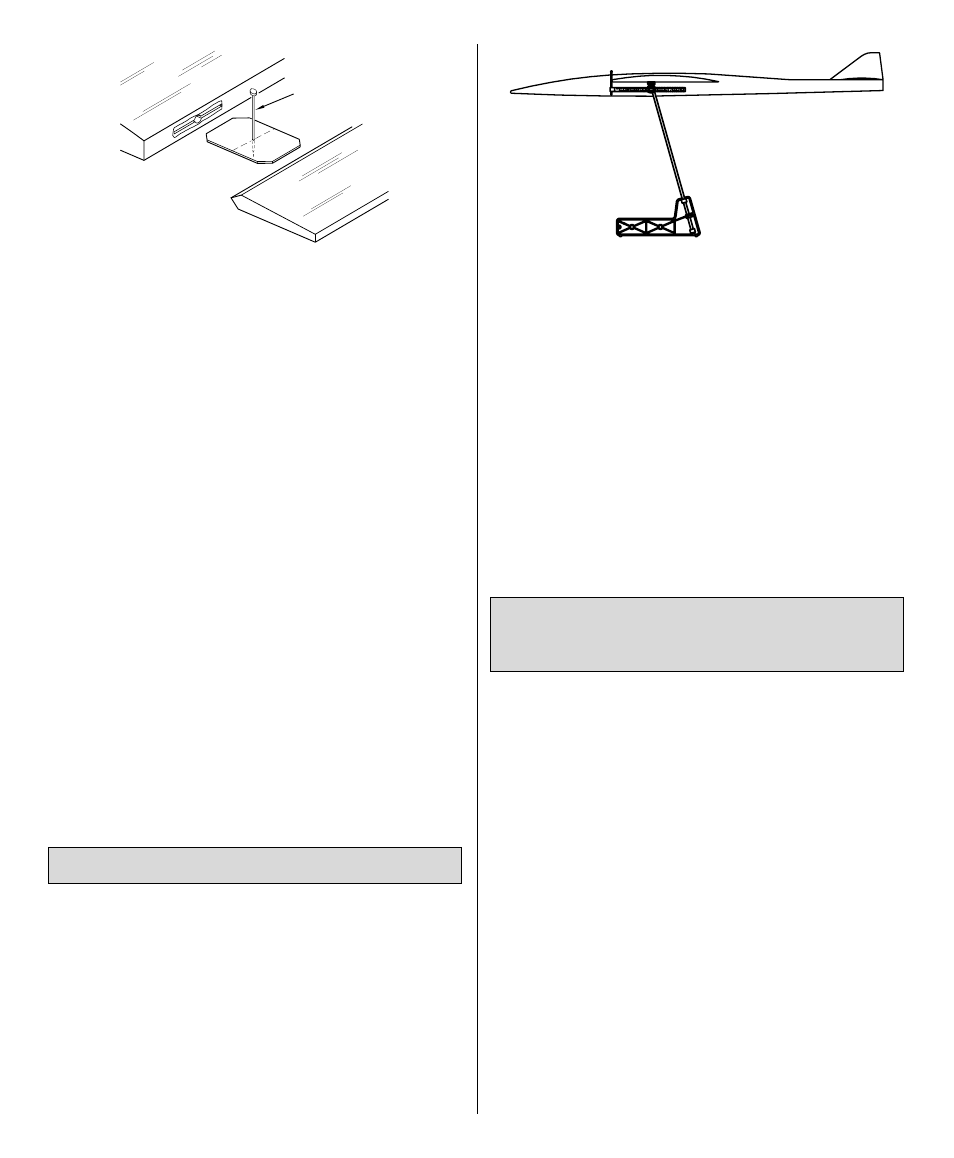
3. Lift your Talon at the balance point (or place it
on a Great Planes C.G. Machine
™
). If the nose drops,
the model is nose heavy. Instead of adding weight,
shift the receiver and battery pack aft to achieve the
correct C.G. If the tail drops, the model is tail heavy.
Shift the receiver and battery pack forward to
achieve the correct C.G. If possible, refrain from
adding additional weight to balance your model in
order to keep it as light as possible (
slope soarers
won’t be too concerned about adding a little
additional weight). If necessary, you can add
additional weight later to change the flying
characteristics, but for the first few flights we highly
recommend you fly your Talon within the C.G.
range shown on the plan.
❏
1. Mount your receiver and battery pack in the
location you determined while balancing the
model. The same as the elevator servo, you may
mount your receiver and battery pack with
double-sided foam tape, or wrap them with 1/4" R/C
foam rubber and secure them with strips of wood.
❏
2. Route your receiver antenna through the antenna
tube in the fuselage.
❏
3. Mount your on/off switch in a location that is
easily accessible from the outside but will not
interfere with anything inside the fuselage.
❏
4. Recheck your C.G.
❏
5. Lift the model by the tail and the nose
several times noting which wing falls each time.
Add stick on lead weight to the “lighter” wing tip
until you can get the model to balance laterally.
MOUNT YOUR RECEIVER
AND BATTERY
BALANCE THE MODEL
TEMPORARY PIN
TO KEEP HINGE
CENTERED
22