Sideminder with headrest – Comfort Company Sideminder Headrest User Manual
Page 2
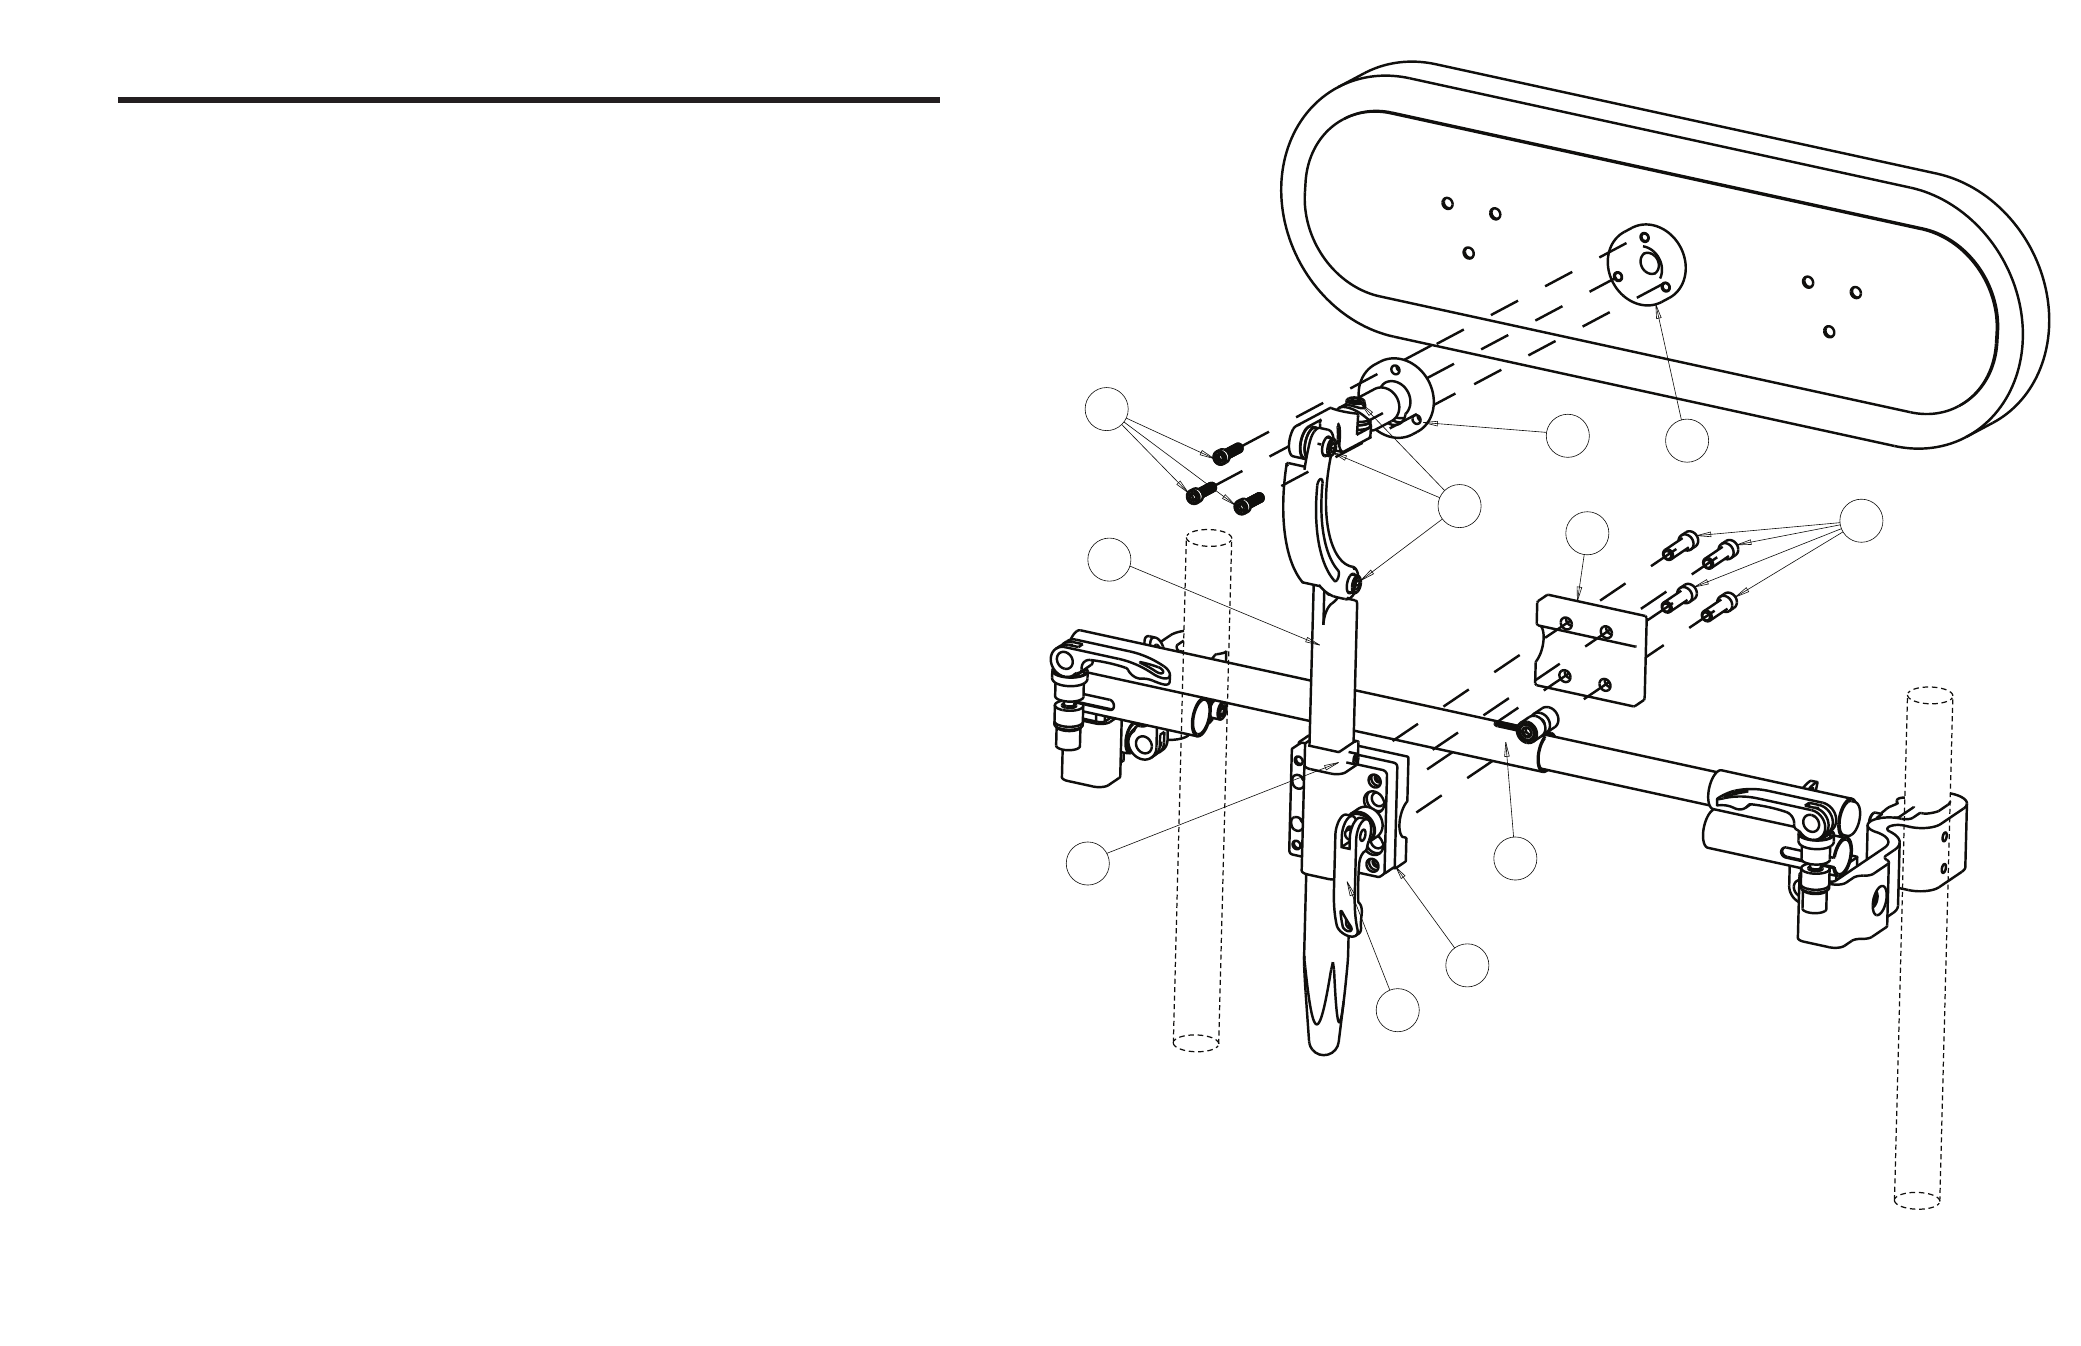
SIDEMINDER WITH HEADREST
Parts From Kit Bag Needed:
F: (4) ¼”-20 x .875” Screws
J: (3) 10-32 x .75” Screws
(1) 3/16” Allen Wrench
(1) 5/32” Allen Wrench
(1) 5 mm Allen Wrench
(1) 3 mm Allen Wrench
Open Quick Release toggle (A) and separate the mounting plate (B) from the main headrest post (C).
Attach the mounting plate (B) to SideMinder
®
(D) using (4) screws (F), the back clamp half (E), and the
supplied 3/16” allen wrench. Center the mounting plate (B) in the middle of the SideMinder
®
(D) as shown.
SideMinder
®
assembly should be installed to the chair before attaching the headrest assembly.
When the main headrest assembly is at the correct height, lower the collar (L) to rest above the mount
plate (B) and tighten the collar set screw with the supplied 3 mm allen wrench. This will ensure the
headrest is returned to the correct position after it is removed for transfers.
1
2
Attach the headrest pad (G) to the headrest ring (H) using the supplied (3) screws (J) and 5/32” allen
wrench.
3
4
6
5
Insert the main headrest post (C) into the mount plate (B) at the desired height and close the quick
release toggle (A).
Loosen the bolts at each joint (K) with the supplied 5 mm allen wrench to adjust the headrest pad to the
desired location and then tighten each bolt firmly.
®
D
A
B
C
E
F
G
H
J
L
K