Reaoving the ribbon, Installing a new ribbon, Fig. 14 – Toshiba MA-1190 User Manual
Page 93
Attention! The text in this document has been recognized automatically. To view the original document, you can use the "Original mode".
REPLACING THE INK RIBBON
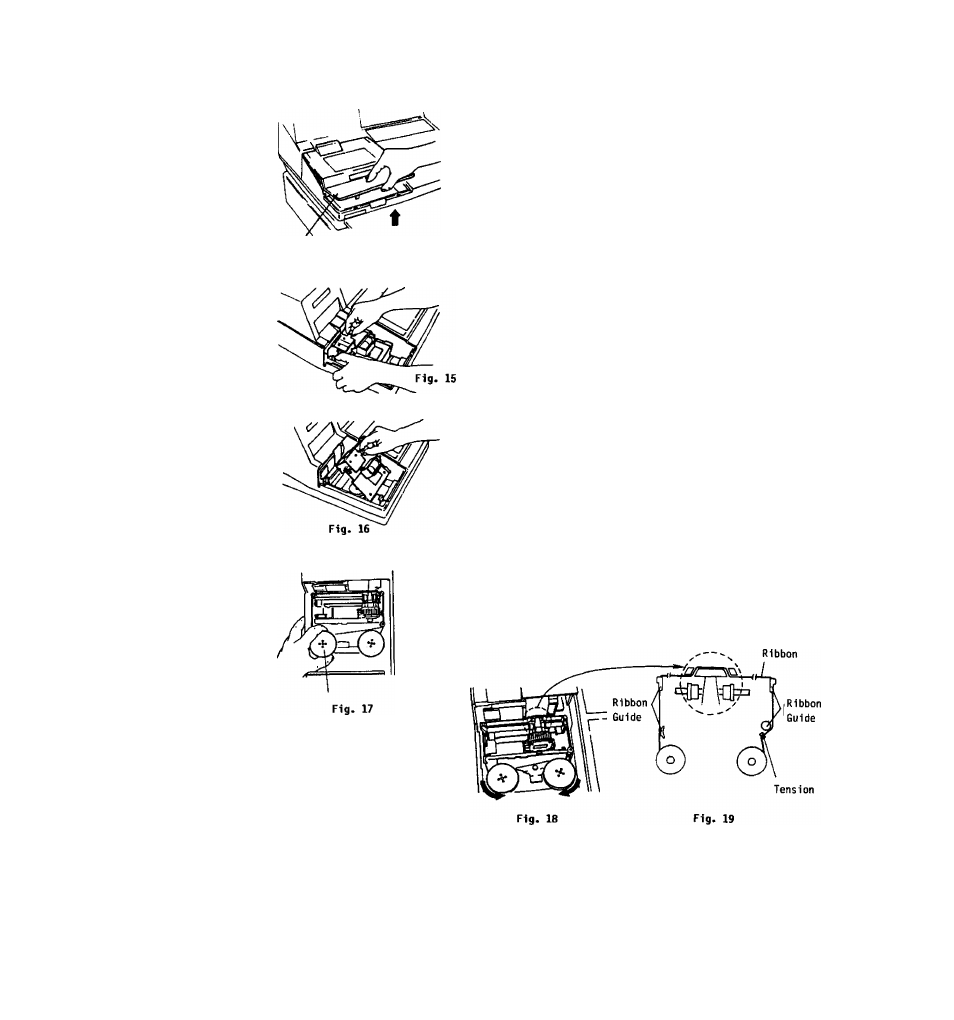
Ribbon Cover
Fig. 14
When
the
receipt
and
journal
is
too
light,
replace
the
ink
ribbon
in
the
following manner.
Reaoving the Ribbon
1, Turn the Power Switch to OFF.
2.
Remove
the
Ribbon
Cover.
(Press
the
side
inward
and
the
hook
will
be
unlocked.)
(Fig, 14)
3,
Open
the
Cutter
Block
by
pulling
it
upward
while
pressing
the
leftside
lever
outward.
(Fig. 15 and Fig. 16)
4.
Remove
the
Ink
Ribbon
by
lifting
up
the
ribbon spools (Fig. 18).
Installing a new Ribbon
1.
Set
the
ribbon
spools
so
that
the
ribbon
will
be
wound
to
the
direction
shown
by
the
arrows
respectively.
Meanwhile,
let
the
ribbon
go
through
the
Ribbon
Guides,
the
Tension,
and
the
Dot
Head
Ribbon
Guide
(Fig. 18 and Fig. 19).
2.
After
setting,
make
sure
that
the
ribbon
properly
goes
through
respective
parts
required,
by
turning
a
ribbon
spool
several turns.
3. Close the Cutter Block.
Make sure that
the leftside lever has locked the block.
4.
Turn the Power Switch to ON.
5. Depress the [C] key.
The flickering
display will stop and be lit steadily.
6. Attach the Ribbon Cover.
- 89 -