Removing the receipt paper, Installing the journal paper, Removing the journal paper – Toshiba TEC MA-206 User Manual
Page 73
Attention! The text in this document has been recognized automatically. To view the original document, you can use the "Original mode".
EOl-11002
Free Lever
Fig. 8
Fig. 9
Journal
Inlet
Fig, 10
Fig. 11
Fig. 12
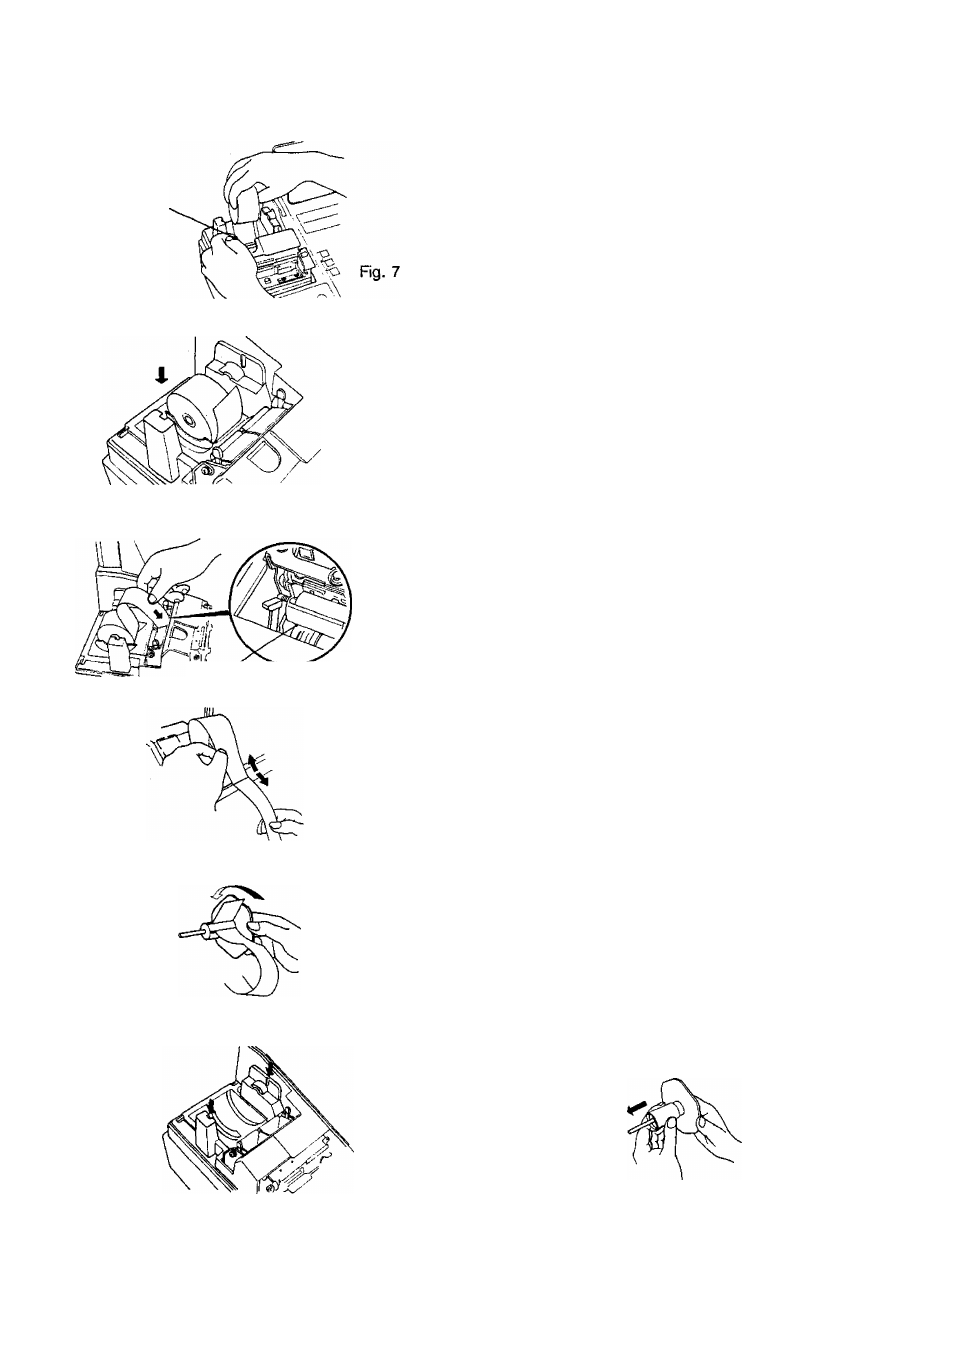
REMOVING THE RECEIPT PAPER
1. Remove the Paper Cover.
Press the Free Lever down and pull the old
paper
core
upward
to
remove
the
remaining
paper end. (Fig. 7)
INSTALLING THE JOURNAL PAPER
1.
Turn the Mode Lock to the “REG” position.
2.
Remove the Paper Cover by pulling it upward,
and remove the Journal Winding Reel. (Fig. 1)
3.
Follow Steps 3 and 4 of INSTALLING THE
RECEIPT PAPER on the previous page.
4.
Place the paper roll in the inner-side roll holder of
the two holders. {Fig. 8)
5.
Insert the paper end into the Journal Inlet, feed
the paper in while pressing down the
[JF]
key.
(Fig. 9)
6.
When the paper comes out for a enough length,
open the folded end. (Fig. 10)
7.
Wind the paper end on the Journal Winding Reel
two or three times as shown in Fig. 11.
8.
Set the Journal Winding Reel to the Reel Holder.
(Fig. 12)
9.
Attach the paper cover,
REMOVING THE JOURNAL PAPER
1.
Remove the Paper Cover.
2.
Press the
[JF]
key to wind up enough portion of
the journal paper, and then tear off the paper,
holding the Journal Winding Reel.
3.
The wound-up portion of the paper can easily be
removed from the Reel by pulling it side way.
(Fig. 13)
4.
If enough paper remains on the roll, follow Steps
6 through 9 above; if paper is running out, follow
Steps 1 through 9 above.
Fig. 13
- 6 9 -