Removing the ribbon cover, Installing the receipt roll – Toshiba TEC DRJST-51 User Manual
Page 12
Attention! The text in this document has been recognized automatically. To view the original document, you can use the "Original mode".
EOM3010
DRJST-51 SERIES
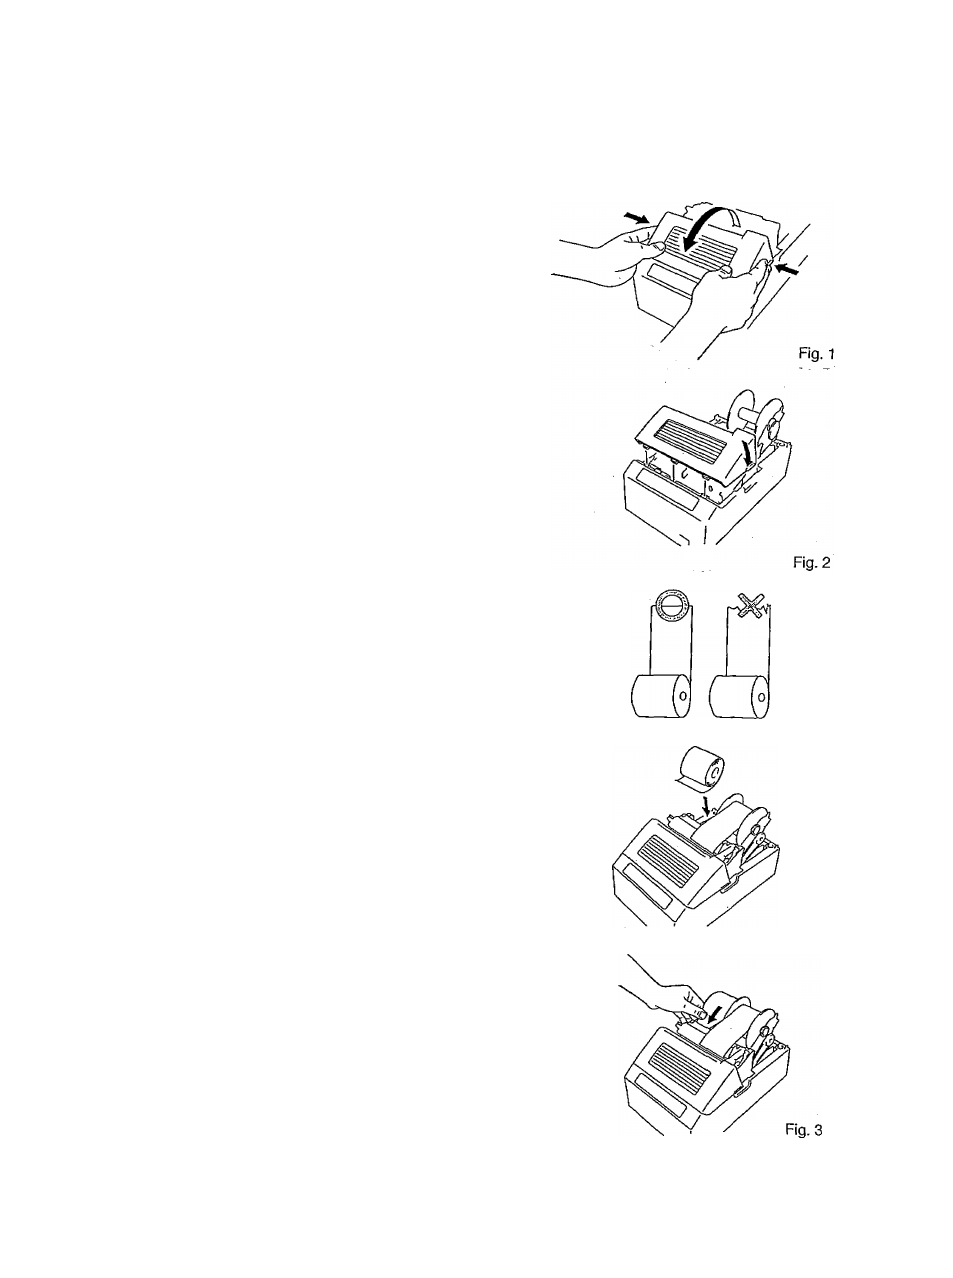
• Removing the ribbon cover
Remove the ribbon cover when the ribbon cassette must be replaced
1. Remove the ribbon cover
1) Remove the paper cover. (Refer to the
"Remove the papeTcover".)
2) Remove the ribbon cover by lifting up on
both edges of the ribbon cover. (Fig. 1)
2. Attaching the ribbon cover (Fig. 2)
1) Make the daws on the front of the ribbon
cover with the hoies in the top cover.
2) Push down the rear side as it ciicks.
Installing the receipt roll
1) Removing the paper cover. (Refer to the
"Removing the paper cover".)
2) Cut the paper end to make it sharp. (Fig. 1)
3) Place the paper end on the left holder so
that paper will be fed from the bottom of the
paper roll. (Fig. 2)
4) Insert the paper end into the paper inlet
until it stops, then feed the paper by
pressing the RECEIPT FEED Switch.
(Fig. 3)
Note: When paper is inserted into the
paper inlet of the printer for Taiwan,
the paper is automatically fed and cut
Remove the cut paper.
5) Attaching the paper cover with the paper
end coming out of the receipt outlet. (Refer
to the "Attaching the paper cover".)
Fig. 1
Fig. 2
- 7 -