Service, Warning – Carrier 50HE003-006 User Manual
Page 62
62
C06137
Fig. 53
--- Humidi--Mizert Hot Gas
Reheat Mode Operation
Hot Gas Reheat Mode
When the humidity levels in the space require humidity control, a
hot gas solenoid valve (specific to hot gas reheat mode only) will
open to bypass a portion of hot gas refrigerant around the
condenser coil. (See Fig. 53.)
This hot gas will mix with liquid refrigerant leaving the
condenser
coil
and
flow
to
the
subcooling/reheat
dehumidification coil. Now the conditioned air coming off the
evaporator will be cooled and dehumidified, but will be warmed
to neutral conditions (72_F to 75_F) by the subcooling/reheat
dehumidification coil.
The net effect of the rooftop when in hot gas reheat mode is to
provide nearly all latent capacity removal from the space when
sensible loads diminish (when outdoor temperature conditions are
moderate). When in hot gas reheat mode, the unit will operate to
provide mostly latent capacity and extremely low sensible heat
ratio capability.
Similar to the subcooling mode of operation, hot gas reheat mode
operates only when the outside air temperature is warmer than
40_F. Below this temperature, a factory installed outside air
temperature switch will lockout this mode of operation.
See Table 36 for the Humidi-Mizer adaptive dehumidification
system sequence of operation.
SERVICE
ELECTRICAL SHOCK HAZARD
Failure to follow this warning could cause personal
injury or death.
When sevicing unit, shut off all electrical power to unit
and install lockout tag.
!
WARNING
Step 1
—Cleaning
Inspect unit interior at the beginning of heating and cooling
season and as operating conditions require.
Evaporator Coil
1. Turn unit power off, tag disconnect. Remove evaporator
coil access panel.
2. If economizer or two-position damper is installed, remove
economizer
by
disconnecting
Molex
plug
and
removing mounting screws.
3. Slide filters out of unit.
4. Clean coil using a commercial coil cleaner or dishwasher
detergent in a pressurized spray canister. Wash both sides
of coil and flush with clean water. For best results,
back-flush toward return-air section to remove foreign
material. Flush condensate pan after completion.
5. Reinstall economizer and filters.
6. Reconnect wiring.
7. Replace access panels.
Condenser Coil
Inspect coil monthly. Clean condenser coil annually, and as
required by location and outdoor air conditions.
One--Row Coil
Wash coil with commercial coil cleaner. It is not necessary to
remove top panel.
2-Row Coils
Clean coil as follows:
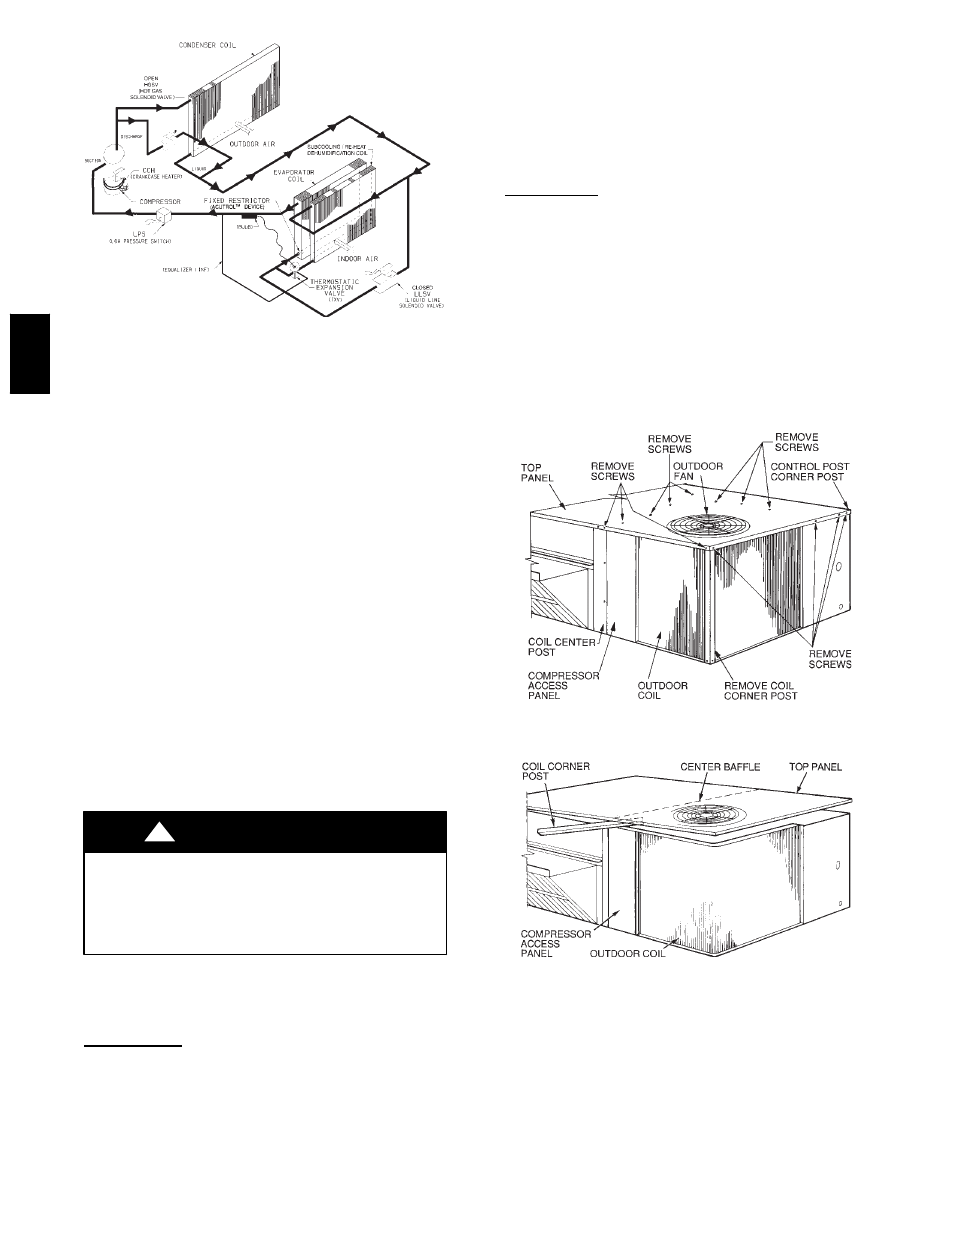
1. Turn off unit power and tag disconnect.
2. Remove top panel screws on condenser end of unit.
3. Remove condenser coil corner post. (See Fig. 54.) To hold
top panel open, place coil corner post between top panel
and center post. (See Fig. 55.)
C06044
Fig. 54
--- Cleaning Condenser Coil
C06045
Fig. 55
--- Propping Up Top Panel
50H
E,
H
J