Playback, Music search, Wake-up playback (ct-s450s only) – Pioneer CT-S250 User Manual
Page 10
Attention! The text in this document has been recognized automatically. To view the original document, you can use the "Original mode".
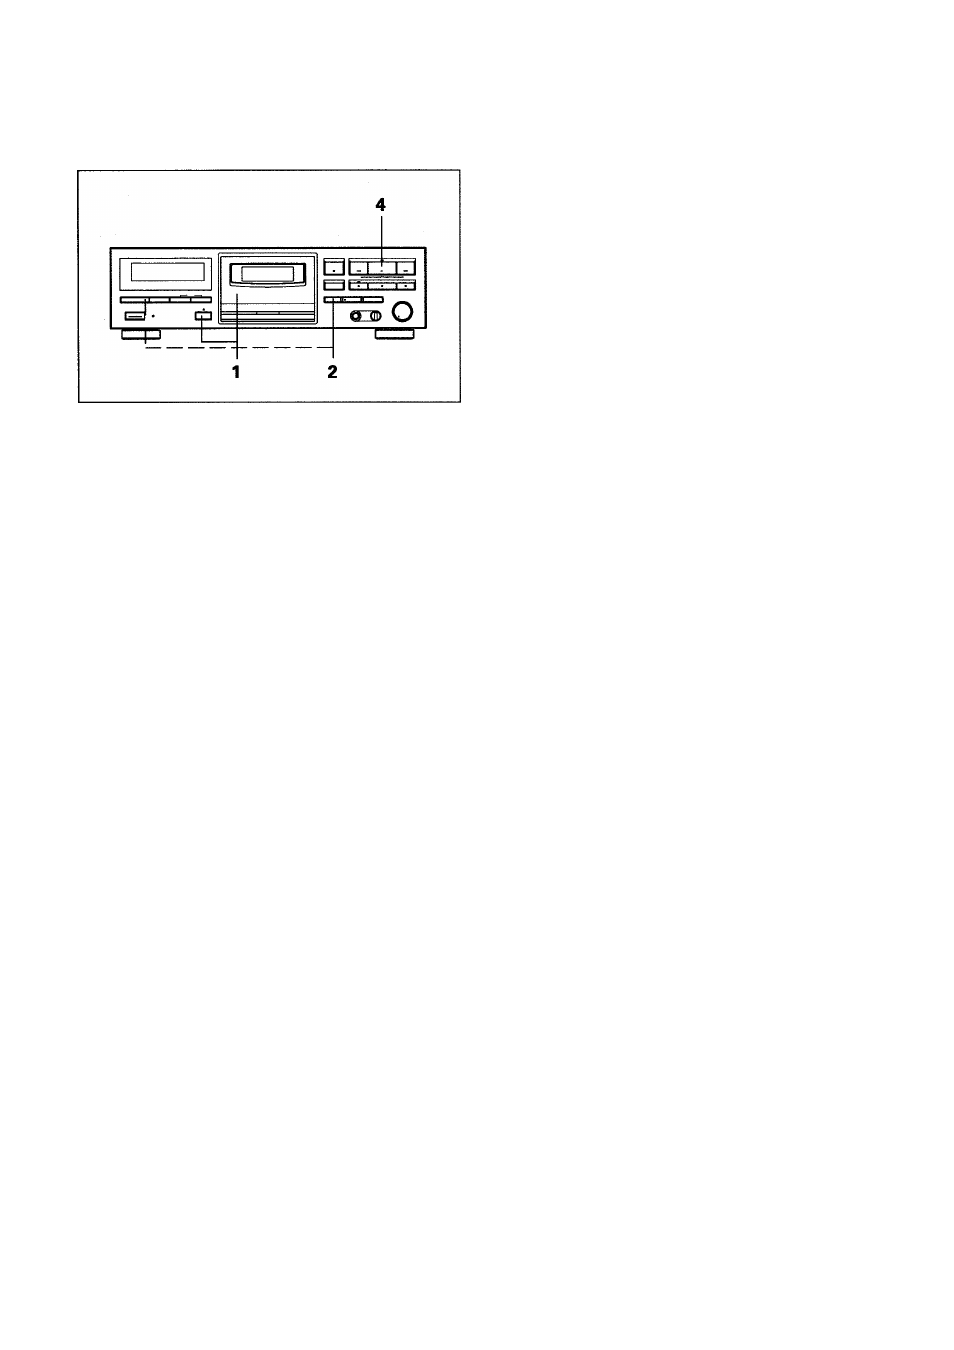
PLAYBACK
Load a prerecorded tape.
(D Press the Eject (A) button.
@ Insert a prerecorded tape.
(D
Close the cassette door.
Set the DOLBY NR system by pressing the DOLBY
NR button or changing the DOLBY NR switch.
•
Always select the same DOLBY NR system that was used
for recording
•
Dolby NR system is set to the previous position automatically
when the power is turned on.
Set the stereo amplifier for tape playback.
Press the playback (►) button.
To improve high frequency sound during playback in
tapes with poor recordings.
Press the FLEX button and playback the tape.
To stop playback temporarily
Press the pause
(II)
button.
• To resume playback, either press the pause
(II)
button again,or
press the playback (►) button.
To stop playback
Press the stop (■) button.
MUSIC SEARCH
(Skipping forward or backward to playback a desired selection)
The music search function detects blanks (longer than 4 seconds)
between selections, advances the tape in the forward or reverse
direction to find the beginning of the desired selection and
automatically starts playback.
It can find a selection located up to 15 selections before or after the
present position.
During playback
When you wish to locate a future song, press the ►► button as
many times as the number of songs to be skipped.
When you wish to listen to the song being currently played from
the beginning, press the button once. To return to the previously
played song, press the button as many times as the number of
songs to be skipped, plus one.
From the stop mode
Press the playback (►) button to set the playback mode, then press
the ◄◄ or ►► button to perform music search as mentioned
above.
10
En
NOTES:
In the following circumstances, the music search function may be
unable to properly detect blanks between selections; this is not,
however, a sign of unit malfunction.
•
When using a tape with blanks between selections less than 4
seconds long.
•
When listening to tapes with long low-level intervals, like classical
music, or with sound breaks several seconds long within
selections.
m When listening to recorded conferences or talk shows, where
sound is intermittent.
•
When using tapes with noise in the blanks between selections.
How selections are counted
When starting the music search operation from the middle of a
selection and specifying ‘1 st previous selection', playback will return
to the beginning of the present selection. To return to selections
further back, count one extra selection.
S e a r c h ( )
3rd selection (2 1st selection
selections
(present
before)
selection)
2nd selection
(last selection)
Search (►►)
2nd selection
1st selection
(next
selection)
3rd selection
Playback (► I
^ A
Present position
NOTE;
Refer to the "TWO MODES COUNTER" sections on page 9 for
more information about the counter display.
WAKE-UP PLAYBACK (CT-S450S only)
1. Load a prerecorded tape.
© Press the Eject (A) button.
® Insert a prerecorded tape.
@ Close the cassette door.
•
Make sure that the tape is rewound.
2. Set the DOLBY NR system by pressing the DOLBY
NR button.
3. Set the stereo amplifier for tape playback.
•
Adjust the volume level while playing back a portion of the
tape.
4. Rewind the tape to the position where playback is to
start.
5. Press the play (►) button, then the pause (ll) button.
6. Set the audio timer.
•
When the audio timer is set, it will turn off the power of all
components connected to the deck.
7. At the specified time on the audio timer, the power
will be turned on.
The counter display will flash "PLAY" for 4 seconds.
Then the counter display will return to the normal
mode and playback will start automatically.
NOTES:
•
If any buttons (including remote control buttons) are pressed
during the first 4 seconds after the power is turned on, the
counter display will be set to the normal mode and the timer
playback will be canceled.
•
Operations depend on the type of audio timer, so be sure to
consult the operating instructions of the audio timer that is
being used.