Flame size, Type of cooking, Proper burner adjustments – Kenmore 790.75503 User Manual
Page 15: Surface cooking, Placement of burner bases and caps
Attention! The text in this document has been recognized automatically. To view the original document, you can use the "Original mode".
Flame Size
For most cooking,
start on the highest control setting and then turn to a iower one to
compiete the process. Use the tabie beiow as a guide for determining proper fiame size for
various types of cooking. The size and type of utensil used and the amount of food being
cooked wili infiuence the setting needed for cooking.
For deep
fat
frying,
use a thermometer and adjust the surface controi knob accordingly. If
the fat is too cool, the food will absorb the fat and be greasy. If the fat is too hot, the food
will brown so quickly that the center will be undercooked. Do not attempt to deep fat fry too
much food at once as the food will neither brown nor cook properly.
*Flame Size
High Flame
Medium Flame
Low Flame
Type of Cooking
Start most foods; bring water to a boil; pan broiling
Maintain a slow boil; thicken sauces, gravies; steam
Keep foods cooking; poach; stew
*These
settings are
based on using medium-weight aluminum pans with lids.
Settings may vary when using other types of pans.
Never extend the flame beyond the outer edge of the utensil. A higher flame simply wastes
heat and energy, and increases your risk of being burned by the flame.
Surface
Cooking
FEATURE OVERVIEW
* Flame Size
* ProperBurner
Adjustment
* Placement of Burner
Bases and Caps
WRONG
Proper Burner Adjustments
The color of the flame is the key to proper burner adjustment. A good flame is clear, blue and
hardly visible in a well-lighted room. Each cone of flame should be steady and sharply defined.
Adjust or clean burner if flame is yellow-orange. To adjust the flame see the
Installation
Instructions
and to clean burner, see instructions under General
Cleaning.
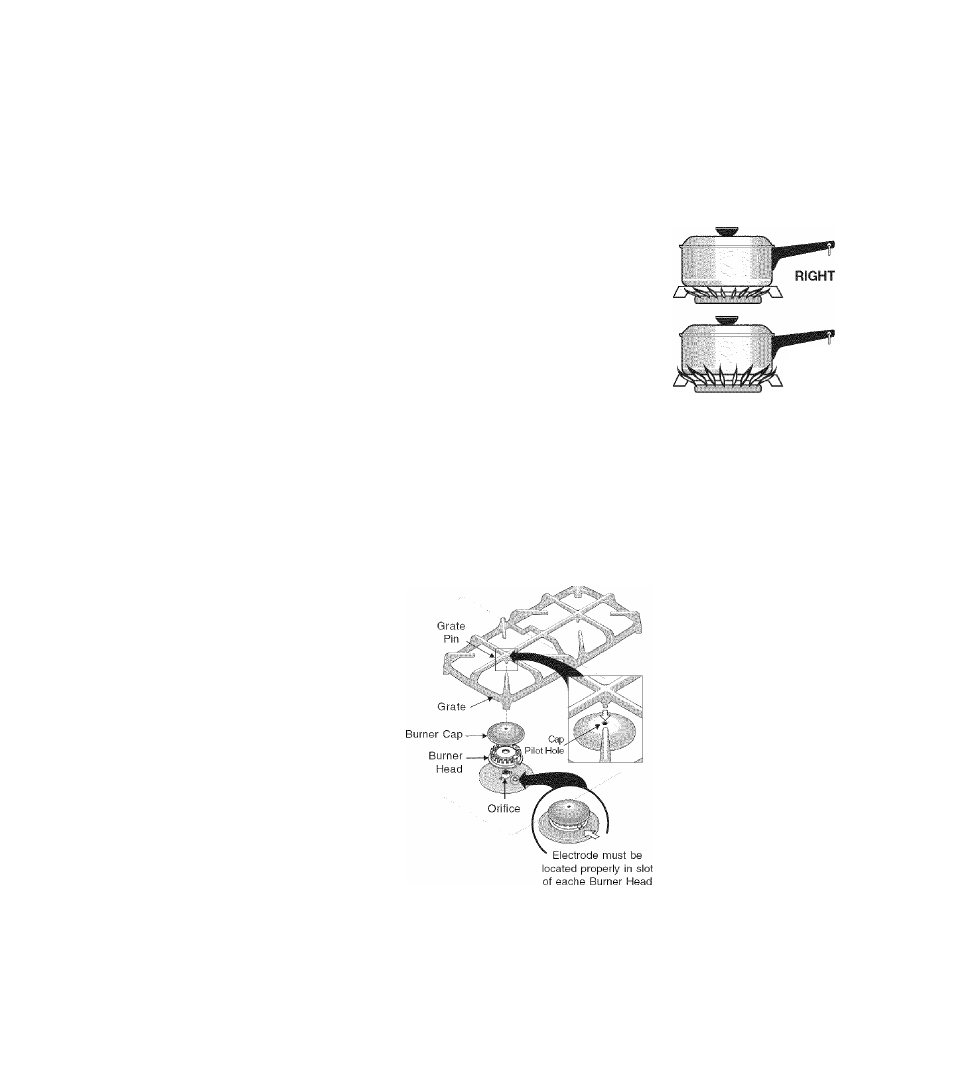
Placement of Burner Bases and Caps
Place the burner base over each gas opening,
matching the burner base size with the gas
opening size. Place the burner cap on each
burner base, again matching the cap size to
the burner base size. The cap for the each
Burner has a inner locating ring which locates
the burner cap in the center of the burner.
Make sure each burner cap
is properly aligned and
level.
Turn the burner on to
determine if it will light. If
the burner does not light,
contact a Sears Service
Center. Do not service the
sealed burner yourself.
15