Rear view of grill, Caution – Kenmore 415.16218 User Manual
Page 16
Attention! The text in this document has been recognized automatically. To view the original document, you can use the "Original mode".
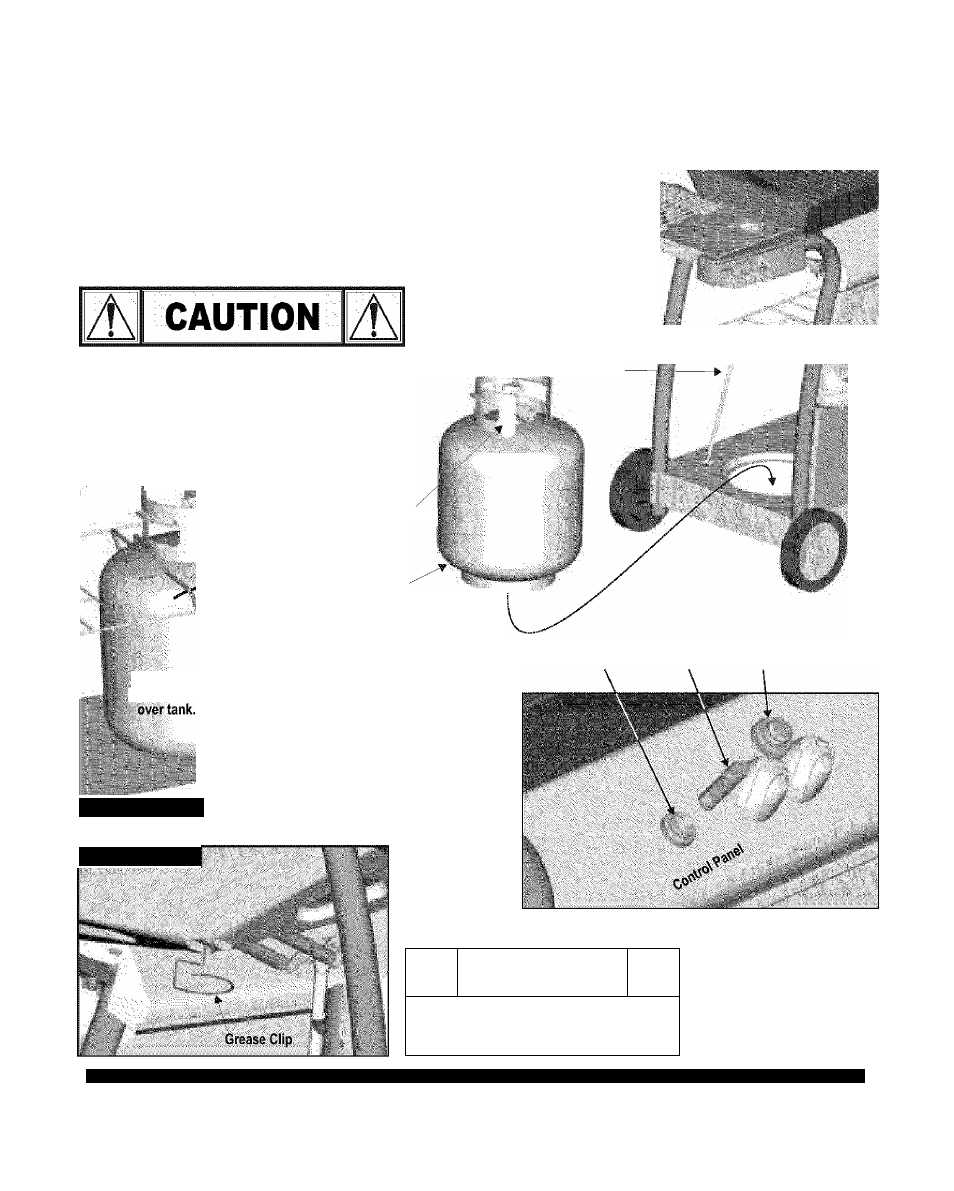
Tank Wire, LP Tank, Grease Clip and Battery
I H and ignitor Button Assembly
□ Place LP tank into hole in base with tank valve facing
toward front of grill.
□ To secure LP tank, pull tank wire over the side of the tank,
toward the tank collar.
□ See Use and Care section for connection of regulator to LP tank.
□ Hang grease clip beneath grill bottom. See inset below. To collect
grease, hang an empty soup can (not included) from grease clip.
□ Insert AAA battery (”+” end first) into ignition module, then twist
ignitor button onto module.
LP GAS TANK IS SOLD SEPARATELY. Fill and leak-check
tank before attaching to grill and regulator. See Use and
Care section for instructions.
Tank collar opening must face to front of cart once
tank is attached.
Failure to install tank correctly may allow gas hose to
be damaged in operation, resulting in the risk of fire.
Tank Wire
r
Î
■‘i
ШШ
liilte::
’
wire
Rear view of grill.
Rear view of
grili.
Tank Collar
LP Tank
(Sold
Separately)
ignition Module AAA Battery Ignitor Button
Ж
CAUTION
A
Failure to install can in clip will cause hot
grease to drip from bottom of grill with risk of
Иге or property damage.
16
>
463845504