Fiug-in surface units, Caution, To reposition surface unit – GE JHC56G User Manual
Page 15: Adjusting oven thermostat, Ul^ tut tuii» ait tuui utiuit it
Attention! The text in this document has been recognized automatically. To view the original document, you can use the "Original mode".
^ Fiug-In Surface Units
fVli> O r*CkO
+Ko /-iflt-fc
i.ilW C4.1VC4.
LiiW'
often. Built-up soil, especially
grease, may catch fire. To make
cleaning easier, the plug-in surface
units are removable.
ICniVlirtALS»
/
.
/
MEWI.UON
UN»T COJLS
W/ir^<^ of/^iitn/4
/3/^ rroo r\'f
TV
UAV/t.4iX1U LllV*
Vfl LXIW
surface unit opening in the range
top. Clean the area below the unit.
Rinse all washed areas with a damp
cloth or sponge.
Caution: Be sure ail controls are
LJ' lilT
4-^«>«<4 4-4 A*- 4-
tUlUQU V_yjl J UC^lUlt aiLClil|JLiUg l\J
clean under the cooktop or re
moving the Calrod® units.
To remove:
• Raise the unit coil onnosite the
------------- ----------- ----------------------------- -I"!-------------------------------------
receptacle. Lift about one inch
above the trim ring and pull away
from the receptacle. Caution: Be
4-Urt. ^ ^ M ^
^ul^ tut tuii» ait tuui utiuit It-
moving a Calrod® unit.
-- --- ^ -------- _ -------
a
Afti=»r rf>mr»'i/iniT thp nlurr-in ciir_
face unit, lift the drip pan/ring to
clean under the unit.
To replace:
® Place the drin nan/ring in the
--------- -
-------------j- ---------------/------------C)--------------------
surface unit cavity found on top
of the range. Line up the drip pan
so the unit receptacle can be seen.
» Insert the terminals of the plug
in unit through the opening in the
pan/ ring and into the receptacle.
tt
o 11 «--To/a 1 4- 1 »-i 4
- VJWIAJW irllV' OUIXCIWW UilJLt U11.V/ ^la^^
SO it fits evenlv and fits snuglv into
^
- -------------------
---- --------
drip pan or trim ring.
Note: If your range has separate
trim rings, the drip pan must be
under the trim ring.
CAUTION
® Do not attempt to clean plug-in
surface units in an automatic
dishwasher.
® Do not immerse plug-in surface
units in liquids of any kind.
• Do not bend the plug-in surface
unit plug terminals.
w Do not attempt to clean, adjust
or in any way repair the plug-in
receotacle.
To Reposition Surface Unit:
® Replace drip pan into recess in
cooktop.
® Put trim ring in place over drip
pan.
• Guide the surface unit into place
so it fits evenly into trim ring. Pan
must be under trim ring.
Adjusting Oven Thermostat
Use time given on recipe when
cooking first time. Oven thermo
stats, in time, may ‘’drift” from the
factory setting and differences in
timing between an old and a new
oven of 5 to 10 minutes are not
unusual. Your oven has been set
correctly at the factory and is more
ar\t iri K
p
Qr-r'iiroti> tiian fVif« r\\)an
WV/ V4.V-V/M Jl VW WiLAAA UAiV V/VWli
which it replaced. However, if you
find that your foods consistently
brown too little or too much, you
may make a simple adjustment in
t Ki:» rrVl
O f i Г^^tí:%r^
U *-i K
Liiw tiiwi mv^ocu.V y Y W l l
S\JlVUi
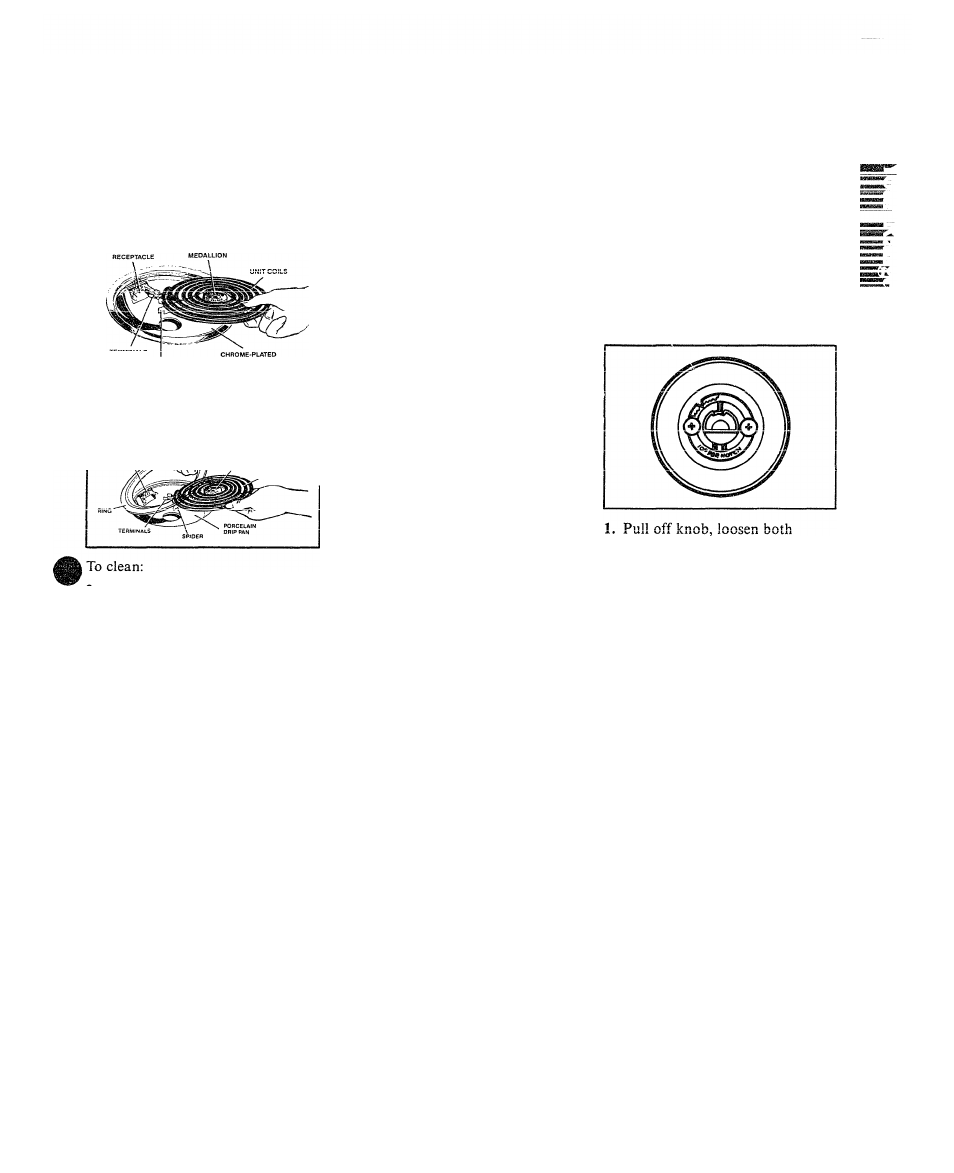
PULL KNOB OFF OF SH.AFT,
LOOK AT BACK OF KNOB AND
NOTE CURRENT SETTING,
BEFORE MAKING ANY
To increase temperature, turn
toward HI or RAISE; to decrease
turn toward LO or LOWER. Each
notch changes temperature 10-
degrees. Temperature can be raised
by 20 degrees or lowered by 30
degrees.
screws on back of knob holding
skirt of knob firmly. 2. Turn black
handle to move pointer one notch
in desired direction. Tighten .screws
RAtlirn L^nr\K ronrrA mo1 rr
AVl&V/U/ 4.W lUAlgW) A A JIC4 JL A 11
flat area of knob to shaft. Recheck
oven performance before making
an additional adjustment.
15