Carl Goldberg GBGA1089 User Manual
Page 10
10
9.
Insert the throttle tubing into the rear cable
exit hole.
Push the tubing into the fuselage while allow-
ing the tubing to pass through the holes in the
rear former inside the fuselage.
Push the tubing forward, guiding it through the
fuselage.
10.
Insert the 2-56 end of the cable into the throt-
tle tubing by the rudder, and pull the tubing out
the front of the fuselage.this will pull the rud-
der cable forward towards the rudder servo.
Repeat for the other end of the cable.
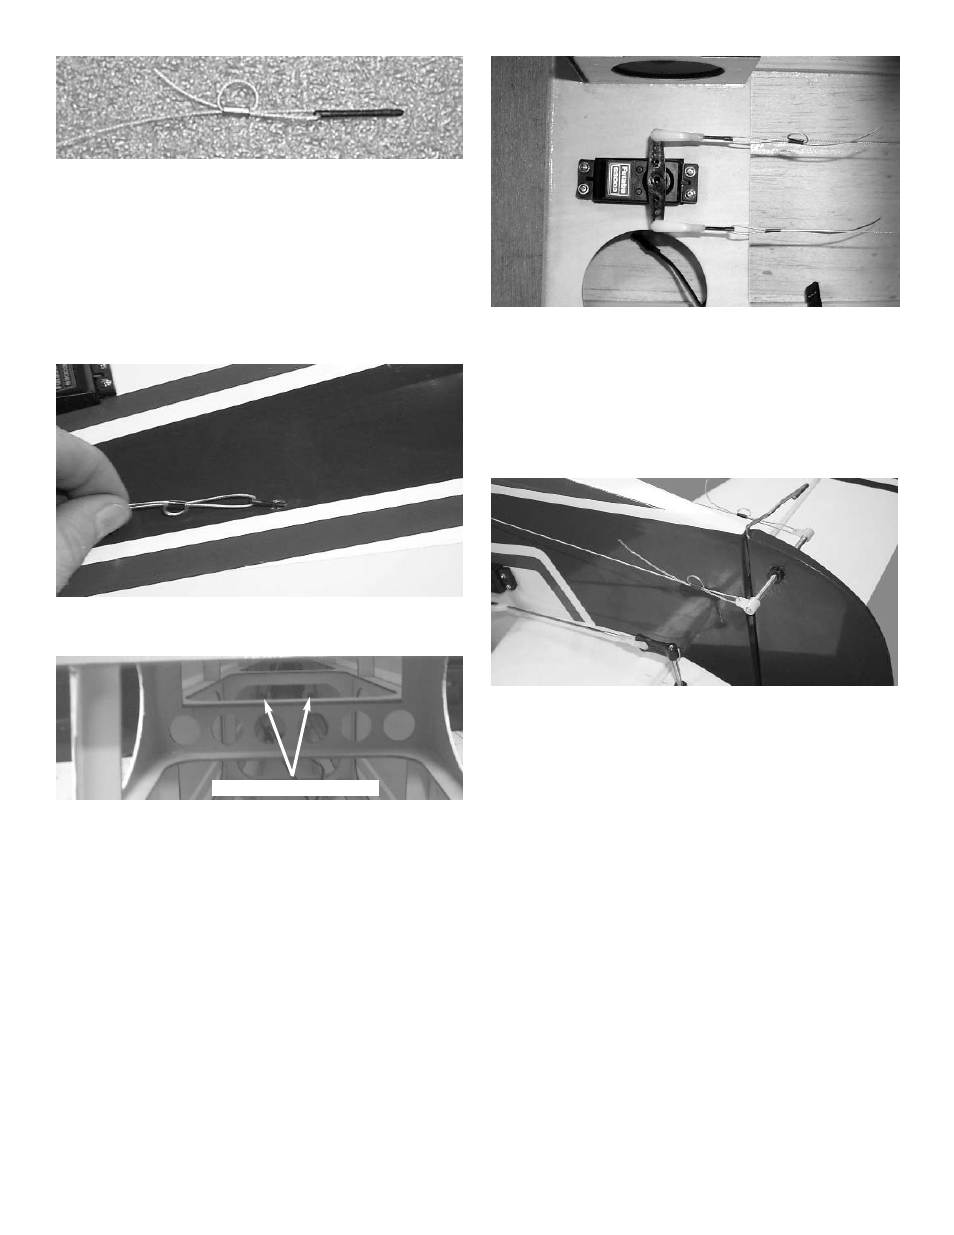
11.
Install the rudder servo in the center servo
hole
Thread a 2-56 hex nut and a 2-56 metal clevis
onto the each threaded ends of the cable.
Connect the clevis to the rudder servo arm.
Insert a clevis clip onto both clevis.
7.
Loop the end of the cable back though the
brass tube.
Next thread the cable though the hole at the
end of the 2-56 threaded rods and loop it back
through the brass tube.
Crimp the tube with pliers.
8.
Repeat the steps 6 & 7 for the other end of the
cable.
Rudder cable hole guides
12.
Insert the cable through the 1/16 OD x 1/4”
brass tubing.
Loop the cable through the adjustable horn
bracket on the rudder and back through the
brass tubing.
13.
Make a second loop through the tubing.
DO NOT CRIMP THE TUBING AT THIS TIME
Repeat for the other side of the rudder.
Making sure that the rudder servo arm stays
straight, tighten both ends of the cable till all
the slack is removed.
Once satisfied crimp the tubing on the cable.
14.
Place the 1-1/4” wheel on the tailwheel wire.
Mount a 2mm wheel collar onto the end of the
tail wire and tighten the set screw.