Stabilizer, Elevator installation – Carl Goldberg GBGA1023 User Manual
Page 7
7
Stabilizer
1.
Collect the following parts:
(1) Fuselage
(1) Stabilizer & Elevator
(1) wing
(1) 4-40 x 1/2” Socket Head Bolt
(1) Wooden Washer covered in red
2.
Locate the hole in the center of the wing for
the wing bolt. Remove the covering over the
hole.
Mount the wing to the fuselage using the bolt
and wooden washer.
Make an out line of where the wooden wash-
er rest on the wing.
Remove the covering on the wing where the
wooden washer will rest.
Glue the wooden washer to the wing.
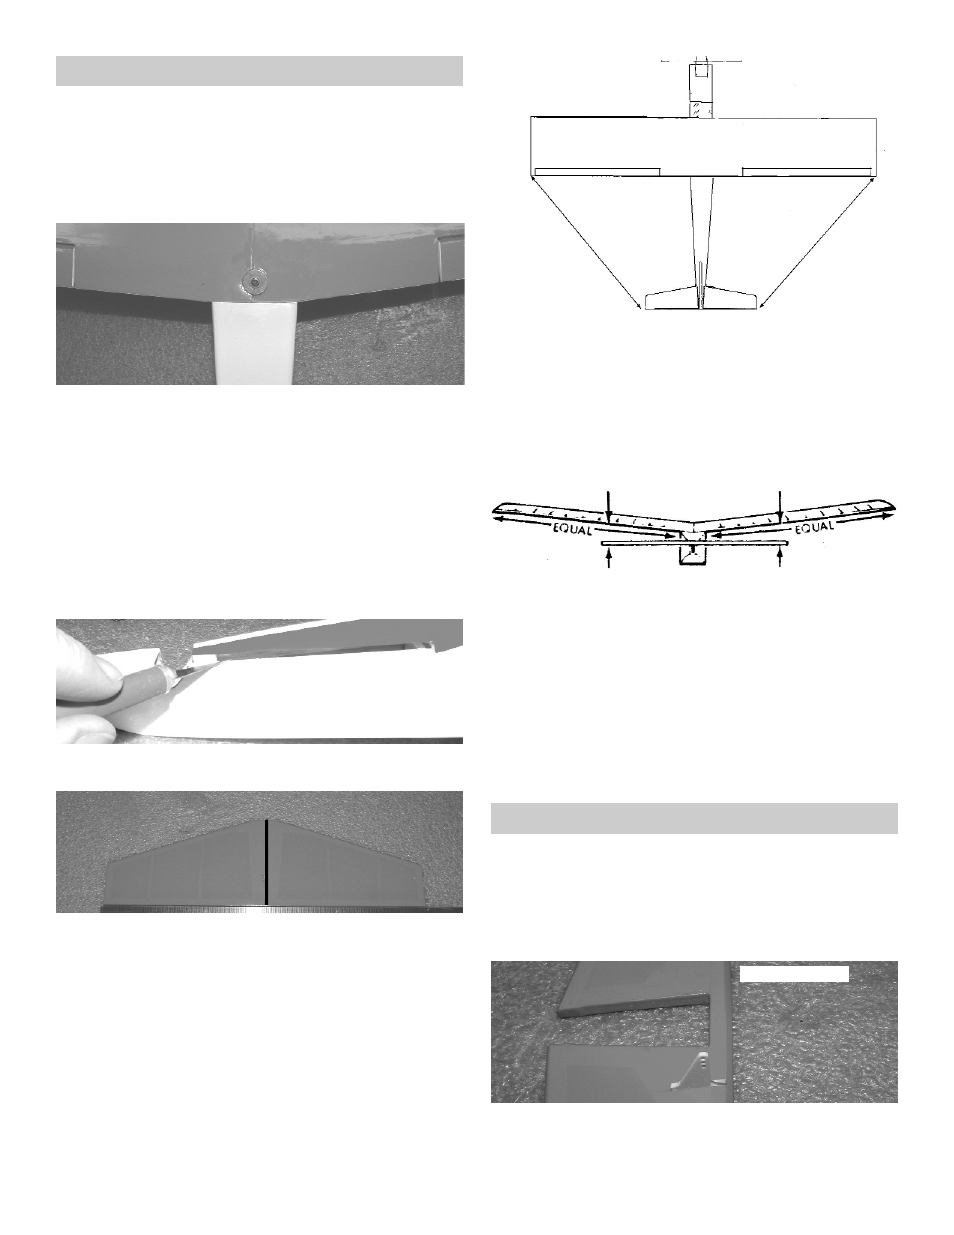
3.
Find the center of the stabilizer, by measuring
the length of the trailing edge where the ele-
vator hinge line is located.
Stand the stabilizer up on its edge and using a
right triangle draw a center line up from the
trailing edge to the leading edge.
Find the center of the fuselage in front of
where the stabilizer sits.
Place the stabilizer on the fuselage using the
marks you just made.
“X”
“X”
4.
Measure from the end of the wing to the tip of
the stab. This measurement should be the
same for both sides.
Mark the stabilizer where it rest on the fuse-
lage
Remove the covering where the stab will be
glued to the fuselage.
Look down the length of the fuselage and
check that the stabilizer is parallel to the wing.
If it is not then shim the low side till they are
parallel.
When satisfied then glue the stabilizer in place
using 5 minuet epoxy. Make sure the stabiliz-
er remains both perpendicular and parallel to
the wing and fuselage while the epoxy dries.
2.
Remove the balsa wood plug at the rear of the
fuselage where the stabilizer mounts.
Elevator Installation
1.
Collect the following parts:
(1) Fuselage With Stabilizer
(2) Elevator
(4) Mini CA Hinges
(1) Nylon Control Horn
(1) Long Pushrod Wire
2.
Locate the slot in one side of the elevators
near the center.
Remove the covering over the slot.
Bottom of Elevator