Installing ailerons, Aileron servo extensions – Carl Goldberg GBGA1023 User Manual
Page 5
5
Installing Ailerons
1.
Collect the following parts:
(1) Wing
(2) Ailerons ( Left & Right)
(6) Mini CA hinges
1.
Locate the pre-cut aileron hinge slots in both
sides of the wing. Using a hobby knife (#11
blade), slide the blade into each slot to make
sure it is cleanly cut.
Repeat this process with the ailerons, making
sure all hinge slots are clean.
2.
Find the control horn slot near one end of the
aileron.
Align the slot in the aileron with the servo hole
in the wing.
Insert the mini CA hinges half way into the
wing and the ailerons. (Use a pin inserted into
the middle of the hinge to help keep the hinge
in the middle.)
Make sure that the aileron is tight against the
wing and even with the wing tip.
Using thin CA glue, place one drop on all
hinges top and bottom.
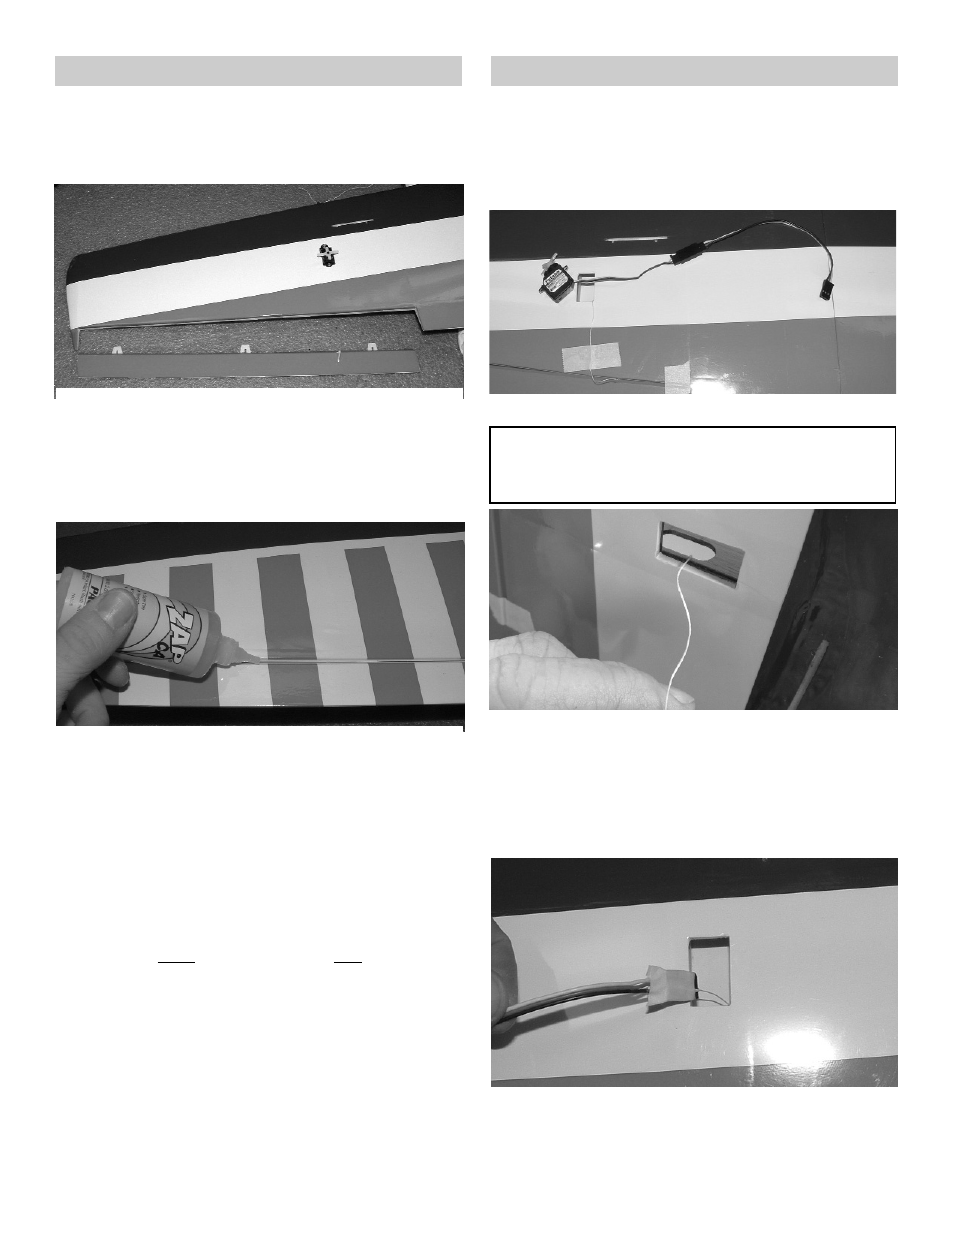
1.
Gather the following items:
(2) 6" Extension wires
(1) Wing
(2) Servos
(1) Electrical tape
2.
Plug one 6" extension wire into one servo.
IMPORTANT! To ensure that any connections located
inside the wing will not come loose, either when the
wires are pulled, or during flying, always tape them
securely together with electrical tape.
3.
Tie the wheel collar to the end of the string.
Insert the wheel collar through the servo
opening in the wing.
Allow the wheel collar to fall through the wing
till it can be pulled out through the hole in the
center of the wing.
Aileron Servo Extensions
4.
Tie or tape the other end of the string to the
servo extension.