Sheer horizontal, Window shadings installation instructions, Step 3: operation – Blinds Chalet Good Housekeeping 3 Room Darkening Sheer Shades User Manual
Page 2: Step 4: child safety, Step 5: hold down installation (optional), Cleaning and care
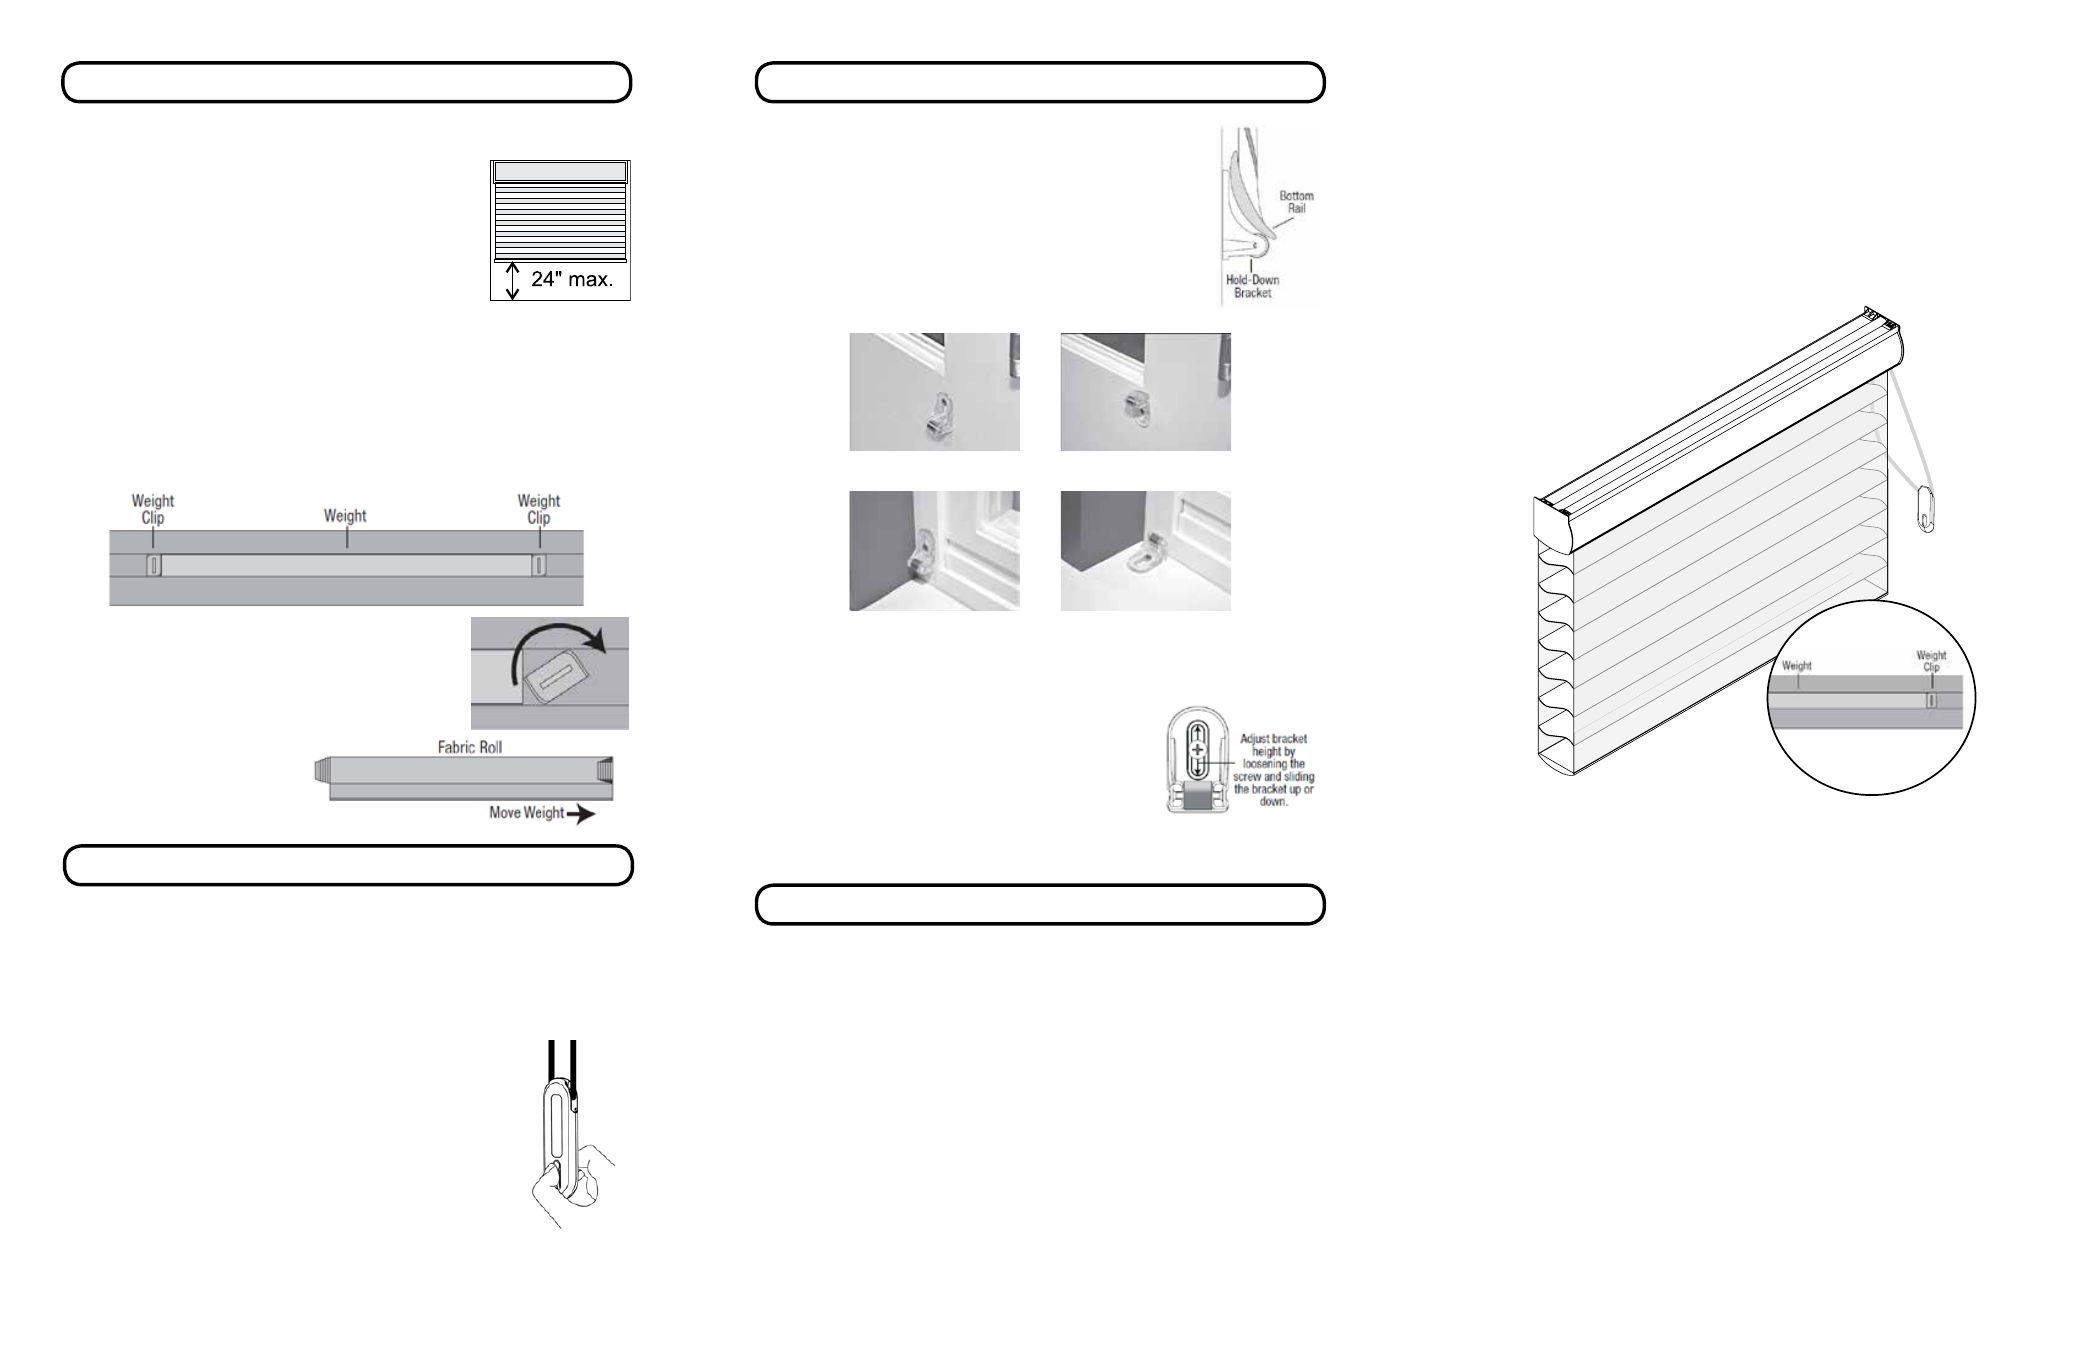
Step 3: Operation
Pulling down on the back cord will lower the shading. When the window
shading is completely lowered, pulling down on the
back cord will open the vanes. Continued pulling in
this direction will raise the fabric with the vanes in
the open position. The window shading must only
be raised a maximum of 24” in this manner to avoid
damaging the fabric.
Pulling down on the front cord will close the vanes and
then raise the shading.
If the fabric is moving to one side as the shade is raised up (skewing), first
check that the installation brackets are level. Shim to level, if necessary. If
the brackets are level it may be necessary to adjust the bottom rail weight.
■ To release the weight clip, insert a flat blade screwdriver into the weight
clip and turn clockwise.
■ Move the weight in 1” increments toward the side
where the fabric is gathering.
■Secure the weight clips in position by turning them
counterclockwise after making the adjustment.
■ Test and, if necessary, adjust again.
Skew Adjustment
Step 4: Child Safety
Cord Tensioner Installation
Your window shade has arrived with the cord tensioner
positioned near the head rail to comply with current WCMA
child safety standards. The cord tensioner must be mounted
and secured before the window shade will operate correct-
ly. To position the tensioner, grasp the screw hole and pull
down to release the lock. Pull the cord through the tensioner
until the tensioner is at the bottom of the cord loop.
Follow the instructions included in the Tensioner Bracket Packet.
Step 5: Hold Down Installation (optional)
Lower the shading, keeping the vanes closed.
■Place the magnetic hold-down bracket onto the bottom rail
just inside the end cap, oriented as shown.
■Hold the bracket while opening and closing the vanes (it
may be necessary to have someone assist you). Adjust the
bracket to the best overall position.
■Mark the screw location using the mounting options shown
below.
The screw should be placed in the middle of the slot. This will allow for
adjustment.
■ Drill the screw holes using a 3/32” drill bit.
IMPORTANT: Use drywall anchors when mounting
into drywall.
■ Attach the hold-down brackets to the mounting
surface using the screws provided.
■If necessary, adjust bracket height by loosening the
screw and sliding the bracket up or down.
The American National Standard for Safety of Corded Window Covering
Products (ANSI) requires the use of a cord tie down (cord tensioner) on
all continuous loop cord systems. The use of such a device is intended to
significantly reduce the occurrence of infant or small child strangulation
injuries or deaths resulting from the looped pull cords on various window
treatment products.
Outside
Mount
Inside
Mount
Preferred
Preferred
Alternate
Alternate
The soft and delicate feel of Sheer Horizontal Window Shadings belies the
durability of the material. Sheer Horizontal Window Shadings are made of
sturdy, knitted polyester fabrics and may be feather dusted or vacuumed at a
low suction setting. Spots or stains can be rubbed clean with a damp sponge
and mild soap. To avoid discoloration of the material, we recommend
against the use of chemical cleaners. If necessary the shading may be
ultrasonically cleaned by a professional.
All knitted fabrics experience weave variations due to heat, humidity
and other room conditions. These variations can result in slight bowing,
puckering and dimpling of the Sheer Horizontal material. The possible
variations are minor and have been shown through case study not to detract
from the beauty of this product.
Cleaning and Care
Sheer Horizontal
Window Shadings
Installation Instructions
Sheer Horizontal Window Shadings represent a design
breakthrough in style, efficiency and function. The unique
fabric structure and hardware system are designed to
provide years of reliable service when properly installed.
Please take a few minutes to read through these instructions
before beginning.
152053
Rev A.
11/25/2013
With easy access skew
adjustment
- Good Housekeeping 3 Light Filter Sheer Shades Good Housekeeping 2 Room Darkening Sheer Shades Good Housekeeping 2 Light Filter Sheer Shades John Gidding Sheer Shadings Room Darkening Horizontal Sheer Shades - 3 Vanes Light Filter Horizontal Sheer Shades - 3 Vanes Room Darkening Horizontal Sheer Shades Light Filter Horizontal Sheer Shades