Blinds Chalet Top Down Bottom Up Installation User Manual
Page 2
H
OW TO
O
PERATE
Y
OUR
S
HADE
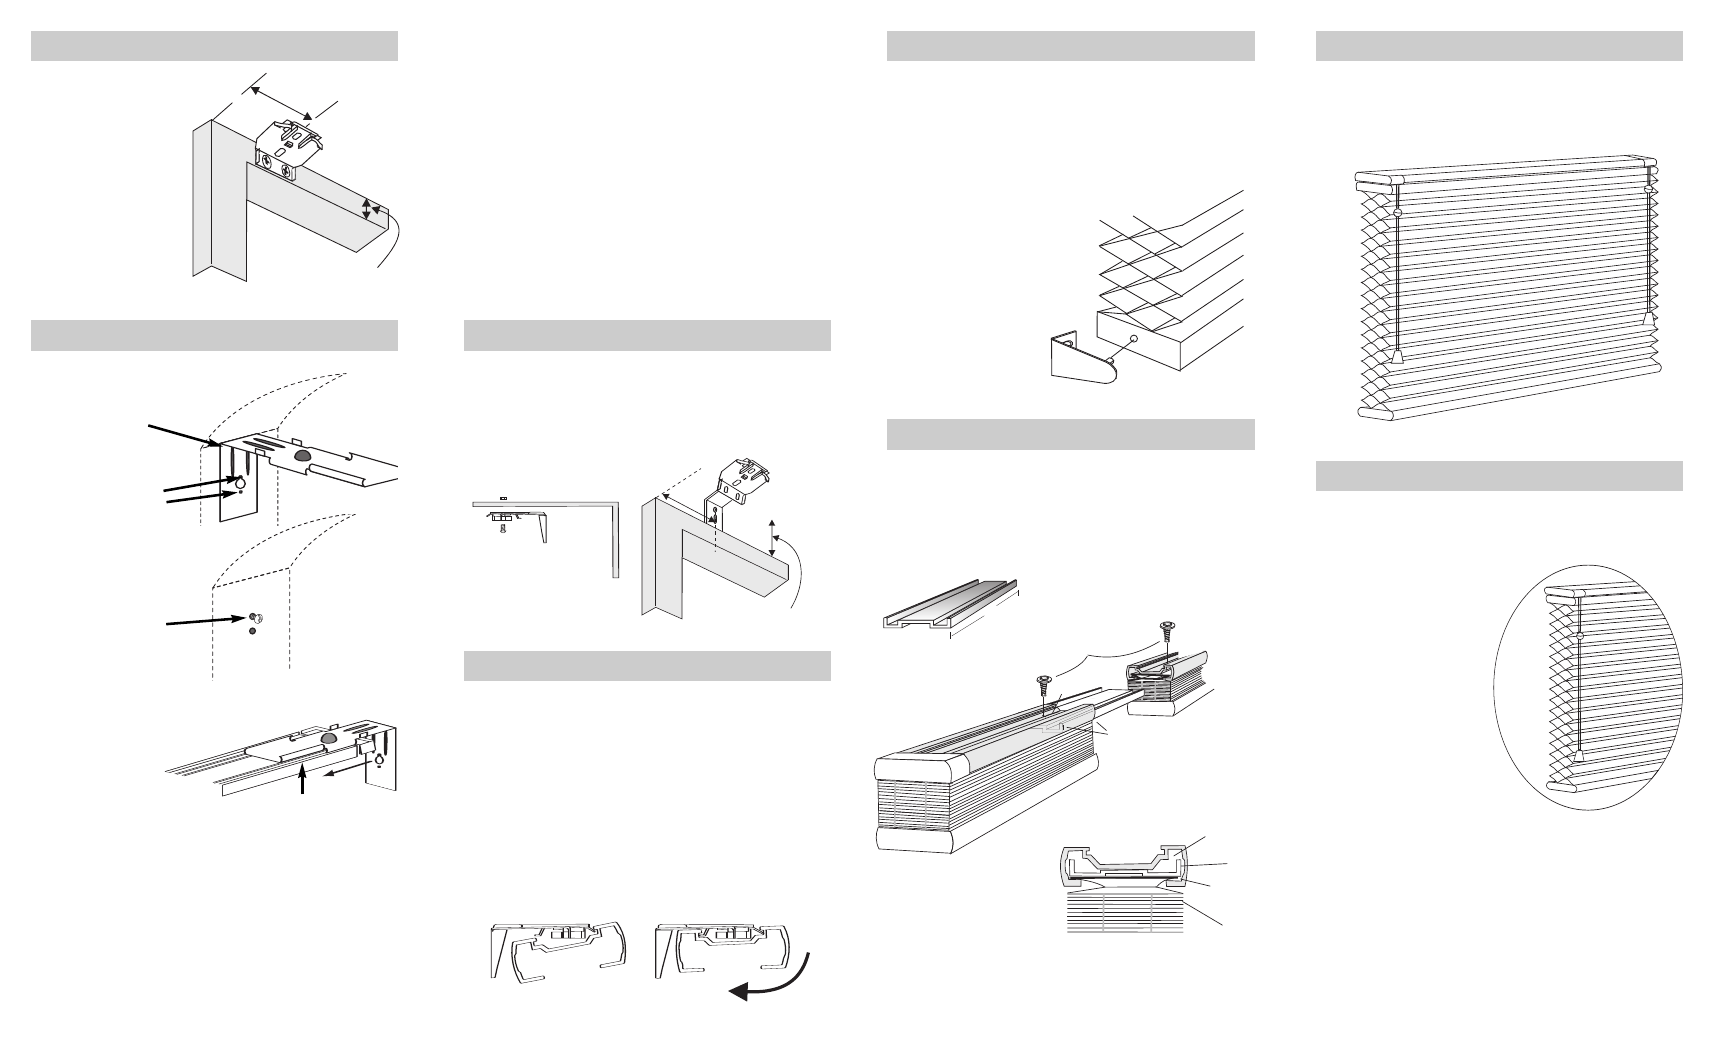
The brackets are
mounted with two bugle
head
screws through the
back end of the
bracket flat against
the window molding
or the wall above the
window. The bracket
requires a minimum
surface 3/4" high.
O
UTSIDE
M
OUNT
Optional Extension Brackets are used to project the back
of the shade up to 2 3/8" from the mounting surface. Attach
the Installation Bracket to the Extension Bracket with the
nut and bolt provided.
O
PTIONAL
E
XTENSION
B
RACKETS
2 1
/2"
3/4"
2 1/2
"
Extension
Bracket
2 1/2" minimum
Nut
Bolt
Unwind the cord from the shade but keep the rubber
band around the shade stack.
1. Hold the shade up near the brackets and insert the front clip of
the bracket into the front groove of the rail.
2. Make sure the shade is centered in the window opening.
3. Push the rail back and up until the back clips of the bracket
are inserted in the back groove of the rail.
To remove shade, reverse procedure.
H
ANGING THE
S
HADE
For shades ordered as Two-on-One Headrail using
the Splicer piece, insert Splicer in Headrail of both
shades as shown. Lock into place using 3/8" Tek
Screws provided.
T
WO
-
ON
-O
NE
H
EADRAIL
S
PLICER
O
PTIONAL
H
OLD
D
OWN
B
RACKET
Aluminum
Splicer Piece
6"
3"
11/2
" to
2"
3/8" Tek Screw
Optional Hold Down Brackets are mounted with
the supplied screws. With the shade at its proper
drop, place the pin of each Hold Down into the
hole in each End Cap and mark the screw holes.
Make sure the pins
are level and aligned.
Raise the shade,
then screw the Hold
Down Bracket into
the mounting
surface.
Assembled Cross Section
Head Rail
Splicer
Stiffener
Fabric
C
ORDLOCK
O
PERATION
To raise or lock either the middle rail or bottom rail
of the shade, pull the cord down and inward to the
center of the shade.
NOTE: When raising the
middle rail all of the way
to the head rail, you
should raise the bottom
rail a couple of inches.
This will prevent pinching
the equalizer between the
rails.
To lower or release either
the middle rail or bottom
rail of the shade, pull the
cord directly downward in the vertical position to
release the lock.
Pull cord down, raising Bottom Rail to lower
Equalizer so it will not get caught between the
Head Rail and the Middle Rail. Do this prior to rais-
ing the Middle Rail.
On a standard Top-Down/Bottom-Up shade, the right
hand cord operates the middle rail, while the left hand
cord operates the bottom rail.
1. Line up the bracket top
with the desired height
of the top of the head-
rail.
2. Mark holes for
screws. Brackets
must be level.
Remove brackets
and drill holes.
3. Insert bugle head
screws for keyhole
slots only.
Approximately
1/8" of the screw
should be left protruding.
4. Pull the cord
lock assembly
partially out of
the headrail
and slide the bracket on as shown. Push the cord
lock as assembly and bracket back all the way
into the rail.
5. Remove the endcap from the opposite end of the
headrail. Slide the remaining side mount bracket
on the headrail. Replace the end cap before slid-
ing the bracket all the way into the headrail.
S
IDE
M
OUNT
B
RACKET
I
NSTALLATION
Rail
6. Hook one bracket onto the screw in the window frame,
using the keyhole slot. Bring the other end bracket
over the screw at the other side of the frame. Slide
down, flexing bracket inward until the screw engages
in the keyhole slot.
7. Make sure both brackets are slipped down all the
way in the keyhole slot so that the screw is in the
top portion of the keyhole slot. Install a screw in
the bottom hole of each bracket. Tighten all
screws.