Cub Cadet RZT 22 User Manual
Page 16
12
10.1. Disconnect the - (negative) lead to the battery.
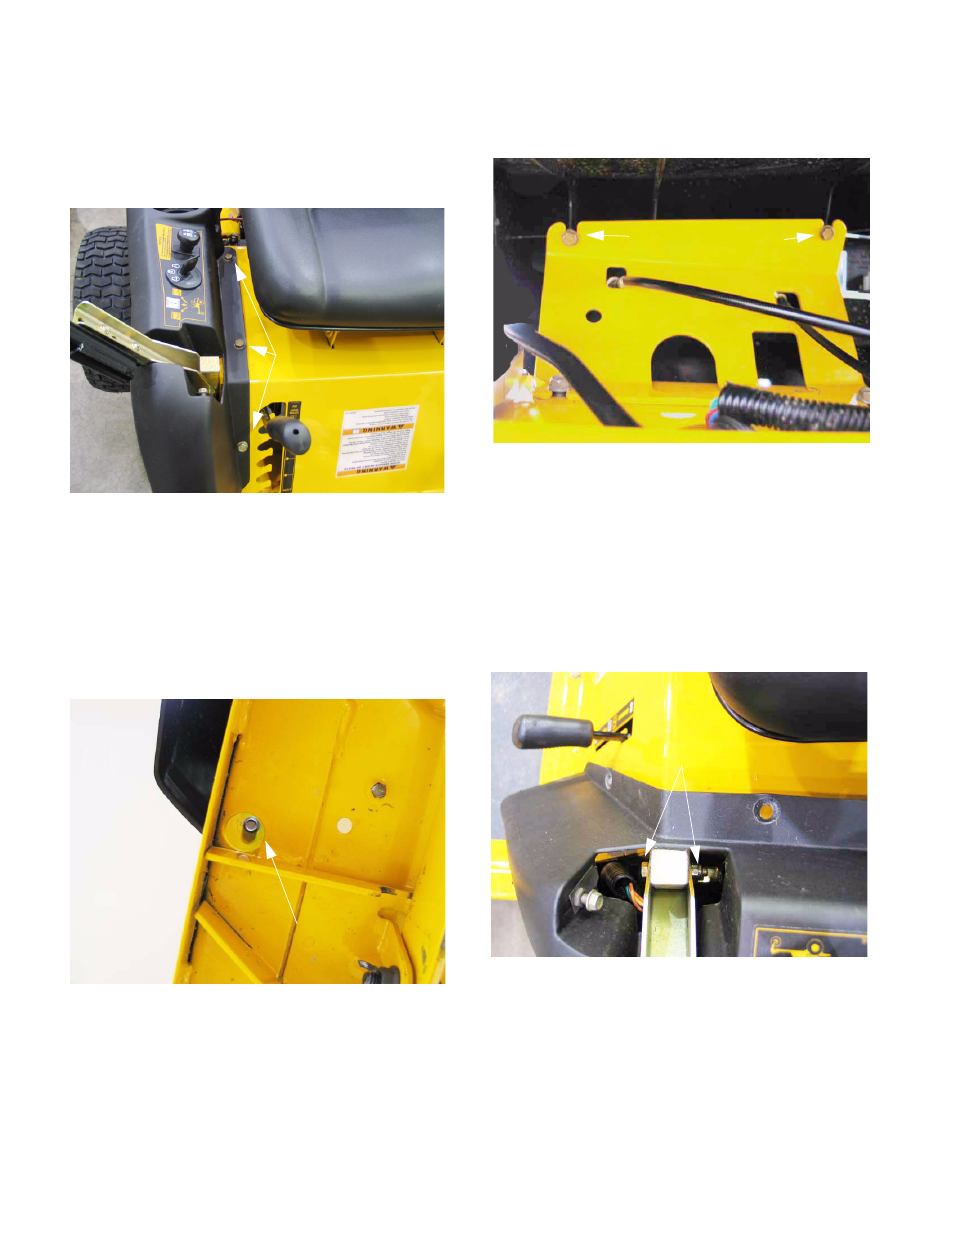
10.2. Using a 1/2” wrench, remove the three screws
securing the console to the seat frame.
See Figure 10.2.
10.3. From underneath remove the four #12-16 self-
tapping hex head screws. This can be accom-
plished by using a 5/16” socket with an exten-
sion.
10.4. There are two screws hidden in the tubular
frame at the front end of the console and the
rear of the console. See Figure 10.4.
10.5. The two other screws are located under the con-
sole mounting bracket. See Figure 10.5.
NOTE: If the console mounting bracket is slot-
ted, where it is attached to the seat frame box, it
may be easier to loosen the mounting screws
from the seat frame and leave bracket mounted
to the console.
10.6. Using two 1/2” wrenches remove the screw con-
necting the lapbar pivot bracket to control hub.
See Figure 10.6.
10.7. Remove the lapbar and set to the side in a clean
safe area.
NOTE: Unscrew fuel cap when removing the left
side.
10.8. Carefully remove console from unit.
Figure 10.2
5/16-18 x .625 screws
Figure 10.4
#12-16 x .500 screw
Figure 10.5
#12-16 x .500 screws
Figure 10.6
Lap bar pivot screw