Steering linkage: adjustment, Steering linkage: adustment – Cub Cadet RZT 22 User Manual
Page 10
6
6.11. Remove the front transmission mounting bolt
using a 1/2” wrench and a 1/2” socket.
NOTE: Secure the transmission or use another
technician to support the transmission while per-
forming the next step.
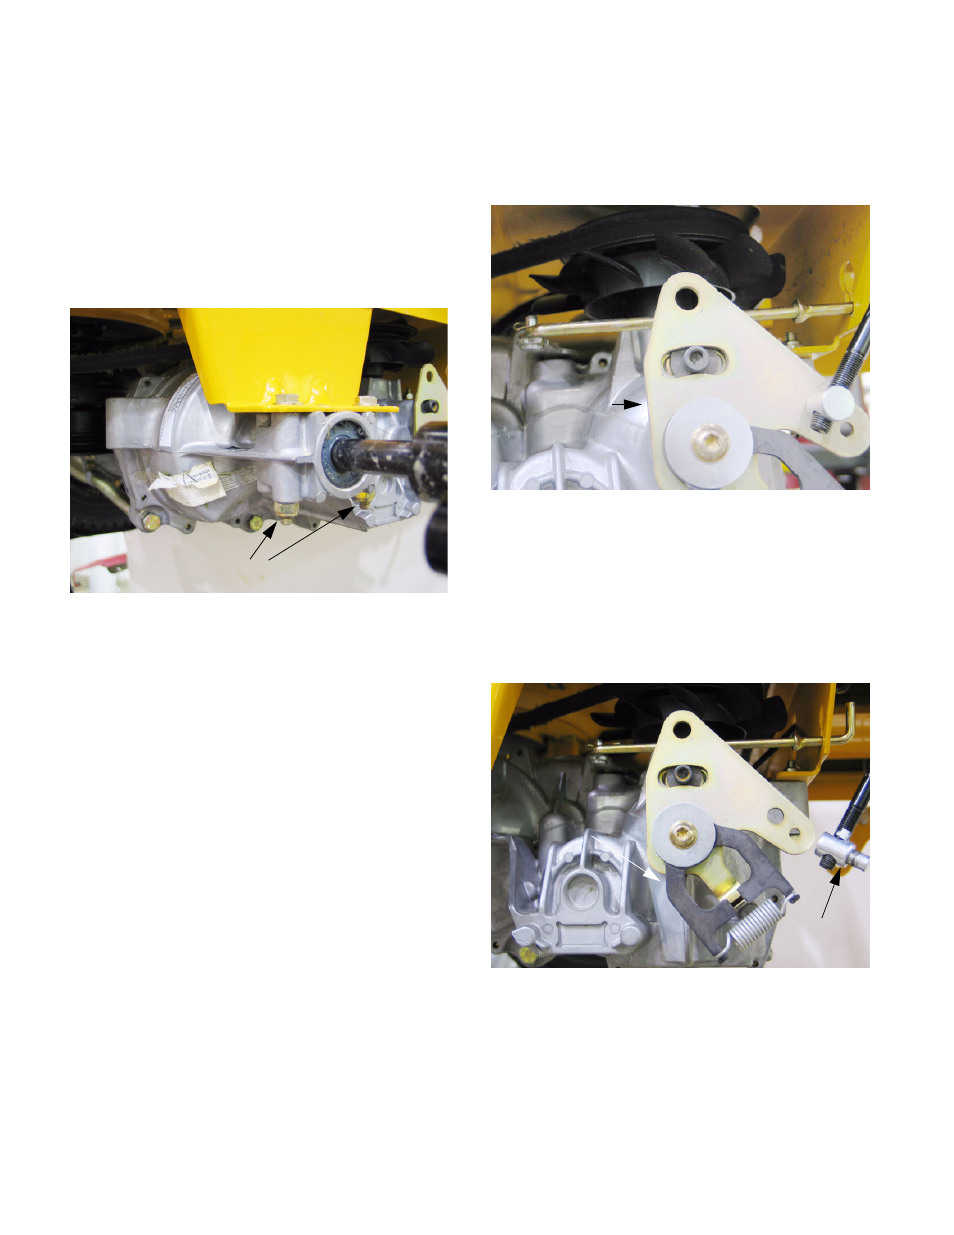
6.12. Remove both transmission mounting bolts
securing the transmission to the mounting
bracket using two 1/2” wrenches.
See Figure 6.12.
6.13. Rotate the transmission out and down until the
fan is clear of the front transmission mounting
bracket, and remove it from the frame.
6.14. Installation notes:
•
Lift transmission into place and start all threaded
fasteners before tightening any individual fasten-
ers.
•
The remainder of the installation process con-
sists of reversing the removal process.
•
Tighten the lug nuts to a torque of 350-500 in-
lbs.
•
Tighten the center wheel hub nut to a torque of
100-160 ftlb.
7.
STEERING LINKAGE: ADJUSTMENT
7.1.
Begin to adjust the steering by confirming that
both EZTs are correctly adjusted for neutral con-
trol. See Figure 7.1.
7.2.
Lift and safely support the rear of the mower.
7.3.
Disconnect the ferrule at the EZT end of each
lap bar control rod from the neutral return
assembly on each of the EZTs. The ferrules are
secured to the neutral return assemblies with
hairpin clips. See Figure 7.3.
NOTE: In the course of normal service, it is very
unusual for the neutral return assemblies to
require adjustment unless someone has previ-
ously tampered with it. It is necessary to check
the adjustment because the rest of the proce-
Figure 6.12
Transmission Mounting Bolts
Figure 7.1
Neutral
adjustment
plate
Figure 7.3
Ferrule