Seat removal – Cub Cadet RZT 22 User Manual
Page 14
10
8.8.
Using a grease gun, fill the rest of the cavity
AFTER final assembly. Filling before final
assembly will allow the flange bearings to be
pushed out.
8.9.
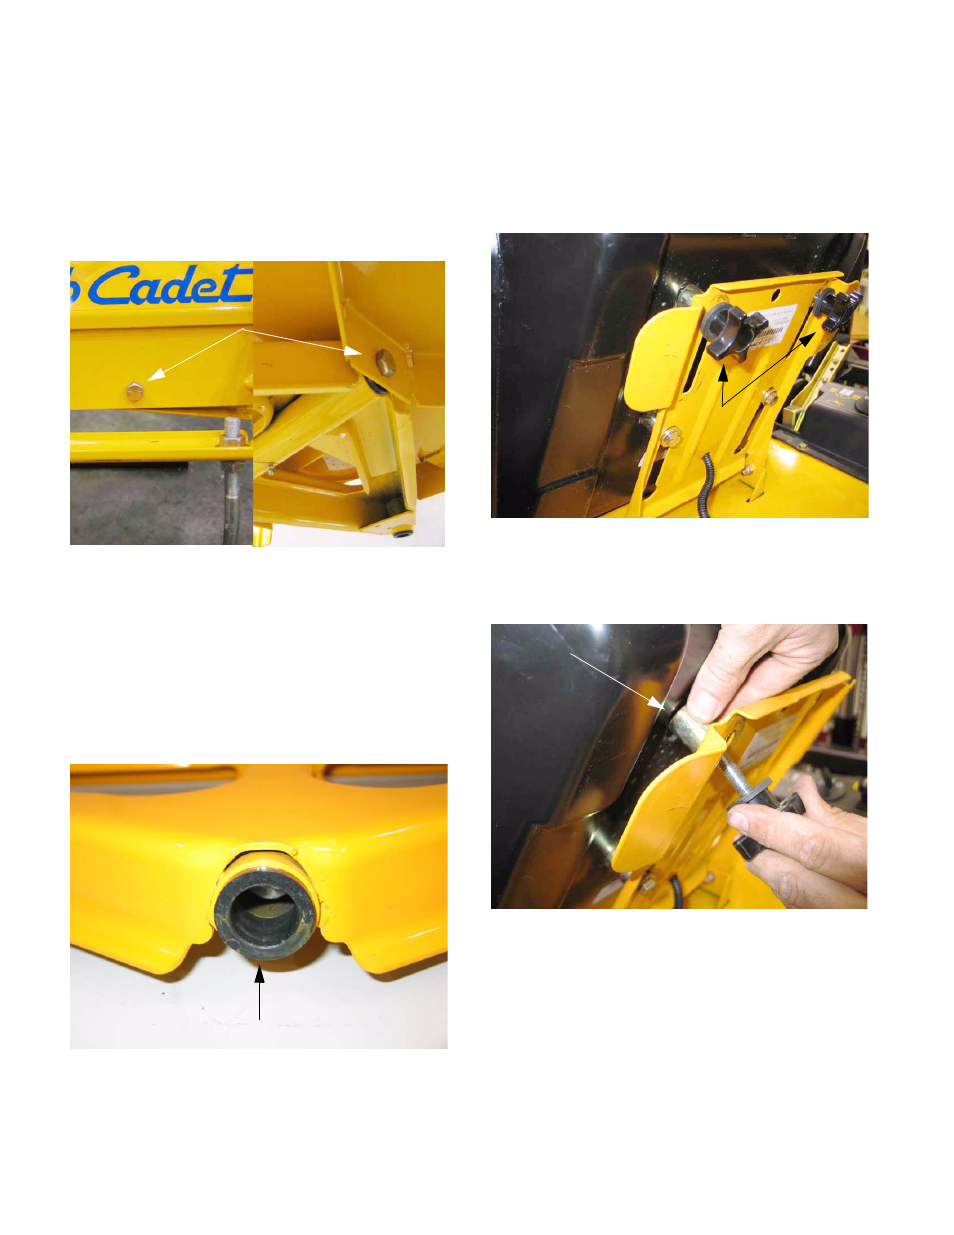
Remove both hex cap screws securing the axle
shaft to the frame. This will be done with a 3/4”
wrench. See Figure 8.9.
NOTE: Use removable threadlocking compound
such as “Loctite 242” during reassembly.
8.10. The axle shaft may be removed and inspected
for wear.
8.11. Inspect the flange bearing on each side of the
pivot axle for wear. Replace as needed.
See Figure 8.11.
8.12. AFTER reassembly use a good quality grease to
fill the axle shaft chamber.
9.
SEAT REMOVAL
9.1.
Disconnect the - (negative) lead to the battery.
9.2.
Flip the seat forward. Keep one hand on back of
seat to prevent seat from trying to bite back.
See Figure 9.2.
9.3.
Remove both wing knobs from under seat. Keep
track of washers and spacers. See Figure 9.3.
9.4.
Slide seat forward to align seat spacers with
large hole in seat mounting bracket. Carefully lift
the seat out.
Figure 8.9
1/2-13 x 1.25 hex cap screws
Figure 8.11
Flange bearing
Figure 9.2
Wing knobs
Figure 9.3
Seat spacer