Pivot bar service – Cub Cadet SLT1500 Series User Manual
Page 73
Series 1000 and 1500
69
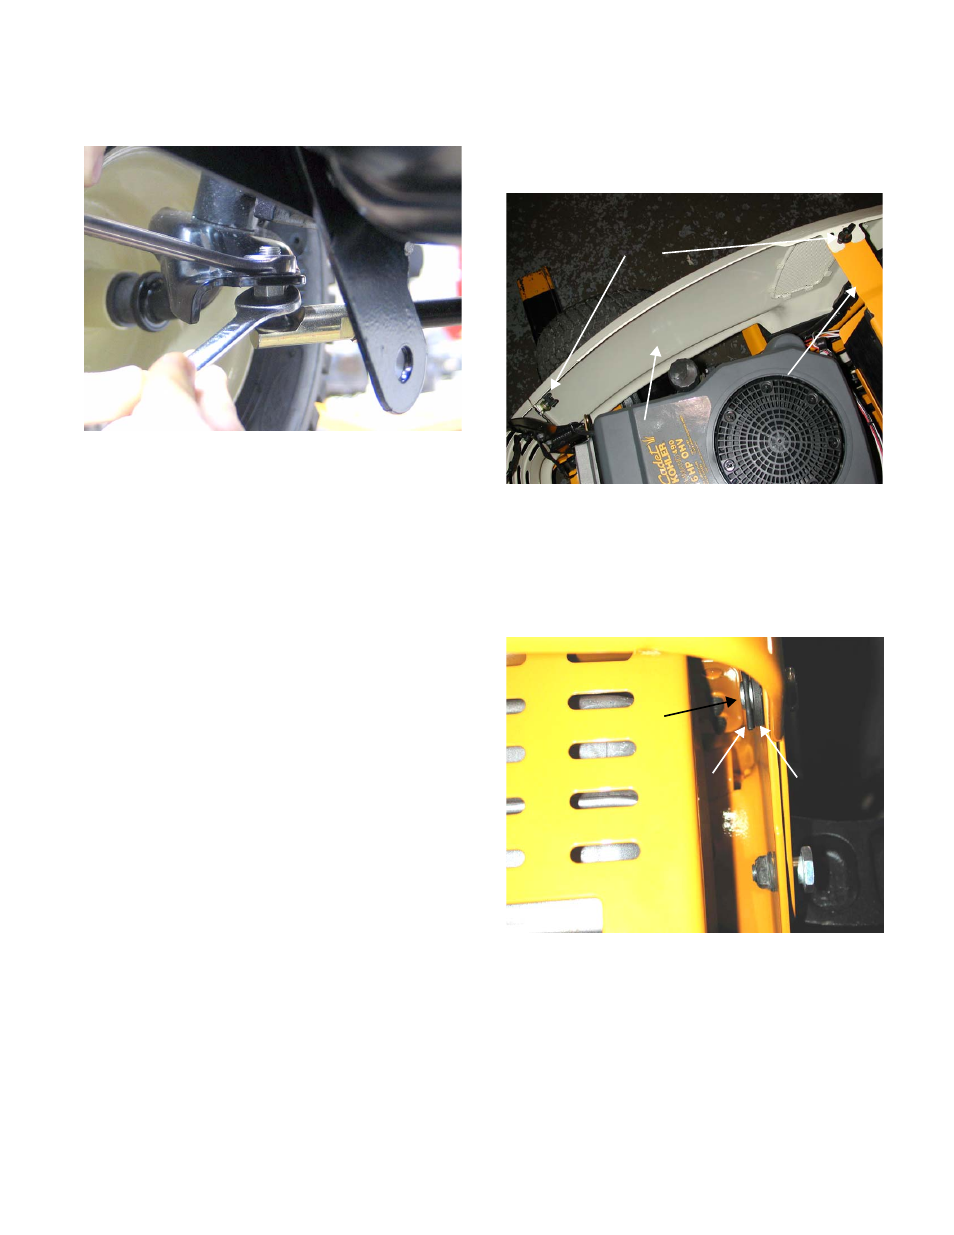
36.11. Remove the right hand ball joint from the right
hand drag link. See Figure 36.11.
36.12. Remove the left hand ball joint performing steps
9, 10 and 11 above.
36.13. Place the left and right tire assemblies in the
straight forward position.
36.14. Set the toe-in for the rim assemblies to the
straight forward position.
36.15. Thread the right hand ball joint onto the right
hand drag link until the mounting hole in the right
hand axle assembly lines up with the ball joint.
NOTE: Count the number of turns the ball joint
was rotated onto the drag link. This number
should be equal for the left side as well.
36.16. Secure the right hand ball joint to the right hand
axle assembly with the lock washer and nut
removed earlier, using a 1/2” wrench and a 9/16”
socket
36.17. Secure the right hand ball joint jam nut to the
right hand drag link using a 1/2” wrench and an
11/16” wrench.
36.18. Install the left hand ball joint using steps 15, 16
and 17.
NOTE: Make certain the same amount of rota-
tions are used on the left ball joint as the right
ball joint.
37.
PIVOT BAR SERVICE
NOTE: On newer units with a one piece hood
see section 2 on hood removal, remove the front
bumper and skip to section 36.8
Figure 36.11
37.1. Loosen the plastic wing nuts securing the side
panels to the battery hold down bracket and the
grille assembly. See Figure 37.1.
37.2. Remove the side panels from the tractor.
37.3. Remove the hairpins, flat washers and clevis
pins (or screws) securing the front bumper to the
tractor frame. See Figure 37.3.
37.4. Remove the front bumper.
Wing Nuts
Side Panel
Battery Hold
Down Bracket
Figure 37.1
Hairpin
Washer
Clevis Pin
Figure 37.3