Traction drive belt replacement: hydrostatic gt – Cub Cadet SLT1500 Series User Manual
Page 56
Series 1000 and 1500
52
30.
TRACTION DRIVE BELT REPLACEMENT:
HYDROSTATIC GT
30.1. Turn-off the engine and allow all parts to cool
before beginning work.
30.2. Remove the cutting deck.
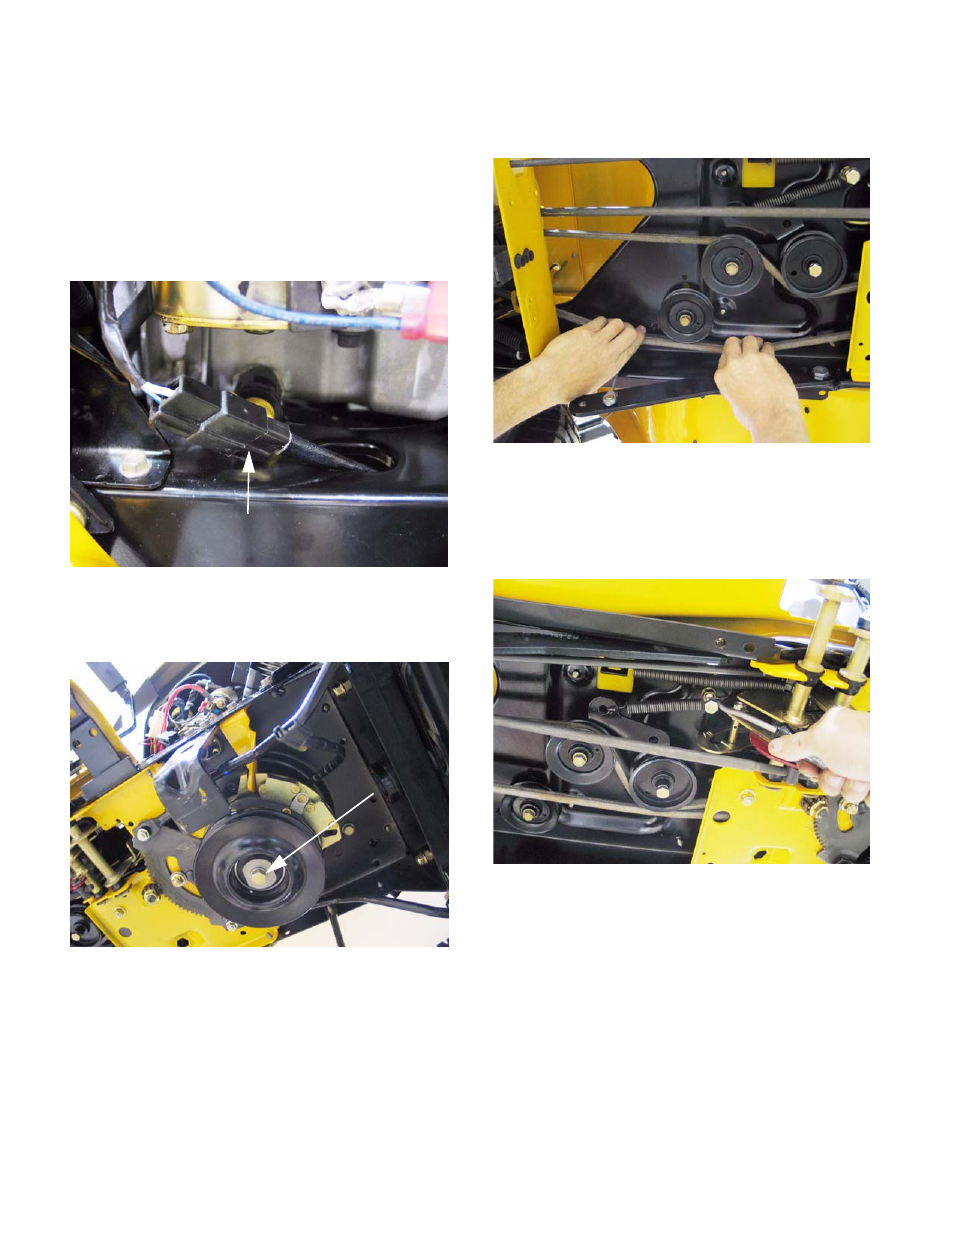
30.3. Identify and unplug the wires leading to the elec-
tric PTO clutch. See Figure 30.3.
30.4. Remove the electric PTO clutch from the engine
crankshaft using a 5/8” wrench. See Figure 30.4.
NOTE: Lower the clutch carefully, keeping track
of the hardware on the crankshaft. There are
variations between engines, clutches and years:
•
Spacers above or below the traction drive pulley.
•
Integral or separate key on traction drive pulley.
•
Different PTO clutch anti-rotation brackets.
30.5. Slip the belt off of the single fixed idler.
30.6. Carefully release the spring that maintains ten-
sion on the double idler bracket using a length of
starter rope or an appropriate tool.
See Figure 30.6.
30.7. Slip the drive belt from between the double idler
pulleys.
NOTE: On some early models, the rear-most
pulley (rides against V side of belt) was large
enough that the double idler bracket acted as a
belt keeper. On those models, it is necessary to
loosen the nut and bolt that secure that pulley to
the bracket in order to slip the belt past the edge
of the bracket.
NOTE: Pulleys may be steel or plastic, depend-
ing on when the tractor was built.
Figure 30.3
PTO clutch wires
Figure 30.4
5/8” head bolt
Figure 30.5
Figure 30.6