Cub Cadet SLT1500 Series User Manual
Page 27
Series 1000 and 1500
23
16.10. Remove the cotter pins in the brake pedal shaft
and the drive pedal shafts. See Figure 16.10..
16.11. Slide the drive pedal to the right. The inboard
bushing and washer can now be removed. Con-
tinue working the drive pedal shaft to the right
and slip it out of the unit.
16.12. Remove the hair pin clip in the brake rod and
disconnect it from the brake pedal shaft.
16.13. Remove the return spring from the brake pedal
shaft.
16.14. Slide the brake pedal shaft to the right and
remove the inboard bushing and washer. Con-
tinue sliding the brake pedal shaft to the right
and work it off of the unit.
16.15. Remove both drag links from the tractor.
NOTE: Make sure to keep the drag links sepa-
rate so the you know which one is for the left and
which one is for the right. they are not marked
and they are not interchangeable.
Figure 16.10
Cotter Pins
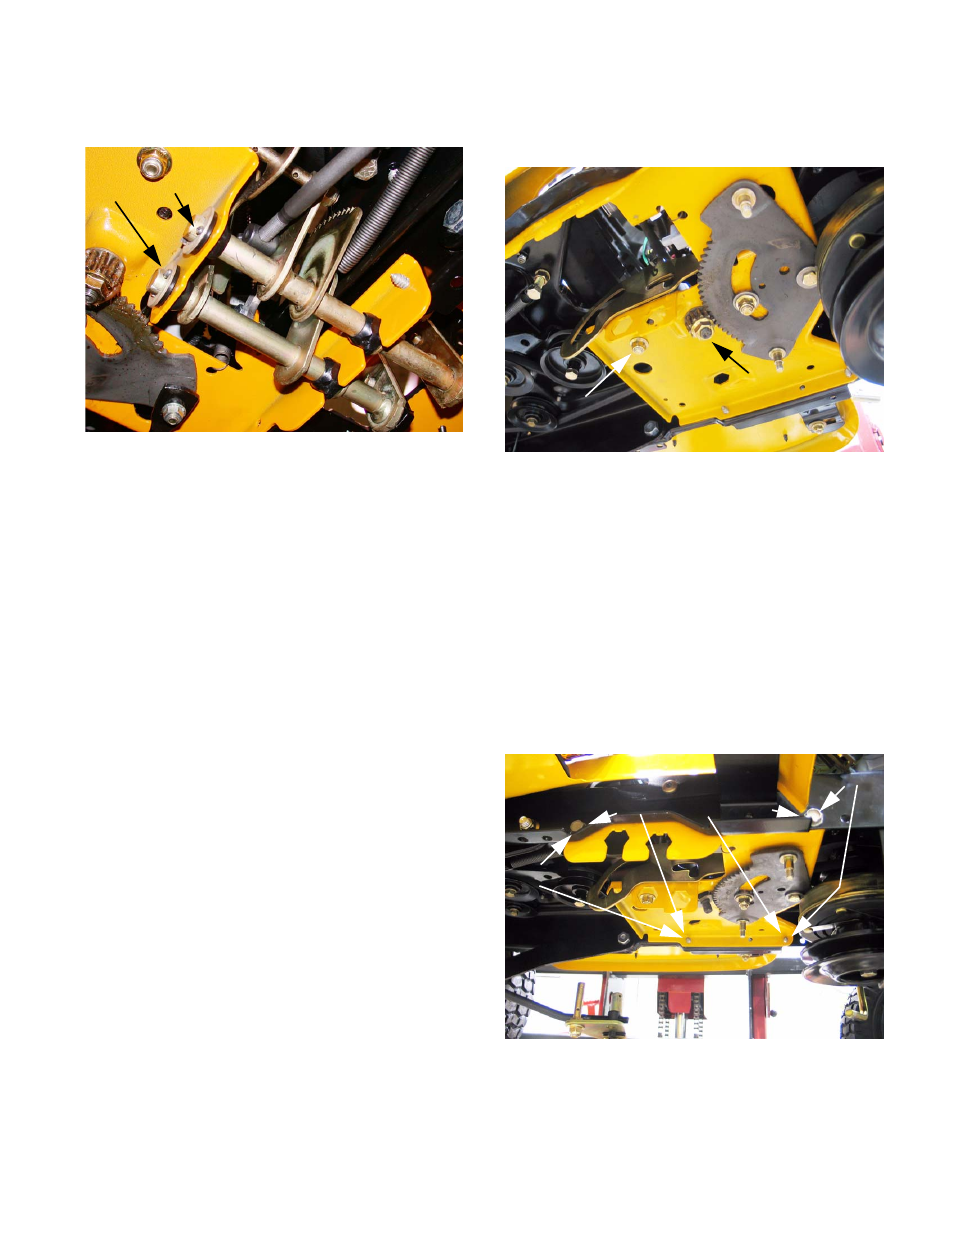
16.16. Remove the lock nut from the bottom of the
steering shaft. Then slide off the steering shaft
gear. See Figure 16.16.
16.17. Reaching up through the opening where the
pedal shafts were, place a 9/16” wrench on the
head of the bolt located in the center rear of the
subframe. Using a 9/16” socket, remove the nut.
See Figure 16.16.
NOTE: There is a sleeve on this bolt that acts as
a spacer between the sub-frame and frame. Be
aware of this sleeve when you lower the sub-
frame in a later step.
16.18. There are four screws holding the subframe to
the tractor.Two on each side. Loosen the two
front screws and remove the two rear screws.
See Figure 16.18.
Figure 16.16
Lock Nut
Hex Nut
Figure 16.18
Sub Frame Hex Screws
Remove these two.
Loosen these two.