Introduction, Important, Ds2 dimensions – Checkline DS2 User Manual
Page 2
page 11
page 2
INTRODUCTION
DS2 Series are state-of-the-art basic performance, easy-to-use
digital force gauges which feature giant, easy-to-read LCD displays
and provide RS-232, Digimatic and analog output. The Real time
measuring mode displays force transients and the Peak measuring
mode captures the peak force achieved during a test. Selectable
lbf(ozf), kgf(gf), and N measuring units.
IMPORTANT
Make sure to read this manual before operating.
1.
WARNING!!
Test samples and fixtures can break or shatter,
wear eye and body protection to avoid injury.
2.
WARNING!!
REGARDLESS of whether the unit is ON or OFF,
DO NOT
exceed the capacity of the gauge.At 110% of the rated
capacity, the display flashes to warn. NEVER exceed 200% of the
rated capacity, or the load cell will be damaged.Avoid shock
load.
3. The gauge can be used between 30 – 100°F (0 – 40°C)
For the most accurate results, use the gauge at temperatures
close to ones on the certificate of calibration.
4. When mounting DS2 Series, use M4 mounting screws with a
maximum insertion depth of 8 mm into the gauge.
5. Measure in line tension and compression
forces only. DO NOT attempt to mea-
sure forces at an angle to the measuring
shaft – damage to load cell and/or shaft
may result.
6. Hand tighten attachments. DO NOT use
tools.
7. Make sure this gauge and all peripherals are powered down
before attaching any cables.
8. DO NOT disassemble the gauge. Disassembly voids warranty.
9. Use only Imada AD120 (or AD230) charger/adapter.
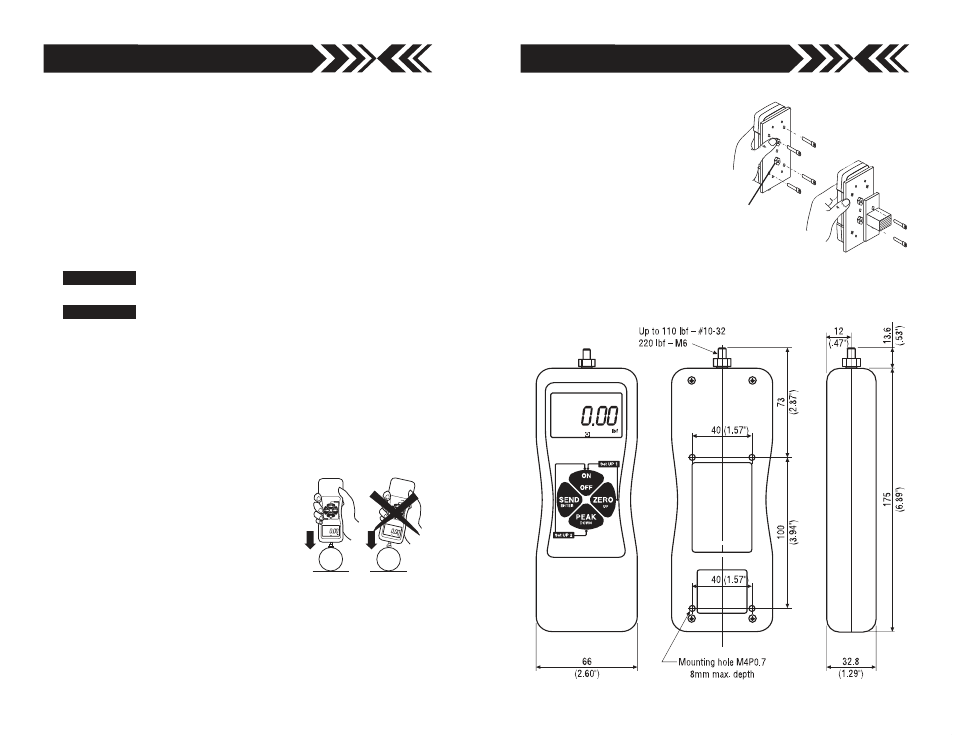
DS2 DIMENSIONS
Optional Adapter Plate
AP-001 Adapter Plate mounts
DS2 gauges to most other
brands of test stands.
Use the 4 screws (included) to
mount the DS2 gauge to the AP-
001 adapter plate.Then use the
2 PEM nuts on the AP-001
adapter plate to mount to other
brands of test stand.
OTHER BRAND TEST STAND
2 MOUNTING PLATE BOLTS
GAUGE MOUNTING
SCREWS (4)
PEM NUTS
IMADA GAUGE
AP-001