Installation instructions – California Faucets 9178-UG-2 User Manual
Page 2
INSTALLATION INSTRUCTIONS
•
California Faucets recommends this product be installed by licensed contractor(s)
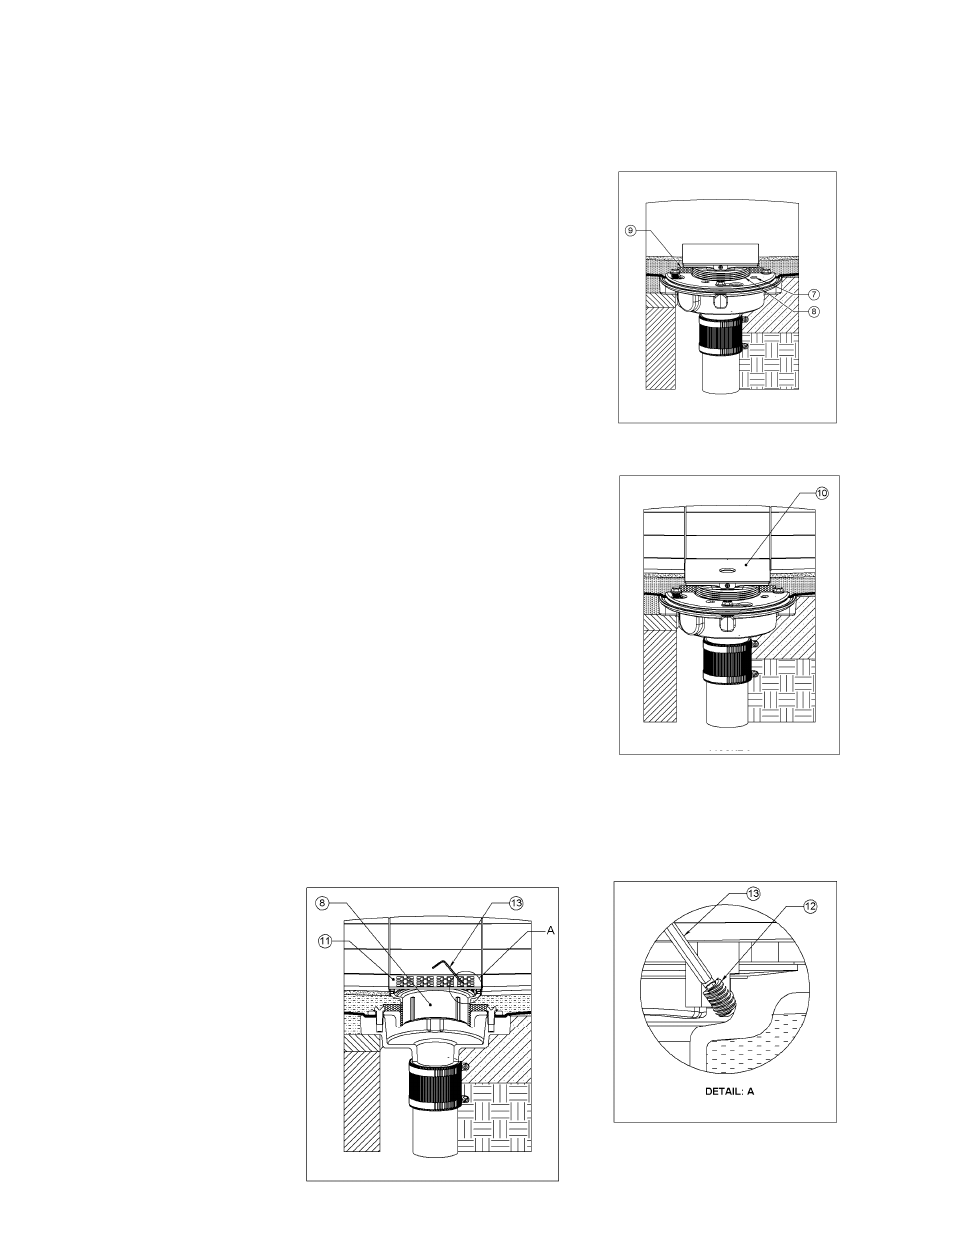
THROAT/GRID HEIGHT ADJUSTMENT
(see figure 1)
1. To obtain proper grid height, rotate THROAT [8] to
raise or lower. One (1) complete rotation of
THROAT [8] is equal to 1/8” in vertical adjustment.
2. Proper height should be determined by flooring
contractor.
3. Before the final mortar application it is suggested to
place some pea GRAVEL [9] over WEEP [7] holes
to prevent blockage of the holes.
NOTE: All figures show cast iron no-hub connection
FIGURE 1
GRID INSTALLATION
(see figure 2, 3 & 4)
1. After completion of finished flooring, remove plastic
MUDGUARD [10] by drilling a hole in the center and
pull out.
2. Place decorative GRID [11] onto drain THROAT [8].
3. Find location of the four SETSCREWS [12] and
tighten all screws securely with supplied ALLEN
KEY [13].
SERVICE ACCESS
(see figure 3 & 4)
FIGURE 2
1. Find location of the four SETSCREWS [12] and
loosen screws with supplied ALLEN KEY [13] by
turning counter clockwise and remove GRID [11].
2. These installation instructions and ALLEN KEY [13]
should be stored in a secure place for future
reference.
FIGURE 4
FIGURE 3
Pg. 2
9178-UG-2_INSTL_090619.doc