2 mounting, 3 connections, Mounting – Windy Nation Solar Panel Charge Controller User Manual
Page 5: Connections
CHC-1224-xx User Manual
Revision 2.0
touching components on the circuit boards. The risk of electrostatic damage is highest when relative humidity is
below 40%.
2.2 M
OUNTING
Mounting is optional; however, the environment must be dry and protected from water.
1. The controller can be mounted on a vertical or horizontal surface. If mounted vertically, the unit
should be oriented such that neither end is at the top so foreign material cannot settle into the unit.
2. Install four user-supplied fasteners through the four mounting slots and into the mounting surface.
3. Tighten all the fasteners to ensure the controller cannot slide in any direction.
IMPORTANT: For best results, mount the charge controller and batteries as close to the panels as practical.
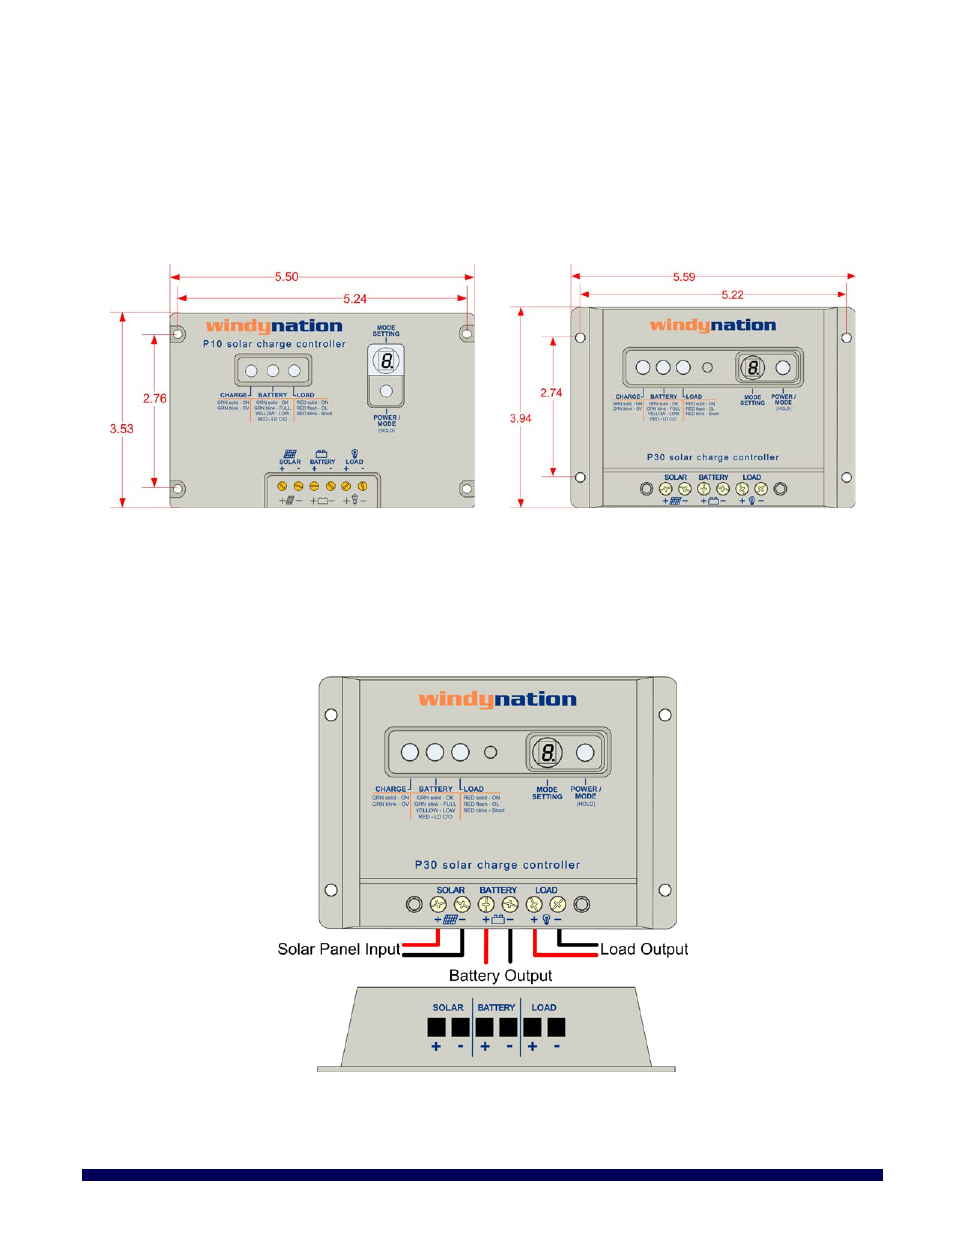
2.3 C
ONNECTIONS
WARNING: Loose connectors result in excessive voltage drop and may cause over heated wires and melted
insulation, which can lead to electrical fires.
IMPORTANT: The NEC requires that the wires carrying the system current never exceed 80% of the conductor’s
current rating (sizing recommendations are located in Section 4).
IMPORTANT: The screw-down terminals on the charge controller accept 10~26AWG wire.
IMPORTANT: Strip the wire ends approximately 0.2” (5mm) before connecting to the charge controller. Use
caution when handling the stripped wires to avoid electric shock.
Page 5 of 12
windy
nation
05/06/2014