Adjustment, Maintenance – TAMA Iron Cobra/Speed Cobra Hi-hat Stand User Manual
Page 2
This instruction manual was issued in June 2011. Specifi cations and design are subject to change without notice.
Adjustment /
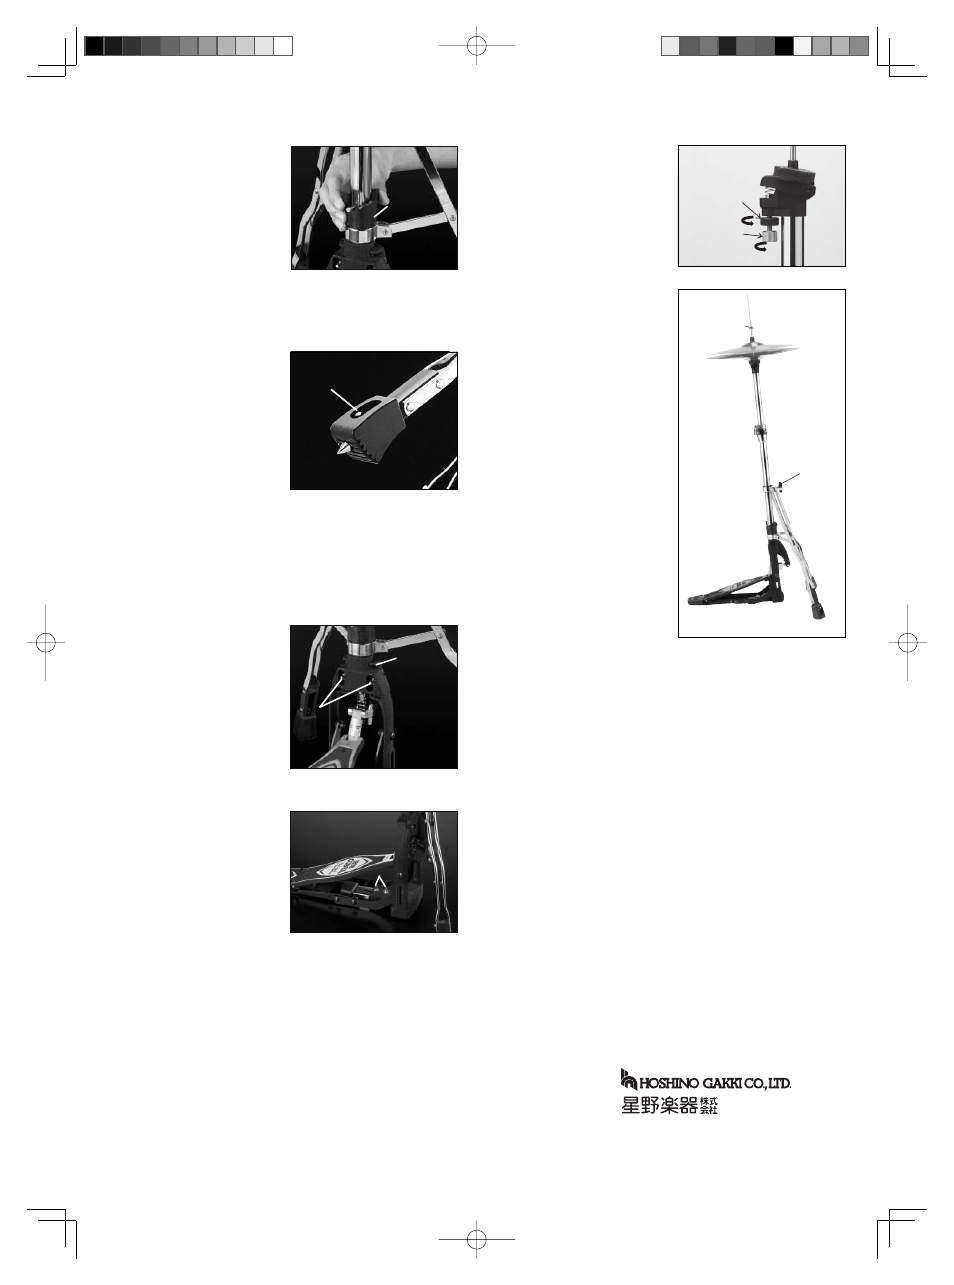
Adjusting the spring tension
(Photo 4)
T h e s p r i n g t e n s i o n c a n b e
adjusted to any of 6 levels.
Turning the adjuster clockwise
increases the spring tension.
Adjusting the duo spike length
(Photo 5)
Each leg has a rubber tip and
spike. When using a spike to
keep the stand from walking,
loosen the square-headed bolt
(a), slide the spike to the desired
length, and then retighten the
square-headed bolt (a).
Adjusting the footboard angle
(Photo 6)
The angle of the footboard
can be adjusted. Loosen the
two square-headed bolts (b),
slide the backside cover of the
base frame up or down until
the footboard is at the desired
angle, and then retighten the
bolts (b). Make sure the two
bolts are parallel when they are
tightened.
Adjusting the Spring seat
(Photo 8)
Using the small spring, the
Spring seat causes the bottom
cymbal of the hi-hat to tilt
slightly when the hi-hat cymbals
are opened. When they are
closed, both the top and bottom
cymbals are flattened by the
compression of the spring.
This works as an air deflector
between the two cymbals. As
a result, this will give you a
tighter “foot close” sound.
T o t i l t t h e b o t t o m c y m b a l
more, turn the adjusting bolt
counterclockwise. When you
reach the desired angle for the
desired sound, turn the locknut
counterclockwise to lock the
angle.
Adjusting the tilt (Photo 9)
The angle of the hi-hat cymbal
can also be adjusted by tilting
the stand itself. First, loosen
the T-bolt
2 , and then slide
the slider to the desired angle.
Retighten the T-bolt
2 when the
stand is at the desired angle.
To ensure parts continue to move smoothly over time, periodically
wipe off dust with a dry cloth and lubricate the chain with TAMA
TOL2 tune-up oil. Please note that bearings and hinges do not
require lubrication due to their lubrication-free design.
The fixing screws may become loose due to vibrations during
playing or transport. Use the included wrench or a Phillips
screwdriver to tighten them as necessary.
Adjusting the stabilizer length
(Photo 7)
The stability of the stand can be
adjusted by changing the length
of the stabilizer.
First, fold up the footboard.
Next, loosen the two square-
h e a d e d b o l t s ( c ) , p u l l t h e
stabilizer rubber to the desired
length, and then retighten the
bolts (c).
Maintenance/
Photo 4
4
Photo 8
8
Photo 9
9
Photo 5
5
Photo 6
6
Photo 7
7
Tension
adjuster
(a)
(b)
(c)
backside
cover
2
Lock nut
Adjust bolt
Tilt more
Lock