TAMA HP300/HP300TW User Manual
TAMA Musical Instruments
HP300 / HP300TW Instruction Manual
This equipment is for playing the drums only. Do not
use it for any other purpose, as there is a risk of injury
to other persons or damage to property.
Take care to keep the drum pedal out of reach of small
children.
There is a risk of injury if the drum pedal is used
barefoot. Please wear suitable footwear.
There is a risk of soiling or damaging floor surfaces. We
recommend placing the drum set on carpeting or some
other floor covering.
Loosen the square-head bolt 1 of the beater
holder using a tuning key.
Insert the beater shaft and adjust it to the desired
height. Then tighten the bolt to secure it. The beater
head is designed with two surfaces, one felt and
one nylon, to be used at the performer’s discretion.
When securing the beater, attach the pedal to the
bass drum and press the footboard so that the
beater surface you have chosen makes contact with
the drumhead. Then tighten the bolt to secure the
beater in the correct position.
The pedal unit is attached to the bass drum.
Loosen the bolt of the hoop clamp and fasten
the clamp to the hoop on the bass drum. After
making sure that it is fastened straight, tighten
the bolt again to secure it.
Hang the spring on the roller 2 of the rocker
cam.
Adjust the spring tension using the nut on the
lower end. When adjusting the spring, first
loosen the locknut, and then turn the adjusting
nut while pressing down on the locknut as in
Fig. 1~2. Tightening the nut makes the pedal’s
resistance heavier, but the beater’s return time
is correspondingly faster.
In order to prevent the spring from loosening
while playing, the adjusting nut engages the cap
attached to the unit roughly every 1/3 of a turn.
Once the desired tension is reached, secure it by
tightening the locknut as in Fig. 3.
The angle of the beater can be adjusted along
with the angle of the footboard by loosening
the square-headed bolt 3 on top of the rocker
cam. You may test the gradations of the angle
memory cap, attached to the end of the shaft,
by adjusting it a bit at a time. As the angle
of the beater is lowered, the footboard rises.
Once the desired angle is reached, tighten the
bolt firmly to secure it.
The left-handed beater of the twin-pedal
model (HP300TW) may be adjusted in the
same way. When a more delicate adjustment
is needed, you can adjust the beater angle
independently of the footboard angle by
loosening the bolt 4 below the beater holder.
This feature is useful when you wish the
footboard angles of both the hi-hat stand and
the left pedal to match.
Attach the universal joints at the end of the
connecting rod to the pedals. Make sure that
the square-headed bolts for attaching the
connecting rod are on top and on the drum
side for the left pedal, and on top and on the
near side for the right pedal.
When assembling the connecting rod and
connecting tube, make sure that the mark
on the rod is facing up (toward the square-
headed bolt on top of the tube) as in the
photo at right. After assembly, adjust the
length as desired and secure the rod firmly.
The Cobra Coil (CC900S) is a spring that assists
the return of the footboard, allowing smoother
and lighter pedal action.
The Cobra Coil can be installed on HP300 or
HP300TW. (It can be installed only on models
that have a Cobra Coil compatible hole in the
center of the under plate.)
Thank you for purchasing this TAMA drum pedal. For
better understanding of its features and capabilities,
please read through this manual before use.
Store the manual in a convenient place for future
reference.
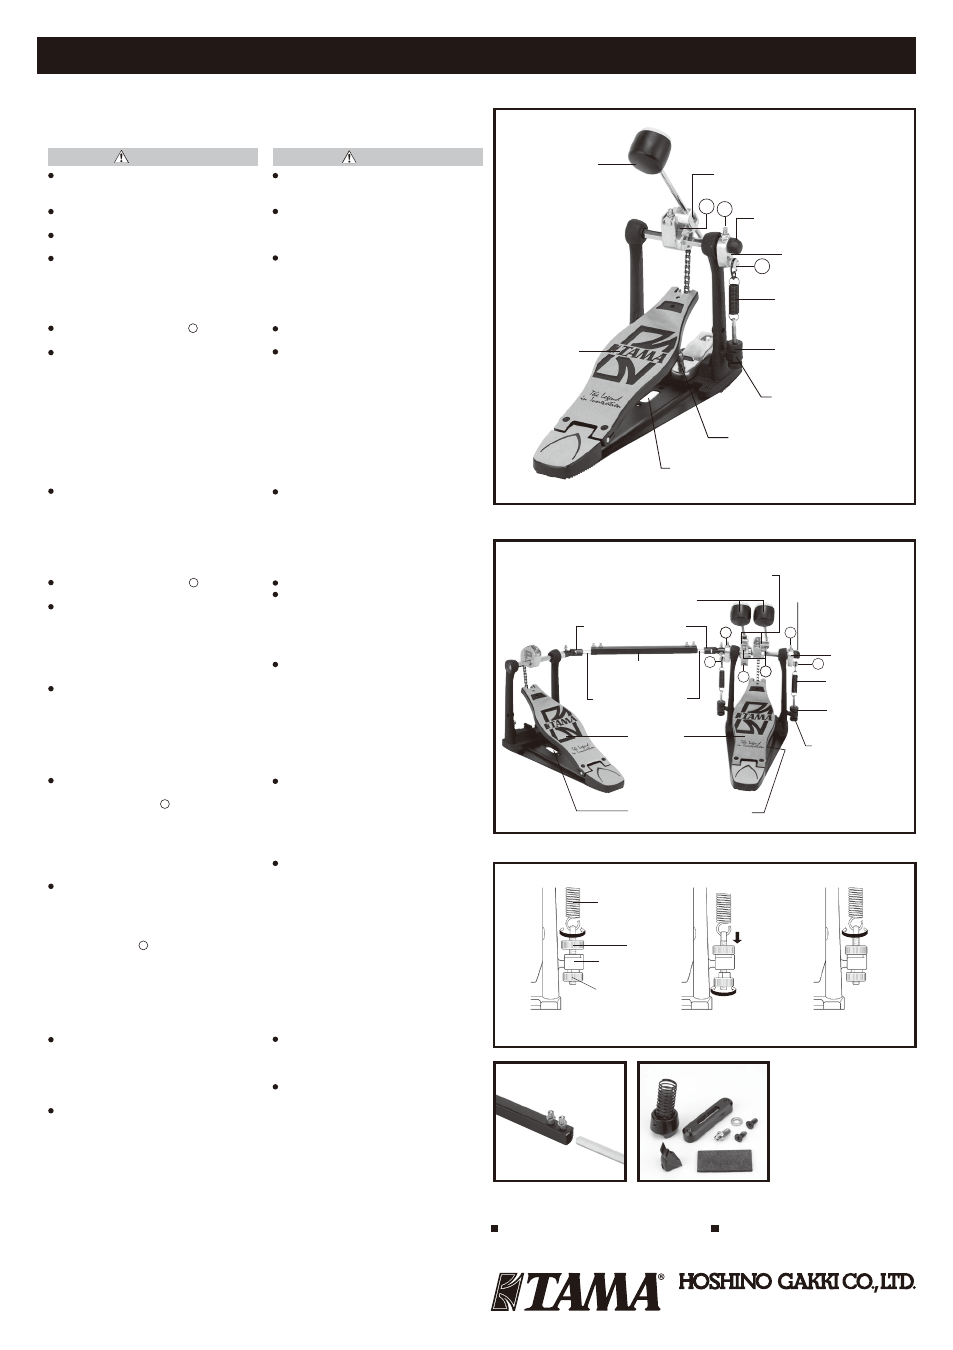
Part Names /
HP300
HP300TW
CC900S
Attaching the Connecting Rod
Notes
Installing the Beater
Attaching the Pedal Unit
Adjusting the Spring
Adjusting the Beater Angle
Attaching the Connecting Rod
(HP300TW)
Attaching the Cobra Coil
(sold seperately)
http://www.tama.com/
This manual is current as of June 2009. Because
we are always working to improve our products,
some features may change without notice.