TAMA HT330 Roadpro Drum Throne User Manual
Drum throne ht330, Instruction manual, Setting up
Height adjustment
CAUTION!
Before sitting down on this drum throne, make sure that the height
lock is at the bottom of the rod above the nylon bushing on the
base of the stand. Loosening T-nut (B) on the base with the height
lock in a fl oating position will cause the seat to fall since the
threads of the rod do not hold the seat at any specifi c height.
1. After tightening T-nut (B), sit down on the seat and check that the
height is appropriate for you.
2. If the seat's height is too low, loosen T-nut (B) and raise the seat
to the height you feel will be appropriate. While still holding the
seat, spin the height lock down to the nylon bushing. Do not
tighten T-nut (B) yet.
3. If the seat's height is too high, spin the height lock up the
distance that you think the seat should be lowered. While still
holding the seat, loosen T-nut (B) and let the seat lower softly.
Do not let go of the seat yet.
If you still need more height, turn the height lock clockwise
(indicated as UP) while still holding the seat loosely. If you want
a lower height, turn the height lock counterclockwise (indicated
as DOWN). In order to move the height lock, T-nut (B) must
have been loosened. You can also spin the seat like a standard
threaded rod throne instead of turning the height lock.
4. When the seat is the desired height, tighten T-nut (B) securely.
This instruction manual was issued on November 2012.
Specifi cation and design are subject to change without notice.
DRUM THRONE HT330
1. Loosen T-bolt (C) and open up the tripod by moving the slider to
the bottom of the stand. Then, tighten T-bolt (C) securely.
2. Insert the top of the threaded rod into the seat holder, and then
tighten T-bolt (A) to secure the seat.
Setting up/
INSTRUCTION MANUAL
Thank you for your purchase of this TAMA drum throne. To ensure safe and effi cient use of this product, please read through this manual
before beginning assembly. Store this manual in a convenient place for future reference.
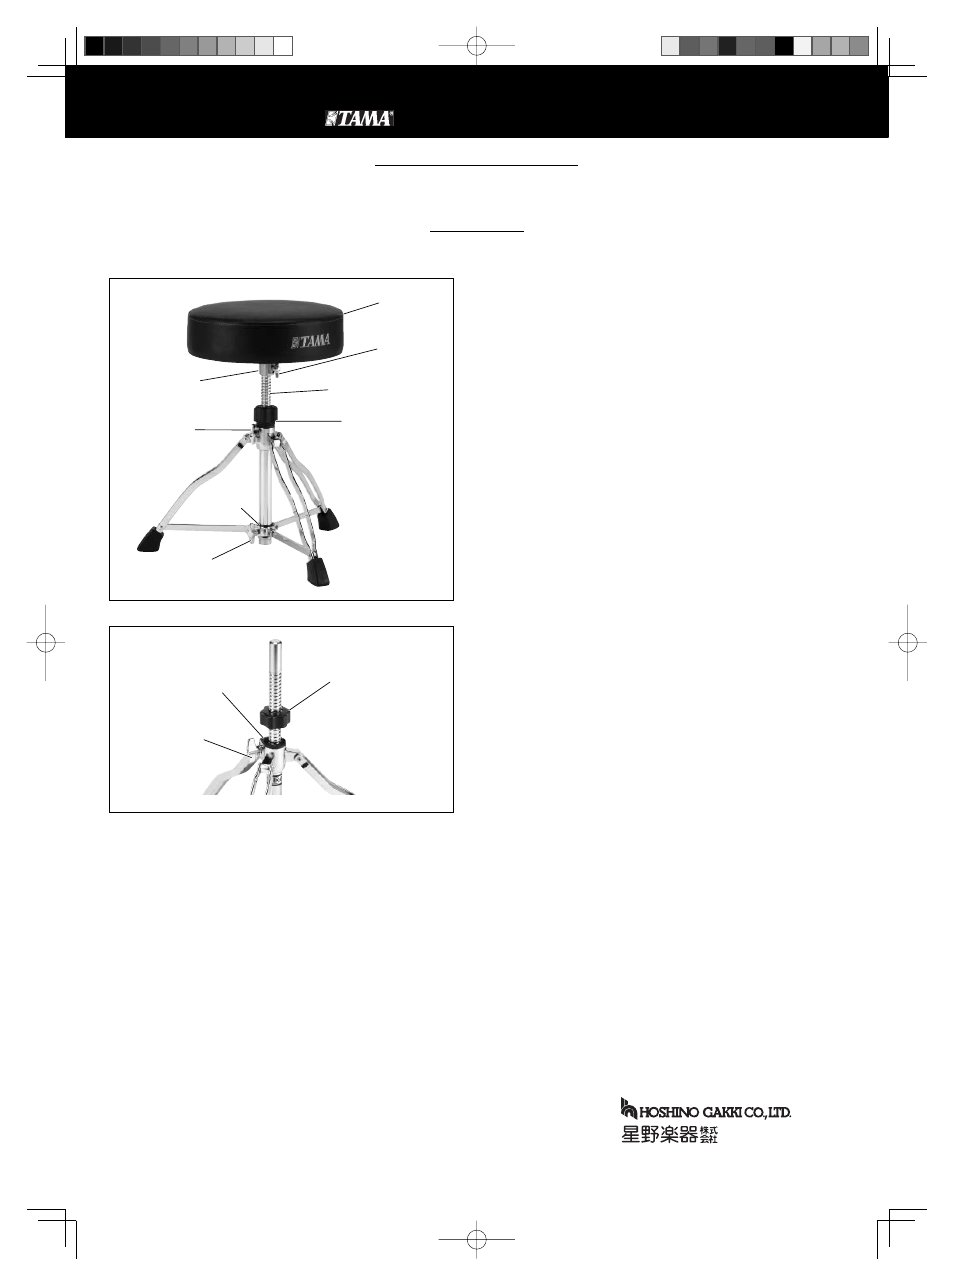
Photo 2
2
Height lock
T-nut (B)
Nylon bushing
Photo 1
1
Seat holder
T-bolt (C)
Slider
Threaded rod
Height lock
T-nut (B)
Seat
T-bolt (A)