Belt Drives EVO-11S User Manual
Page 3
6. Rotate the motor using a socket wrench, the belt should track straight and away from the motor plate but not
so that it may come in contact with the outside pulley flanges. Be sure that the belt drive is not making contact
with the motor plate.
7. Grease starter shaft and install our starter pinion
gear onto starter shaft, apply red loctite to starter
bolt and tighten to HD specifications.
(We supply 2 starter bolts with the kit, one is a
1/4-20 x 2-1/2" for 1990-93 starters the other is a
10-32 x 2-1/2" for 1994 and up starters. Be sure not
to tighten starter bolt too tight as this may
interfere with proper engagement of the starter
pinion gear.) (Fig. 7)
Fig. 7 Install starter pinion, supplied with kit. There are 2
bolts supplied, one for 1990-93 and one for 1994-up
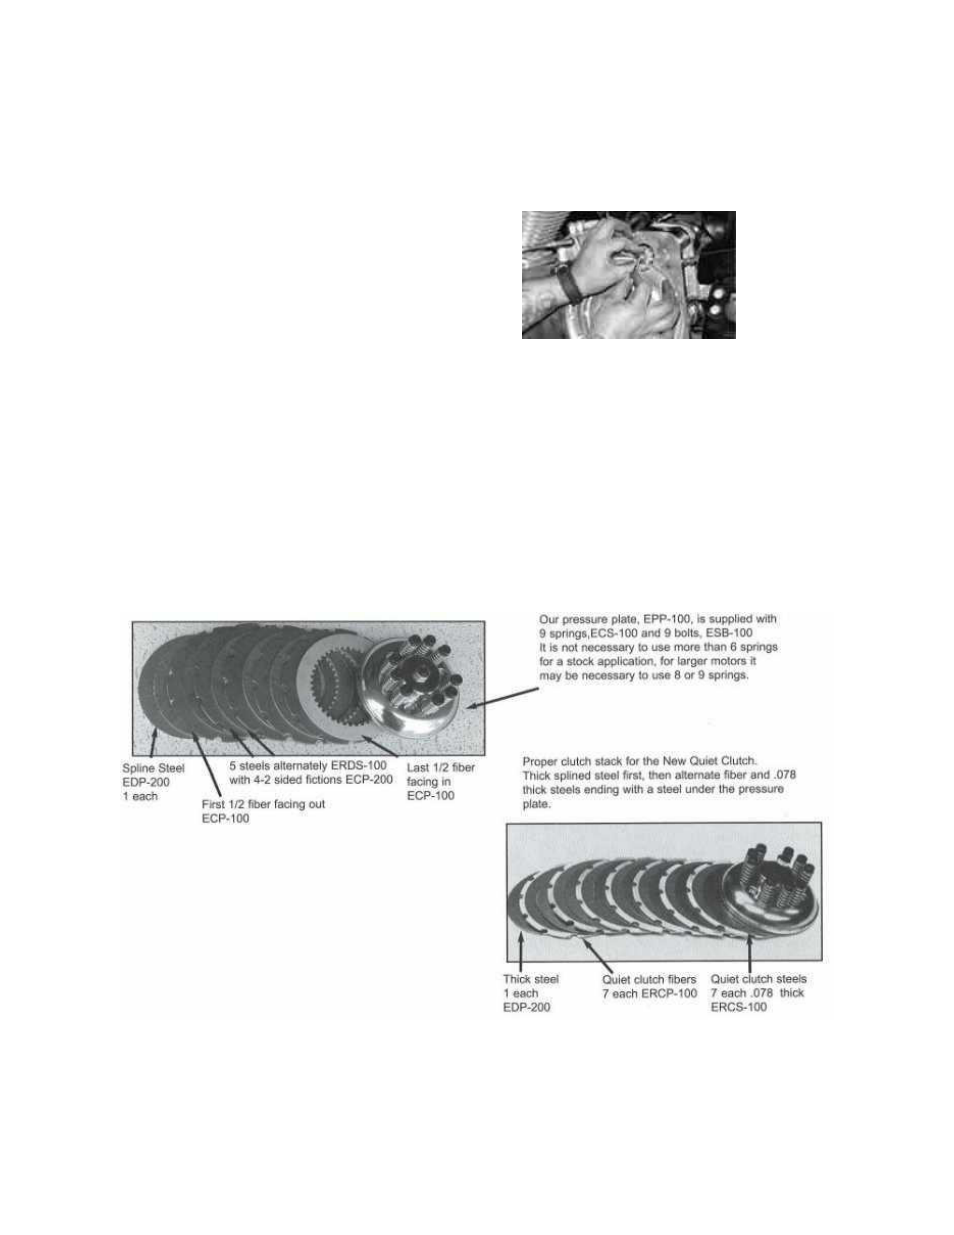
8. Install clutch pack, refer to schematic (below) spline steel first, 1/2 sided friction plate with fiber facing out,
then alternate steel and two sided fiber plates ending with the other 1/2 sided friction plate with fiber facing in. If
your kit contains the new Quiet clutch then refer to the lower diagram. Install pressure plate, springs and
shoulder bolts.
procedure until all 6 bolts are in place, then tighten them all the way down until they bottom out. There is no
adjustment to the spring pressure, this is all pre-determined with the length of the shoulder bolt and exact
dimensions of our pressure plate. (Fig. 8)
Fig. 8
3
To install shoulder bolts apply red
Loctite® to a bolt and install it one turn, go on to the next bolt with same